Growing Tips
What Are Some of the Best Eco-Friendly Apps that can Help You Go Green?


Going green can have major benefits for the environment and for your health. However, it can be difficult to make some of the major changes that come with going green and focusing on sustainability, even if you believe in the cause.
So, what can you do to make going green easier? There are a number of tools right at your fingertips that can help. Let’s go over some of the best eco-friendly apps that can help you go green right here.
General Eco-Friendly Apps
We’re going to break our eco-friendly app suggestions into categories. Some apps offer a well-rounded focus on all things green. You can check out:
- BrightNest
- JouleBug
- Oroeco
These apps focus on your lifestyle choices and actions around the home as a whole, allowing you to focus on going green in all aspects of your life. Some of these apps, like Oroeco, offer you personalized tips that can make going green even easier.
Recycling Eco-Friendly Apps
If you want to focus specifically on recycling as you go green, you may want to focus on apps like:
- iRecycle
- RecycleNation
These apps can help you improve your recycling habits and they’re both free. You can get information about where to recycle in your area and about what items can be recycled.
Energy Usage Eco-Friendly Apps
Energy usage – and the kind of energy you use – is a big part of going green. You can monitor your carbon footprint with apps like:
- greenMeter
- Energy Cost Calculator
These apps can help you determine areas where you can lower your carbon footprint, perhaps by deciding to drive an energy-efficient car or by deciding to purchase energy-efficient light bulbs. You can even check out Light Bulb Finder if you need help selecting the eco-friendliest lightbulbs for you.
Shopping Eco-Friendly Apps
Going green can mean making some big changes to your shopping habits. Fortunately, there are some apps you can turn to if you need help focusing on sustainability while you’re out doing your shopping. You can check out:
- GoodGuide
- EWG’s Food Scores
- Locavore
These apps can help you compare products to determine which ones are the most environmentally friendly, or to find local food in your area.
Additional Eco-Friendly Apps
Some of the best eco-friendly apps are very highly focused on specific aspects of going green. For example, you can use Dropcountr to monitor your water consumption on a daily, weekly, monthly, or yearly basis to decrease your water usage in your garden and greenhouse.
You can also cut down on paper waste in your life with PaperKarma. This app can remove you from mailing lists that end up with you dealing with mountains of junk mail, reducing the overall strain on the planet.
Start Using Eco-Friendly Apps in Your Life
You don’t have to figure out how to go green all on your own. There options out there that can help you shift to an eco-friendlier lifestyle.

Container Gardening
How to Protect Your Garden and Greenhouse from Extreme Summer Heat: The Complete 2026 Survival Guide
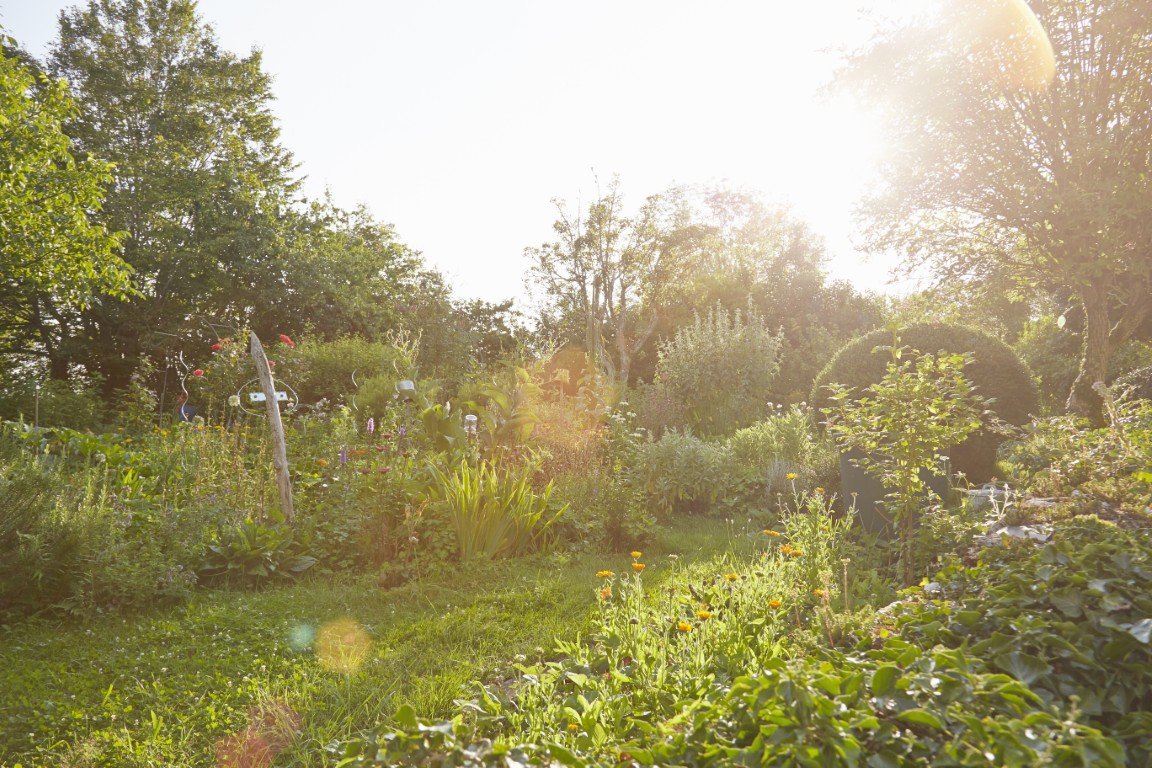
Why This Summer Is Different
If you’ve stepped outside this July and felt like you walked into a wall of heat, you’re not alone. Across much of the country, summer 2026 is shaping up to be one of the hottest on record — and gardens are feeling every degree.
According to Utah State University Extension, gardeners this month should be focused on one thing above all else: helping plants survive rather than expecting them to thrive. “Start enjoying the tomato harvest. Fertilize potatoes with nitrogen in early July. Harvest summer squash and zucchini while they are young and tender,” their July 2026 guidance reads — but the underlying message is clear: manage heat stress or lose your crop (USU Extension).
The good news? A few strategic adjustments can mean the difference between a garden that withers and one that produces abundantly all summer long. Whether you’re managing outdoor beds or a greenhouse, this guide covers everything you need.
1. Water Smarter, Not Harder
When temperatures soar past 90°F, watering becomes both the most important task and the easiest one to get wrong. The key isn’t more water — it’s better water timing and delivery.
Water Early — and We Mean Early
The optimal watering window is between 6:00 AM and 10:00 AM. Watering at midday means losing a significant percentage to evaporation before it reaches the roots. Evening watering can work, but it leaves foliage damp overnight, inviting fungal diseases. Morning watering gives plants what they need before the heat peaks and gives leaves time to dry.
Go Deep, Not Frequent
Established plants benefit far more from deep, infrequent watering than daily sprinkles. Aim for 1 to 1.5 inches of water per week delivered in one or two sessions. This encourages roots to grow downward where soil stays cooler and moisture lasts longer. Shallow, frequent watering trains roots to stay near the surface — exactly where they’ll bake in a heatwave (Lawn Care Center).
Check Before You Water
Use a moisture meter or simply dig a few inches into the soil with your finger. If it’s damp two inches down, hold off. Overwatering in heat can be just as damaging as underwatering — saturated soil lacks oxygen and can literally cook roots.
Drip Irrigation and Soaker Hoses Win Summer
If you don’t already have drip irrigation or soaker hoses, July is the month to invest. They deliver water directly to the root zone with minimal evaporation loss. Overhead sprinklers can lose 30% or more to evaporation on hot, windy days.
2. Shade: Your Garden’s Best Friend
Reducing light intensity is one of the most underutilized heat-management tools. Even sun-loving plants like tomatoes and peppers can suffer from sunscald when temperatures climb too high.
Shade Cloth: The MVP of Heatwaves
Shade cloth — available in densities from 30% to 70% — can reduce temperatures underneath by 10°F or more. For vegetables, 30% to 40% shade cloth is usually ideal: it cuts enough light to lower stress without stunting growth. Drape it over hoops, stakes, or a simple frame. Even a few hours of afternoon shade can prevent heat damage to sensitive crops (High Plains Journal).
Move Containers into the Shade
One advantage of container gardening: mobility. Pots heat up much faster than in-ground soil. On days above 95°F, moving container plants into partial shade — even for the afternoon — can save them from heat stress. This is especially important for leafy greens and herbs, which bolt quickly in extreme heat.
Strategic Planting for Natural Shade
Plant tall, heat-tolerant crops (like corn, sunflowers, or okra) on the west side of your garden to cast afternoon shade on more sensitive plants. This is a low-tech, zero-cost strategy that mimics nature’s own heat management.
3. Mulch Like Your Garden Depends on It (Because It Does)
Bare soil in July is a recipe for disaster. Unprotected soil can reach temperatures 20°F to 30°F hotter than mulched soil. A 2- to 3-inch layer of organic mulch — straw, wood chips, shredded leaves, or grass clippings — acts like insulation for the root zone.
- Straw: Excellent for vegetable gardens; lightweight and easy to apply
- Wood chips: Best for perennials and shrubs; breaks down slowly
- Grass clippings: Free and nitrogen-rich — but apply in thin layers to avoid matting
- Shredded leaves: Ideal if you have them; they mimic a forest floor
Mulch also suppresses weeds — which compete for water exactly when your plants can least afford it — and slows evaporation from the soil surface.
4. Heat-Tolerant Plants That Laugh at July
If your garden took a hit this summer, the fix isn’t planting the same crops next year and hoping for cooler weather. It’s planting smarter. Here are crops that thrive when the mercury climbs (Park Seed; Gardenary):
| Vegetables | Herbs | Flowers |
|---|---|---|
| Okra | Basil | Marigolds |
| Sweet Potatoes | Rosemary | Zinnias |
| Southern Peas (Cowpeas) | Thyme | Coneflowers (Echinacea) |
| Eggplant | Oregano | Salvia |
| Malabar Spinach | Sage | Lantana |
| Swiss Chard | Lavender | Portulaca (Moss Rose) |
For beginners especially, basil and marigolds are the easiest entry points. Both grow quickly from seed, tolerate heat and some drought, and reward you fast.
For tomatoes, look for drought-resistant varieties like Roma, San Marzano, and Black Krim — but note that even heat-tolerant tomatoes may stop setting fruit above 85°F. The plant will survive; it just pauses production until temperatures moderate (Earth911).
5. Greenhouse Heat Management: A Different Ballgame
Greenhouses amplify heat. On a 90°F day, an unventilated greenhouse can hit 130°F or higher within hours. If you’re growing in a greenhouse this summer, passive management isn’t optional — it’s urgent.
Maximize Ventilation
Open every vent, door, and window first thing in the morning. If your greenhouse has roof vents, keep them fully open. For roll-up side panels, drop them early. The goal is to create cross-ventilation — air moving in one side and out the other. Stagnant air is the enemy (UbiGro).
Shade Cloth on the Greenhouse
Exterior shade cloth is more effective than interior because it blocks solar radiation before it enters the structure. A 50% shade cloth on the greenhouse exterior can drop internal temperatures by 10°F to 15°F. Install it on the south and west sides — the angles where the summer sun hits hardest (Frame It All).
Evaporative Cooling: Wet Walls and Misting
Wetting down greenhouse floors, benches, and walls in the morning creates evaporative cooling as the water transitions to vapor — pulling heat from the air in the process. For more serious cooling, misting systems and evaporative cooling pads can transform a stifling greenhouse into a comfortable growing environment.
Plants Cool Themselves — Help Them
Plants naturally cool their surroundings through transpiration — releasing water vapor through their leaves. Well-watered plants in a greenhouse actually contribute to a cooler microclimate. This is one more reason to keep greenhouse plants properly hydrated during heatwaves (Growing Spaces).
6. July Greenhouse Planting: What to Sow Now
Yes, you can plant in July. In fact, the heat promotes ultra-fast germination — sometimes less than 48 hours for beans. July is ideal for sowing green beans, radishes, arugula, and starting autumn lettuce seedlings in the greenhouse (AtmoSerre).
- Green beans: Bush varieties mature in 50–60 days — you’ll harvest by early September
- Radishes: Ready in 25–30 days; succession-plant every two weeks
- Arugula: Bolt-resistant varieties handle greenhouse heat surprisingly well
- Fall lettuce starts: Sow now in trays inside the greenhouse for transplanting when temperatures ease in late August
7. Recognizing Heat Stress Before It’s Too Late
Catching heat stress early lets you intervene before permanent damage sets in. Watch for these signs:
- Wilting during the heat of the day — normal if plants recover by evening; concerning if they don’t
- Leaf scorch — brown, crispy edges on leaves
- Blossom drop — flowers form but fall off without setting fruit (common in tomatoes, peppers, beans)
- Sunscald on fruit — pale, leathery patches on tomatoes, peppers, and squash
- Bolting — leafy greens and herbs suddenly shooting up flower stalks
Plants wilting in afternoon heat but recovering overnight are doing what they’re supposed to — it’s a natural defense mechanism that reduces leaf surface area exposed to the sun. But if they’re still wilted at sunrise, water immediately and provide shade.
The Bottom Line
Extreme summer heat doesn’t have to mean the end of your garden. With smart watering (early morning, deep, and infrequent), strategic shade (cloth, containers, tall companion plants), generous mulch, heat-tolerant varieties, and active greenhouse ventilation, your garden can not only survive July — it can keep producing well into fall.
The most important step? Start tomorrow morning. Water deeply before the sun climbs high, and get that shade cloth up. Your plants will thank you.
Further Reading on Garden & Greenhouse
- Greenhouse Maintenance Tips from Plumbers — smart watering system insights
- 4 Ways to Drought-Proof Your Lawn This Summer — companion strategies for the rest of your yard
- Strawberry Plants: A Complete Guide to Growing Delicious Strawberries at Home — keep your berry patch thriving through summer
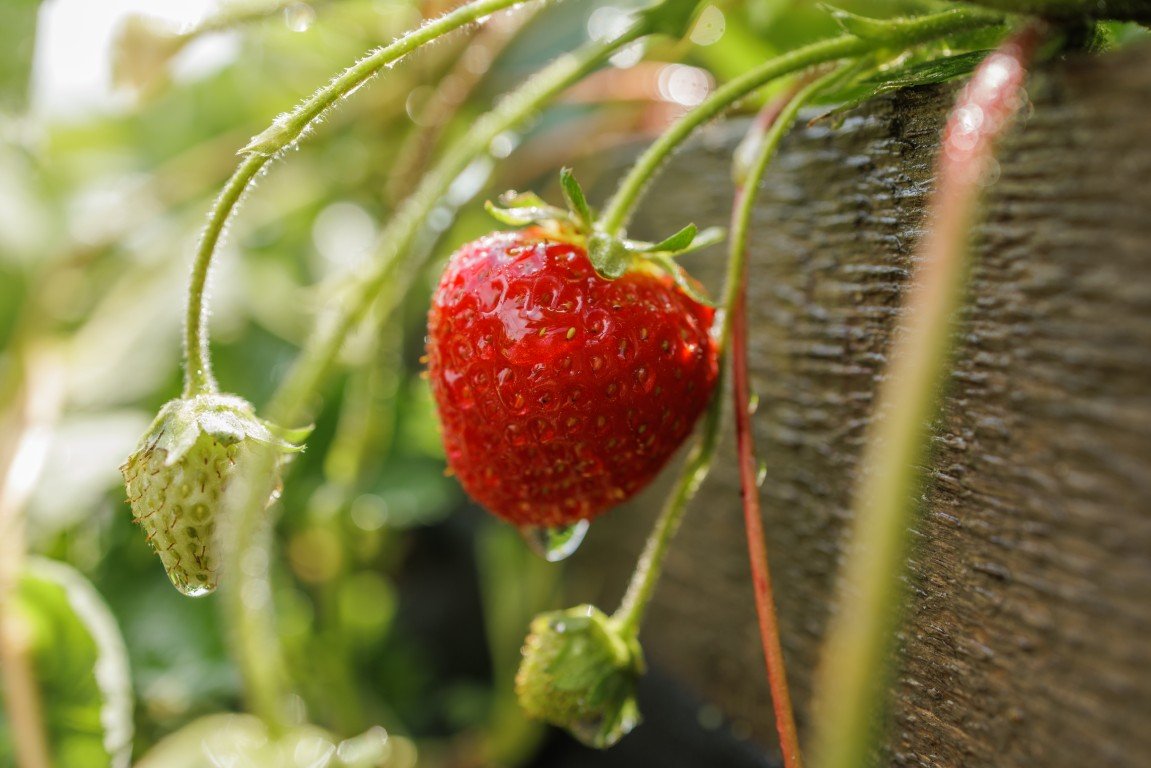
Strawberry plants are one of the most rewarding soft fruit plants you can grow in the UK. Whether you’re an experienced gardener or just starting out, strawberries are easy to grow, quick to fruit, and produce delicious results that far surpass supermarket varieties. With the right care and high-quality plants, you can enjoy fresh, juicy strawberries straight from your garden, patio, or allotment.
In this guide, we’ll cover everything you need to know about strawberry plants—from choosing the best varieties and planting tips to care, harvesting, and common mistakes to avoid.
Why Choose Strawberry Plants for Your Garden?
Strawberries are incredibly versatile and suitable for almost any growing space. They can be grown in borders, raised beds, hanging baskets, containers, or even window boxes, making them perfect for both large gardens and small urban spaces.
Key Benefits of Growing Strawberry Plants
- Easy to grow and suitable for beginners
- High-yielding plants with generous harvests
- Fast results, often fruiting in the first season
- Health benefits, rich in vitamin C and antioxidants
- Cost-effective, producing fruit year after year
With proper care, strawberry plants can remain productive for up to three years, making them a great long-term investment for home growers.
Types of Strawberry Plants Explained
Choosing the right type of strawberry plants is essential for maximising your harvest. Strawberry plants are generally categorised into three main types.
1. Summer-Fruiting Strawberry Plants
Summer-fruiting varieties produce one large crop between late May and July. These plants are ideal if you want a heavy harvest in a short period, perfect for jam-making or freezing.
2. Ever-Bearing Strawberry Plants
Also known as perpetual strawberries, ever-bearing strawberry plants produce smaller crops throughout the summer and into early autumn. They’re ideal for gardeners who want a steady supply of fresh strawberries.
3. Alpine Strawberry Plants
Alpine strawberries are smaller but packed with intense flavour. They’re excellent for edging borders and thrive well in partial shade.
How to Plant Strawberry Plants Successfully
Planting strawberry plants correctly gives them the best possible start and sets the foundation for healthy growth and strong yields.
1. When to Plant Strawberry Plants in the UK
- Bare-root plants: Best planted in autumn or early spring
- Potted plants: Can be planted from spring through early summer
Autumn planting allows plants to establish strong roots before winter, leading to heavier crops the following year.
2. Where to Plant Strawberry Plants
Strawberries thrive in:
- Full sun (at least 6 hours per day)
- Well-drained, fertile soil
- Sheltered positions away from strong winds
Avoid planting strawberry plants where tomatoes, potatoes, or peppers were grown recently, as these crops can carry soil-borne diseases.
Caring for Strawberry Plants Throughout the Year
Proper care ensures healthy plants and consistent fruit production.
1. Watering and Feeding
Strawberry plants need regular watering, especially during flowering and fruiting. Keep the soil consistently moist but not waterlogged.
Feed plants with a high-potash fertiliser once flowering begins to encourage better fruit development.
2. Mulching and Weed Control
Mulching with straw, bark chips, or black polythene helps:
- Retain moisture
- Suppress weeds
- Keep fruits clean and off the soil
This also reduces the risk of rot and fungal diseases.
3. Protecting Strawberry Plants
Birds love strawberries just as much as we do. Protect your crop using:
- Garden netting
- Fleece covers
- Fruit cages
In colder regions, straw or fleece can also be used to protect plants from frost.
Growing Strawberry Plants in Containers
Container growing is an excellent option if you have limited space. Strawberry plants grow exceptionally well in pots, hanging baskets, and grow bags.
Tips for Container-Grown Strawberry Plants
- Use containers with good drainage
- Choose peat-free, nutrient-rich compost
- Water more frequently, especially in warm weather
- Replace compost annually for best results
Container-grown strawberries are easier to protect from pests and can be moved to sunnier spots when needed.
Harvesting Strawberries for Maximum Flavour
Strawberries should be harvested when fully red and ripe. Unlike some fruits, strawberries do not continue to ripen after picking.
Harvesting Tips
- Pick in the morning when the fruits are cool
- Gently twist the fruit from the stem
- Harvest regularly to encourage more fruit
Freshly picked strawberries have the best flavour and texture and are perfect for desserts, smoothies, or eating straight from the plant.
Common Problems with Strawberry Plants (and How to Fix Them)
Even healthy strawberry plants can occasionally face issues.
Common Issues Include:
- Grey mould: Improve airflow and remove affected fruit
- Slugs and snails: Use barriers or organic deterrents
- Poor fruiting: Ensure enough sunlight and proper feeding
Replacing older plants every three years helps maintain vigour and reduces disease risk.
Why Buy Strawberry Plants from a Trusted UK Nursery?
High-quality strawberry plants make a noticeable difference in both yield and flavour. Plants grown specifically for UK conditions are more resilient and productive.
At Pomona Fruits, strawberry plants are carefully selected to ensure:
- Strong root systems
- Excellent disease resistance
- High yields and superior taste
Buying from a reputable supplier gives you confidence that your plants will thrive in your garden.
Conclusion: Start Growing Your Own Strawberry Plants Today
Strawberry plants are a fantastic addition to any UK garden, offering delicious rewards with minimal effort. Whether you prefer summer-fruiting, ever-bearing, or alpine varieties, growing your own strawberries ensures unbeatable freshness and flavour.
If you’re ready to enjoy home-grown strawberries, explore the full range of premium-quality strawberry plants available at Pomona fruit trees.
Buy high-quality strawberry plants today:
Frequently Asked Questions (FAQs)
1. How long do strawberry plants take to produce fruit?
Most strawberry plants produce fruit within their first growing season. Summer-fruiting varieties typically crop the year after planting, while ever-bearing plants can fruit within months.
2. Do strawberry plants come back every year?
Yes, strawberry plants are perennial and will return each year. However, they are most productive for around three years, after which replacing them is recommended.
3. Can strawberry plants grow in partial shade?
Strawberry plants grow best in full sun, but they can tolerate partial shade. Expect slightly reduced yields if sunlight is limited.
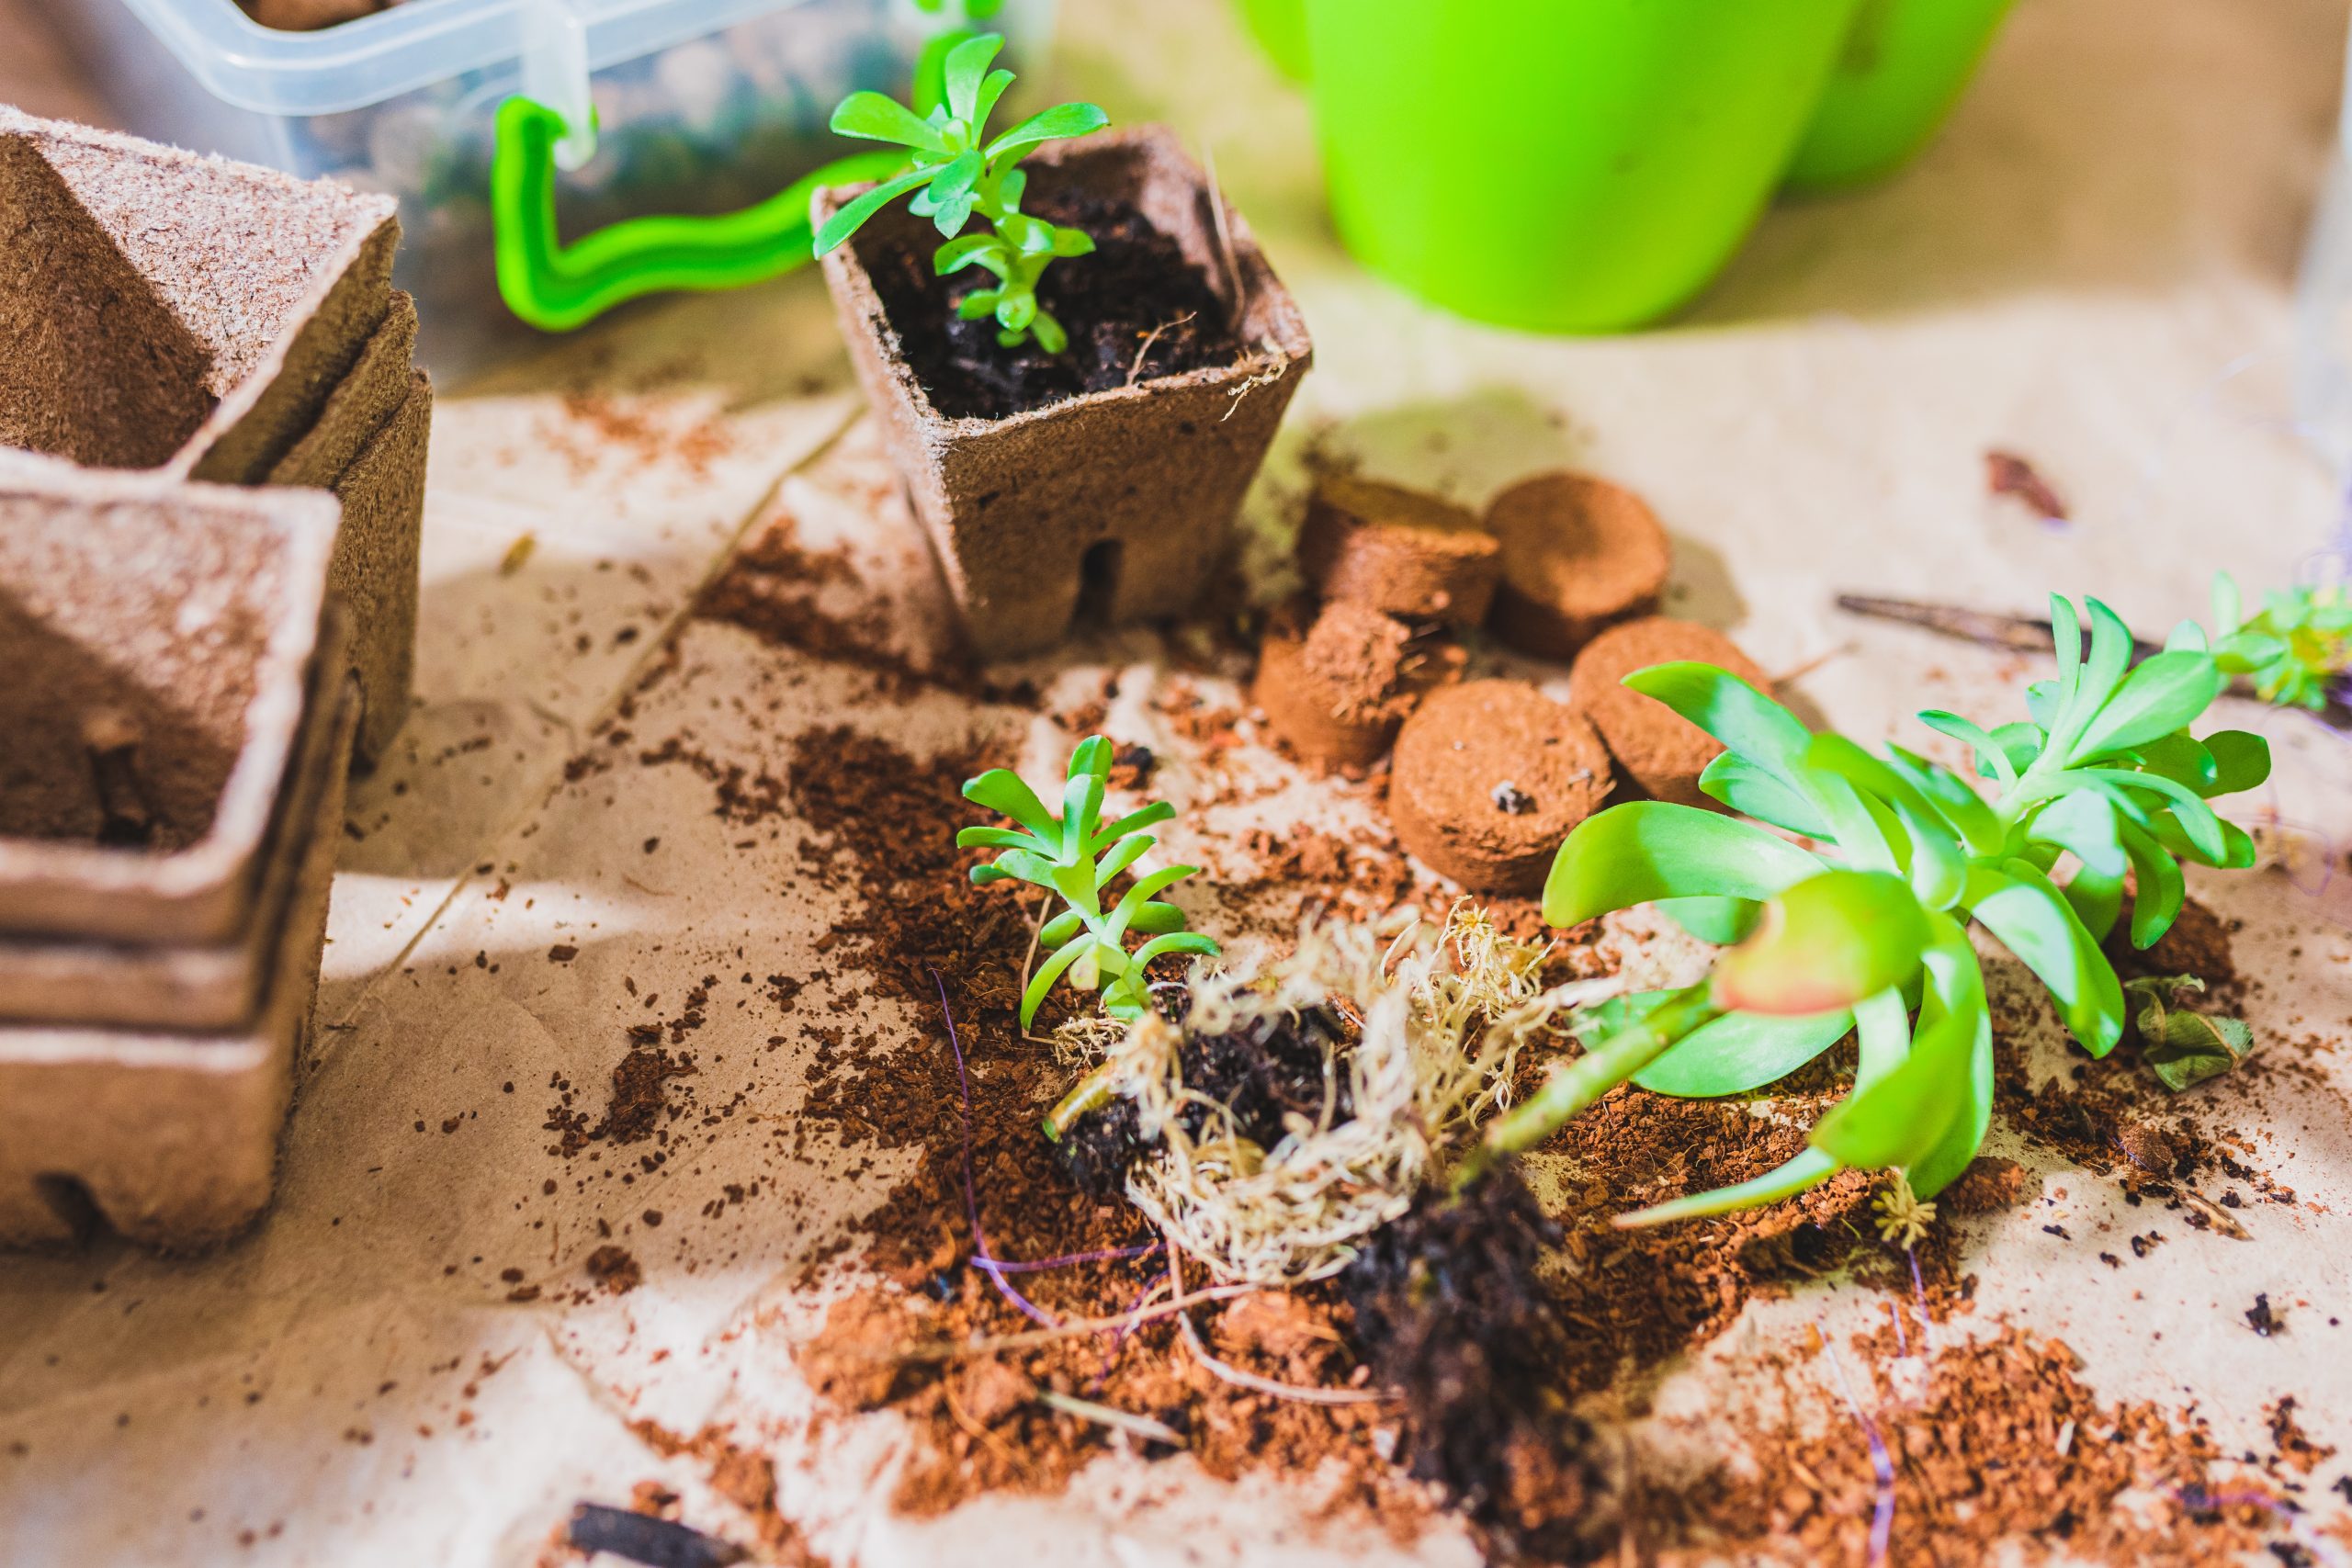
If you spend time in your garden, you’ve probably seen tiny ants marching across flowerbeds or climbing plant stems. While a few ants here and there may seem harmless, a closer look reveals they can play both hero and villain in your garden’s ecosystem.
Why Ants are Attracted to Gardens
Ants are drawn to gardens for food, water, and shelter. Flower nectar, honeydew from aphids, decaying plant matter, and even moist soil all provide what ants need to thrive. Once they establish a colony nearby, they’ll build intricate tunnels through soil and mulch, creating a permanent home in your garden beds.
The Good Side of Ants
Believe it or not, not all ants are bad for your garden. In small numbers, they can actually be beneficial. Ants aerate the soil as they tunnel, helping water and nutrients reach plant roots more efficiently. They also eat other insects, including some that damage plants.
When Ants Become a Problem
Ants cross the line from helpful to harmful when their colonies grow too large or when they start “farming” aphids. Aphids produce a sweet liquid called honeydew that ants love – so much that they’ll protect aphids from predators to keep their supply steady. This relationship allows aphid populations to skyrocket, leading to wilting leaves, stunted growth, and plant disease.
You might also notice ants nesting under pavers, in raised garden beds, or near the foundation of your home. When that happens, it’s a sign that the colony is expanding beyond your garden.
How to Keep Ants Under Control
To discourage ants naturally:
- Eliminate food sources: Wash away honeydew from leaves and control aphids with insecticidal soap.
- Disturb their nests: Regularly turn over soil or mulch where ants are active.
- Create barriers: Sprinkle diatomaceous earth or cinnamon around plant bases and entry points.
- Keep moisture in check: Overwatered areas are prime nesting spots for ants.
These methods can reduce activity, but if ants are nesting near your home or you notice trails leading indoors, it’s best to take a professional approach.
When to Call in the Pros
If your garden’s ant problem is spreading to patios, driveways, or inside your home, professional treatment can stop colonies at the source. Greenhouse Termite and Pest Control offers targeted, environmentally responsible ant control services that eliminate active colonies and create a barrier to keep them from returning.
Ants might be small, but when they take over your garden, they can cause big problems. By balancing prevention, natural control, and professional help when needed, you can protect your garden’s beauty – and keep those trails of ants where they belong.
How Greenhouse Termite and Pest Control Can Help
At Greenhouse Termite and Pest Control, our team understands that every ant problem is different. We start by identifying the specific species invading your yard – whether they’re sugar ants, fire ants, or another type – then apply a treatment plan and create a lasting barrier from the front curb to the back fence, helping keep ants from re-establishing their colonies. We focus on responsible solutions that protect your plants, your home, and your peace of mind.
Ants might be small, but when they take over your garden, they can cause big problems. By balancing prevention, natural control, and professional help when needed, you can protect your garden’s beauty – and keep those trails of ants where they belong.
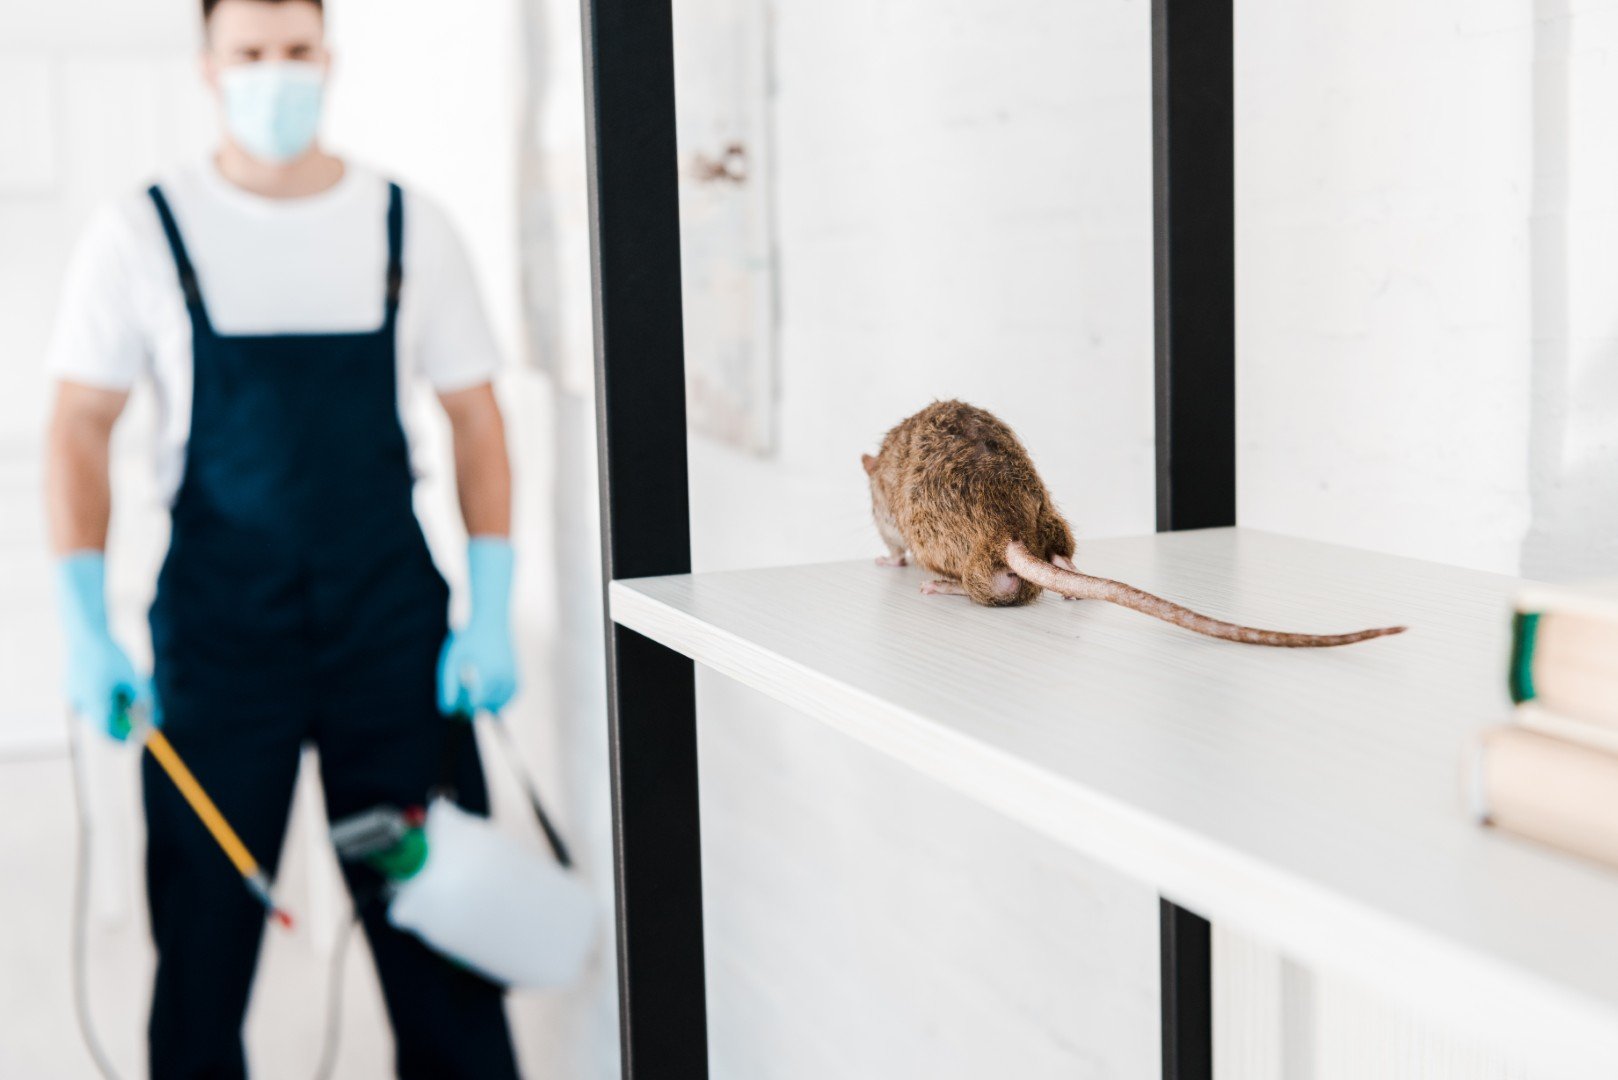
Why Preventing Pests Matters More Than Ever
Pests like ants, cockroaches, and rodents are more than just an indoor nuisance; they can bring serious health hazards and costly damage to your living space. As populations rise and climates shift, the need to block out pests is growing ever more important for homeowners. For those in Florida and surrounding regions, choosing reliable Citrus County pest control services can mean the difference between a quick resolution and ongoing frustration. Taking preventative measures ensures not only comfort but also safeguards indoor air quality and food safety. Common household pests can contribute to allergic reactions, exacerbate asthma, and introduce bacteria and other harmful pathogens.
How Pests Find Their Way Indoors
Understanding how pests enter your home is crucial to stopping them. Tiny fissures in foundations, unobstructed doorways, open windows, or gaps surrounding pipes and wires all serve as access points. Most household pests target food crumbs, standing water, or dark, cluttered corners for shelter. Even pristine homes can fall prey when these vulnerabilities go unchecked.
Small acts of vigilance, like sealing entry points and managing moisture, can turn the tide and dramatically reduce your risk of invasion. These efforts not only address obvious infestation threats but also mitigate issues before they become larger problems.
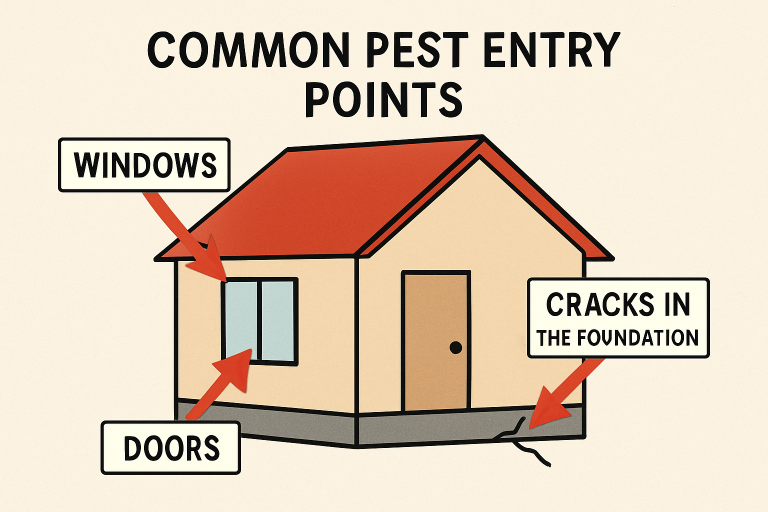
Simple Habits to Reduce Pest Problems
- Store food securely in airtight containers.
- Take out the trash frequently and keep lids closed.
- Clean crumbs and spills promptly, especially in kitchens.
- Declutter storage areas to remove hiding spots for pests.
- Fix dripping faucets or plumbing leaks quickly.
Integrating these simple habits into your daily routine significantly reduces the likelihood of pest activity. Preventive care—like storing pet food properly or sweeping under appliances—further tilts the odds in your favor. Proactive maintenance is a cornerstone of effective pest defense and keeps costs manageable over time.
Seasonal Adjustments for Effective Prevention
Every season presents unique pest threats, and your approach should shift accordingly. As spring arrives, keep an eye out for increased ant activity and patch up any gaps they find. Summer’s humidity brings mosquitoes and flies, so check for standing water and install or repair window screens to block entry.
- Spring: Inspect for ant trails and block their pathways with fresh weatherstripping.
- Summer: Remove stagnant water, maintain landscaping, and use screens on doors and windows to reduce flies and mosquitoes.
- Fall: Clean gutters, clear yard debris, and seal exterior cracks to prevent rodents from moving in.
- Winter: Store firewood away from your home and double-check door sweeps to discourage cold-weather critters.
Developing an adaptable, year-round prevention strategy ensures you stay ahead of seasonal pest cycles and maintain a healthy living environment.
Eco-Friendly Approaches for Modern Homes
Homeowners are increasingly seeking ways to keep pests at bay without overreliance on harsh chemicals. Integrated Pest Management (IPM) is a comprehensive approach that combines inspection, preventive maintenance, and the use of natural deterrents. Products like diatomaceous earth, boric acid, or essential oils can be potent tools for defense against common household pests.
The EPA’s guide to integrated pest management offers practical strategies for using eco-friendly products and approaches. IPM not only addresses active infestations but also helps ensure your prevention plan is sustainable and safe for both family and pets.
When to Seek Expert Guidance
Persistent pest problems can overwhelm even the most diligent homeowner. Key warning signs like small droppings, unexplained property damage, or recurring bites signal it’s time to consult a seasoned professional. Licensed experts have access to advanced diagnostics, baiting systems, and treatments that aren’t available to the general public. Their expertise quickly identifies both visible and hidden threats, substantially reducing the risk of repeat infestations.
The Lasting Importance of Proactive Pest Prevention
Preventing pests is not just about keeping your home clean; it is about protecting your health, comfort, and property value year-round. By understanding how pests enter your home, adopting simple daily habits, adjusting strategies for seasonal challenges, and exploring eco-friendly solutions, homeowners can dramatically reduce the likelihood of infestations. While proactive measures go a long way, recognizing when professional help is necessary ensures that even stubborn or hidden pests are addressed effectively. Ultimately, a consistent, thoughtful approach to pest prevention safeguards both your living space and your peace of mind.

Beneath every fading bloom rests a quiet promise, waiting to be gathered and carried forward.
Saving seeds turns each season’s close into a new beginning, built with care and attention. It offers more than self-sufficiency, bringing you closer to the rhythm of your garden.
Know When and How to Harvest Seeds at Their Best
At the heart of seed saving lies a simple question—will it grow again?
This depends entirely on viability, which is shaped by conditions long before storage. Dampness, fluctuating temperatures, and early harvesting can all compromise a seed’s strength.
Fortunately, with a little observation, it’s easy to judge when seeds are ready.
Lettuce seeds signal their readiness when their flowers turn dry and papery, whereas tomatoes prefer to be soft and deeply coloured before giving up their treasures. Meanwhile, beans and peas should rattle in their brittle pods before you touch them.
Use a small bowl of water to test viability. Seeds that sink usually hold promise, while floaters are best cast aside. Though the method isn’t perfect, this simple test gives a reassuring start.
To avoid guesswork next season, consider keeping a garden notebook. Make a note of the ripening dates, changes in weather, and the plants that were particularly notable.
In time, these scribbled notes become a map of your garden’s rhythm, helping you catch the right moment to collect without rushing or missing your window.
In addition to these steps, it’s worth noting that some plants require more careful planning to produce viable seeds. Root crops such as carrots often cross-pollinate with ease, especially when different varieties flower at the same time.
If several types are left to go to seed within close proximity, their offspring can lose desirable traits or become unpredictable in growth and flavour.
To avoid this, it’s best to allow only one variety to flower at a time or to use physical separation such as mesh bags or distance planting.
Keeping varieties apart helps preserve their distinct characteristics, ensuring that what grows next year stays true to what you saved.
Trace Tomorrow’s Garden Through Today’s Growth
Once you’ve timed it right, the next task is choosing which seeds are truly worth saving. Not every bloom, however cheerful, deserves a second showing.
Begin with the plants that thrive effortlessly in your soil. These aren’t simply lucky, as they’re locally adapted, and their offspring are likely to perform just as well.
Choose the healthiest, most productive specimens, especially those that resisted pests or thrived in poor conditions. Nature has done some of the selection for you.
Heirloom and open-pollinated varieties are ideal. They pass on their characteristics predictably, offering consistency in future crops.
Unlike hybrids, which are bred for specific outcomes but often lose their traits in subsequent generations, these seeds keep their identity intact.
For those new to seed saving, stick with the straightforward: tomatoes, peas, chillies, and beans. These are generous plants, both in yield and ease of seed collection.
Each success builds your confidence, and each harvest becomes more personal.
As you select, imagine the garden you want to greet you next year. A plant’s narrative commences with its parents, and it is you who initiates the next chapter.
Also, try to avoid seeds from plants that have bolted too early, such as spinach or lettuce during summer heatwaves. Premature flowering can be passed on, reducing the reliability of your future crops.
Dry, Store, and Label Your Seeds with Care
Having chosen and collected your seeds, the next step is to preserve their vitality. This part is deliberate, requiring a touch of patience.
Spread your seeds on paper, card, or mesh screens. Let them sit in a cool, dry, well-ventilated room. It’s best to avoid kitchens or greenhouses, where humidity tends to linger. Turn the seeds gently every few days, helping them dry evenly and avoid clumping.
Most will dry within a fortnight, though larger seeds may take longer. You’ll know they’re ready when they feel dry to the touch and break easily between your fingers.
Rushing this step risks moulding later on, so let them rest fully.
Moreover, glass jars, old film canisters, and screw-top spice tins all make fine homes. Slip in a small packet of silica gel if you can, or wrap a teaspoon of dried rice in tissue as a substitute.
Labelling is just as important. Record the plant name, variety, collection date, and even its position in the garden. These tiny notes will jog your memory months later.
When stored somewhere cool and dark, perhaps a pantry or hallway cupboard, seeds will often last several years. Some, like parsnips, prefer to be used quickly, while others, like tomatoes, surprise you with their staying power.
For longer preservation, consider vacuum-sealing or placing packets inside an airtight tin with a moisture absorber. While not essential for casual gardeners, these methods are useful if you’re saving rare or difficult-to-replace varieties.
Map the Seasons with a Seed-Saving Calendar
Once your seeds are stored, it’s tempting to set them aside and forget. But a quiet habit can bring them back into focus—a calendar that follows your garden’s pace.
Begin modestly. Mark your planting dates and, a few weeks later, note when you expect each variety to flower or fruit. As the year unfolds, use it to schedule reminders for seed collection, storage checks, and even viability testing.
Whether on paper or digital, consistency is key. With every season, your calendar becomes more insightful. You might notice that beans grown near the path ripen earlier than those behind the shed. Or that spinach bolts more quickly after a wet spring.
Try including a few reflections alongside your timings. Did the courgettes overrun the borders? Did the fennel struggle near the tomatoes? These observations, brief as they are, help you refine future planting decisions.
Calendars, when kept with care, become more than tools. They’re quiet witnesses to your learning, offering a kind of gardening help that no book can replicate.
It also helps to colour-code tasks based on their type, like edible crops, ornamentals, or perennials, so you can scan and prioritise your efforts as each season unfolds.
Solve Small Troubles Before They Grow
Even the most careful seed saver will face the occasional setback. That said, most problems can be softened with a little attention and know-how.
Mould is commonly the result of incomplete drying. If it appears, isolate the affected seeds immediately and allow the rest more air. Prevention, of course, lies in patience and proper airflow during drying.
Low germination is another common concern. To test, place a few seeds on damp kitchen paper in a sealed container and keep it in a warm spot. After a few days, see how many have sprouted. This simple check saves time and disappointment later.
Beyond that, clean tools and containers reduce contamination risks. Use warm water and a mild detergent, followed by thorough drying. It seems fussy, but it keeps your stored seeds clean and disease-free.
And if things do go awry? Don’t worry.
The seed-saving community is a generous one. Local garden clubs, allotments, or even your neighbours across the fence typically offer tips, swaps, and encouragement. Most gardeners love to share stories of their near misses as much as their triumphs.
Finally, consider sharing spare seeds with friends or community groups. It’s not only a kind gesture but also adds diversity to other gardens, creating a wider network of local resilience.
Conclusion
Beyond potential, each saved seed carries the memory of a season well cared for.
You shape your garden’s future by learning when to collect, what to keep, and how to care for each variety.
In doing so, you grow not just plants but a lasting connection with the land you call your own.
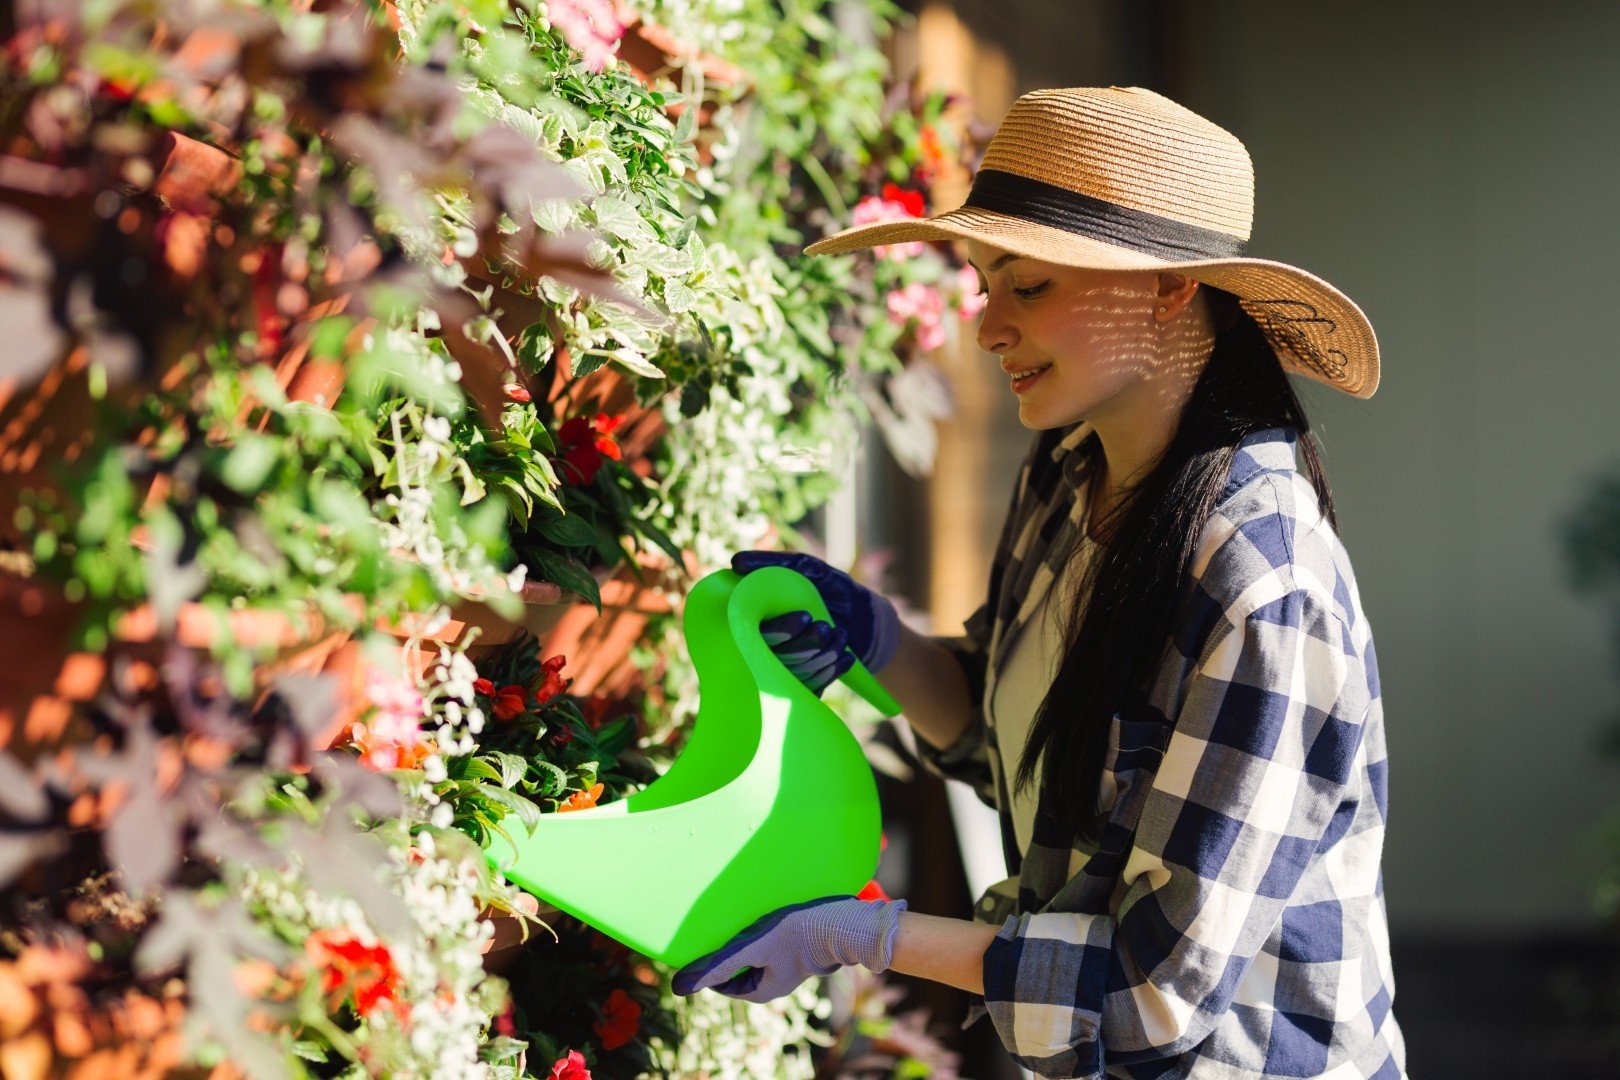
When it comes to maintaining a healthy garden, water is essential, but too much of a good thing can cause more harm than good. Overwatering is one of the most common gardening mistakes, and while many gardeners worry about plants drying out, overly damp soil can quietly create the perfect conditions for pest infestations.
Excess moisture attracts a long list of uninvited guests, from slugs and snails to fungus gnats and even mosquitoes. These pests can cause serious damage to your plants, and in vegetable gardens, they can contaminate or destroy your produce before you ever get the chance to enjoy it.
So, how do you know if you’re overwatering? And what can you do to keep your garden healthy and pest-free? Let’s break it down.
Pest Attracted by Overwatering
- Slugs and Snails
These slimy invaders thrive in moist environments, especially in shaded garden beds with dense foliage or mulch. They feed on soft leaves, seedlings, and ripening fruits, often leaving behind ragged holes and shiny trails.
- Fungus Gnats
Fungus gnats lay their eggs in wet soil, and their larvae feed on plant roots, stunting growth and making your plants more vulnerable to disease. They’re especially common in overwatered potted plants or greenhouse containers.
- Springtails
These tiny jumping insects are harmless in small numbers, but a soggy garden can cause their populations to explode. While they mostly feed on decaying organic matter, large infestations can stress your plants and indicate overly moist conditions.
- Mosquitoes
If you have trays, buckets, or low spots in your garden where water collects, mosquitoes will take advantage. Stagnant water is all they need to lay their eggs, and your garden can quickly become a breeding ground for these biting pests.
- Root Rot Fungi and Mold
While not insects themselves, mold, mildew, and fungal infections brought on by overwatering weaken your plants and create easy targets for sap-sucking pests like aphids and whiteflies.
Signs You’re Overwatering Your Garden
It’s not always obvious when your plants are getting too much water. Here are a few common signs:
- Soggy Soil: If the soil feels wet days after watering or there’s standing water, it’s too much.
- Yellowing Leaves: Many people assume this means the plant is thirsty, but yellow, drooping leaves are often a sign of root stress due to excess water.
- Wilting Despite Moist Soil: If a plant wilts even though the soil is damp, the roots may be rotting.
- Mushrooms or Mold: Fungi growing in your beds or mulch signal that moisture levels are too high.
- Increased Insect Activity: Swarms of gnats, slime trails from slugs, or chewed leaves often point to an underlying moisture issue.
Why Pest Control Still Matters – Even with Proper Watering
Even when you fix your watering routine, existing pest populations might still linger. Once pests make your garden their home, they can quickly spread to nearby beds, ornamental plants, or even inside your home.
That’s where routine pest control comes in. Regular visits from a licensed pest control company help prevent infestations before they get out of hand, especially in gardens with fruit, vegetables, and herbs that are vulnerable to insect damage. Ongoing treatments not only help eliminate active pests but also create a long-term barrier against future problems.
Protect Your Garden with Help from Greenhouse Termite and Pest Control
At Greenhouse Termite and Pest Control, we understand that a healthy garden starts with balance, and that includes managing moisture and monitoring for pest activity. Our team offers tailored solutions for homeowners with backyard gardens, greenhouses, or edible landscaping.
We don’t just spray and leave. We inspect the surrounding conditions that might be attracting pests, like excessive moisture or dense mulch, and develop a plan that’s environmentally conscious and effective. Whether you’re struggling with slugs eating your lettuce or gnats swarming your greenhouse, we’ve got treatments designed to keep pests out and protect your plants.
Overwatering may seem harmless at first, but it’s one of the fastest ways to invite pests into your garden. By staying aware of moisture levels, recognizing signs of overwatering, and investing in routine pest control, you’ll protect your plants and enjoy a more productive, beautiful garden.
And if you’re already dealing with a pest issue, let Greenhouse Termite and Pest Control help you reclaim your garden before pests take root by filling out a free quote.

Gardening offers relaxation and helps you connect to the natural elements. But for first-time gardeners, the excitement may lead to avoidable mistakes that could impede progress or even prevent them from achieving their goals.
Learning about these common pitfalls will help you have a smoother and more satisfying gardening journey as a first-time gardener. For instance, bulbsociety offers lessons on how to keep your garden fertile and productive.
Most First-Timer Gardeners Will Make These Error
Gardening doesn’t require so much expertise if it’s a hobby. Regardless of your objective for owning a garden, reducing your losses as a first-time gardener is essential. Below are the most common mistakes made by first-time gardeners.
Overwatering or underwatering
Improper watering is one of the most common mistakes beginners make. Too much water causes root rot, and too little leads to dehydration.
Before watering, check the soil. This is a good rule of thumb: Water it if one inch below the surface feels dry. Succulents’ need for water is drastically different than that of a tomato or herb, and the difference has to be understood.
Planting in the wrong location
Good plant growth depends on sunlight, especially the kind that gives plants their characteristic color. Many first-time gardeners do not consider choosing the right spot. Placing sun-loving plants in shaded areas and shade-loving plants in full sun is one of the most common errors.
Most vegetables and flowers require at least 6 hours of direct sunlight each day. However, paying attention to your gauge’s light patterns before planting can help you avoid this issue.
Ignoring soil health
Beginners usually overlook soil quality. Poor compaction of soil can restrict root development, limit nutrient uptake, and call for irrigation as water is not taken up or held in the soil. However, it’s worth spending some time on testing and amending the soil.
The resulting improvement will be substantial if compost, organic matter, or raised beds are present and the soil is rich in nutrients.
Choosing the wrong plants
Most first-time buyers select plants based on their looks rather than their suitability for the local climate and soil. Research what is good to grow in your USDA area or regional climate. Before you get into native and low-maintenance introduced plants, you will begin to gain confidence.
Crowded planting
New gardeners may be overzealous and crowd plants into their enthusiasm, thinking that more is better. But spacing is crucial for circulating the air properly, rooting, and bringing in sunlight.
Overcrowding can cause diseases and failed growth. Never deviate from the recommended spacing of plants on seed packets or plant tags.
Skipping regular maintenance
Watering, weeding, pruning, feeding, pest monitoring—the list goes on and on for the regular upkeep of a garden. Some beginners even plant but forget, expecting nature to do the rest.
If you have the space, scheduling a few minutes a day to tend your garden will prevent minor problems from becoming major ones.
Conclusion
Gardening is a path with no end. It won’t ensure perfection, but it will lay a solid foundation to avoid these common first-time errors. The greenest thumb can be perfected with patience, observation, and a willingness to learn.
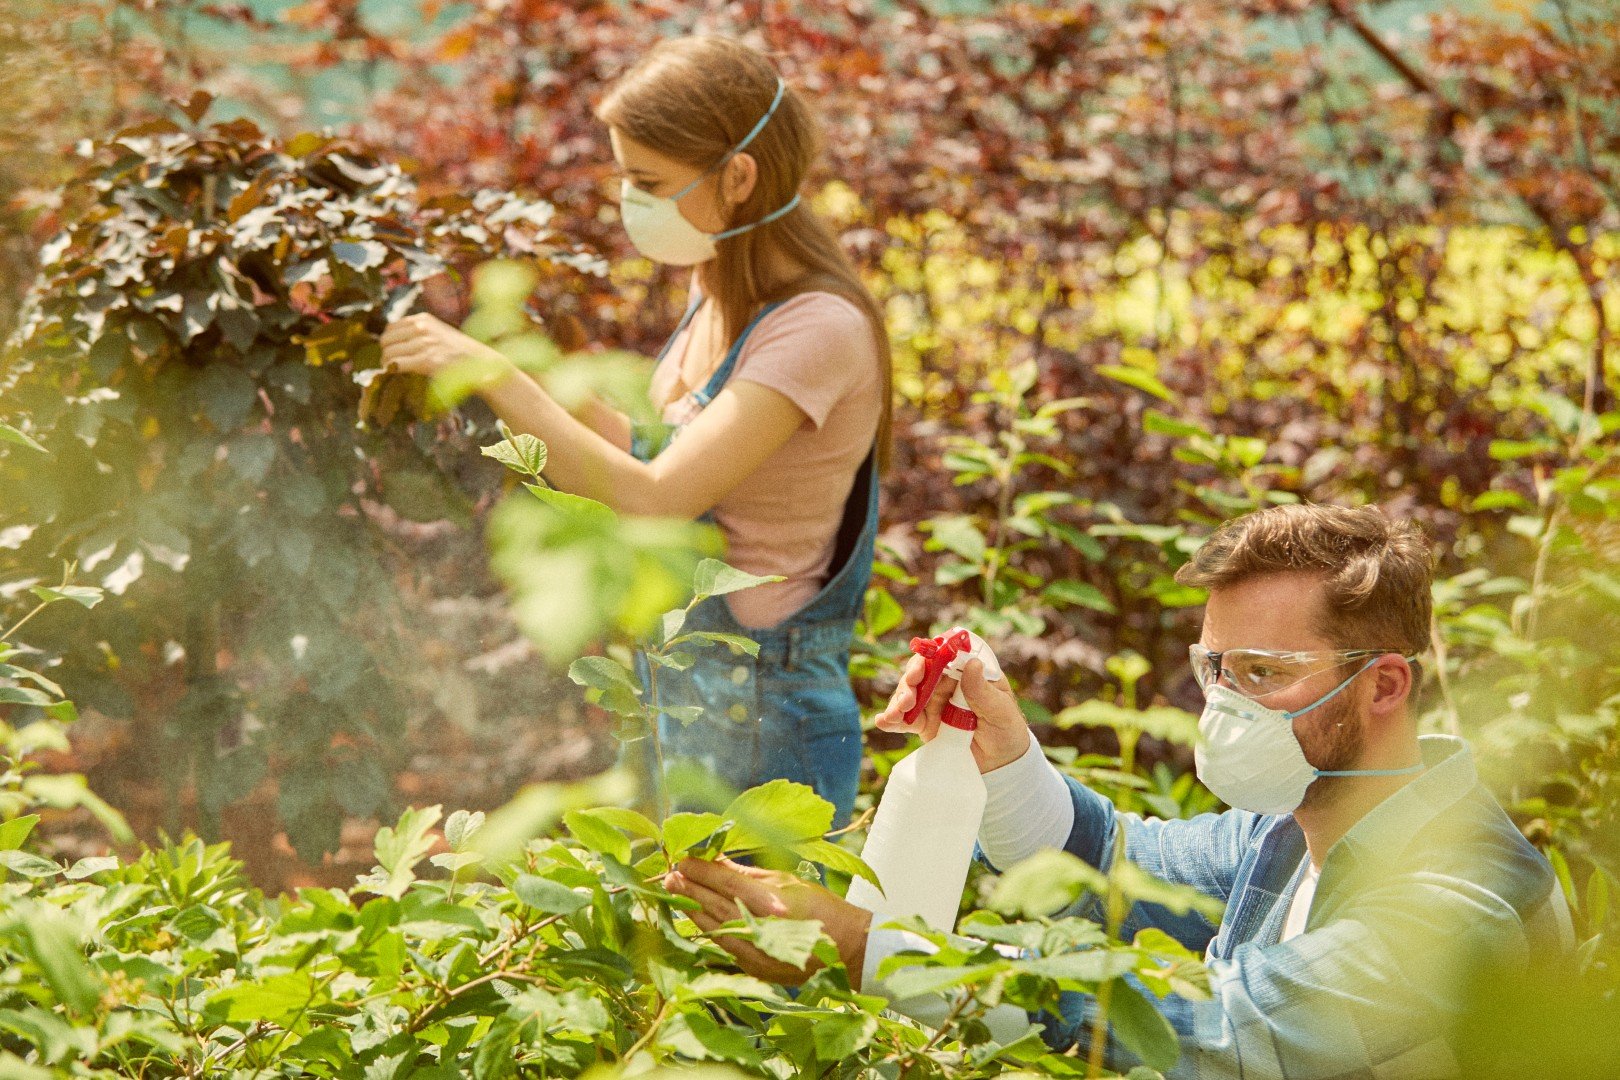
Creating a thriving garden or greenhouse is a labor of love for many homeowners. However, the enjoyment of nurturing plants can quickly turn into frustration when pests invade. These unwanted guests can wreak havoc on your hard work, causing significant damage to your plants, vegetables, and flowers. Understanding the damage caused by various pests is essential for effective prevention and elimination strategies, ensuring your garden remains healthy and productive.
Types of Pests and the Damage They Cause
Aphids
Aphids are notorious for sucking sap from plants, leading to stunted growth and yellowing leaves. Their feeding can weaken plants, making them more susceptible to diseases. Additionally, the sticky honeydew they excrete can encourage the growth of sooty mold, further harming plant aesthetics and health.
Spider Mites
These tiny pests feed on plant cells, causing discoloration and speckling on leaves. Heavy infestations can lead to leaf drops and plant decline, especially in greenhouses where conditions may be ideal for their proliferation.
Caterpillars
As larvae of moths and butterflies, caterpillars can defoliate plants rapidly. They consume leaves, flowers, and stems, leading to reduced yields and unsightly plants that may not survive the growing season.
Slugs and Snails
These mollusks create irregular holes in leaves and can consume entire seedlings overnight. Their feeding habits can stunt growth and lead to the death of young plants.
Powdery Mildew
This fungal disease manifests as a white, powdery coating on leaves, inhibiting photosynthesis and weakening plants. In severe cases, it can lead to premature leaf drops and diminished harvests.
Termites
While primarily associated with structural damage, some termite species can invade wooden structures in greenhouses, compromising their integrity. They can also feed on plant materials, leading to additional harm.
The Ripple Effect of Pest Damage
The impact of pest damage extends beyond the immediate destruction of plants. Infestations can lead to reduced crop yields, which can be financially devastating for homeowners who rely on their gardens for food and income. Additionally, the aesthetic appeal of a garden can suffer, leading to decreased enjoyment and potential loss of property value. The presence of pests can also create a cycle of damage, as weakened plants become more susceptible to diseases, further complicating recovery efforts.
Prevention Methods
Preventing pest infestations is crucial for maintaining a healthy garden or greenhouse. Here are some effective strategies:
- Regular Inspections: Routinely check plants for signs of pests or disease. Early detection is key to preventing a full-blown infestation.
- Healthy Soil: Well-nourished plants are more resistant to pests. Incorporate organic matter and mulch to promote healthy soil.
- Companion Planting: Certain plants can deter pests naturally. For example, planting marigolds can help keep nematodes at bay, while basil can repel flies.
- Water Management: Overwatering can create an ideal environment for pests like fungal gnats and slugs. Ensure proper drainage and only water when necessary.
- Crop Rotation: Changing the location of specific crops each season can help disrupt pest life cycles and reduce infestations.
- Physical Barriers: Use row covers, nets, or screens to physically block pests from accessing your plants.
Elimination Methods: Why Hire a Pest Control Expert?
When pests invade your garden or greenhouse, hiring a pest control expert can provide a more effective and long-lasting solution than DIY methods. Here are several reasons to consider professional pest management:
- Expertise and Experience: Pest control professionals have the knowledge and experience to identify specific pests and understand their behaviors. This expertise allows them to implement the most effective treatment strategies tailored to your unique situation.
- Targeted Treatments: Professionals can use specialized tools and techniques to eliminate pests while minimizing harm to beneficial insects and plants. They know which products are effective for different pest issues.
- Long-Term Solutions: Pest control experts don’t just treat the symptoms; they address the root causes of infestations. They can assess your garden or greenhouse and provide recommendations to prevent future pest problems.
- Time-Saving: Managing pest infestations can be time-consuming and labor-intensive. Hiring professionals allows you to focus on enjoying your garden while they take care of the pest issues.
- Application of Products: Pest control professionals are trained to handle and apply pesticides effectively and safely. They adhere to all regulations and guidelines, ensuring that treatments are done responsibly.
For homeowners seeking professional help, Greenhouse Termite and Pest Control offers tailored pest management solutions to keep your garden and greenhouse thriving. Their team can assess your pest situation and provide effective treatments, ensuring your plants are protected from damage.
Protect and Enjoy Your Thriving Garden
Understanding the types of damage caused by pests in your garden or greenhouse is crucial for effective management. By recognizing the potential threats and implementing preventative measures, you can protect your green space and ensure its health and productivity. When it comes to eliminating pests, consider the benefits of hiring a pest control expert. For more information on specific pests and pest control methods,
visit Greenhouse Termite and Pest Control. With the right approach, you can enjoy a flourishing garden free from pest-related worries.

Gardens add beauty to any rental property. On top of that, a garden can offer tenants a place to relax or even grow flowers. However, gardens also run the risk of attracting unwanted pests that could bother renters or damage the property. As a landlord trying to maintain appealing outdoor spaces for your tenants, you may need help with the best ways to prevent and control garden pests safely and effectively.
The good news is that there are environmentally responsible options available to deter common garden invaders. Read on to learn some of the safest methods for keeping your garden pest-free.
Identifying Common Garden Pests
The first step toward prevention and control is learning to recognize the usual suspects that can infest rental property gardens and landscaping. Typical pest problems fall into a few major categories such as:
- Insects
Watch out for common plant-eating insects like aphids, snails, beetles, caterpillars, and whiteflies that damage vegetable plants and ornamentals. Ants often follow to feed on honeydew secreted by sap-sucking insects, allowing them to proliferate. Other nuisance insects like mosquitoes and flies can bother outdoor enjoyment.
- Weeds
Weeds compete with desired plants for water, space, and nutrients. Aggressive weeds like bindweed, thistle, poison ivy, crabgrass, and dandelions are adept at spreading seeds and encroaching where they are not wanted.
- Wildlife
Deer, rabbits, voles, squirrels, and birds can ravage gardens by feeding on plants or digging and disturbing roots. Raccoons, skunks, rodents, and other wildlife also forage and can even take up residence on rental properties.
- Plant Diseases
Bacterial, fungal, and viral plant diseases can leave gardens looking unsightly. Blight, rust, powdery mildew, molds, and other common plant diseases can quickly damage plant health and vigor.
Northern Virginia property managers suggest that landlords familiarize themselves with common pest signs like aphids on leaves or slug trails. Then, you will be able to decide what action you should take to get rid of the problem.
Safe Pest Control Options for Gardens
The most effective pest management programs rely on multiple complementary tactics to control garden invaders without harming people or the environment. Here are some of the safest pest control options that you can try.
- Physical Barriers
Fences, netting, woven ground cover, and tree wraps create physical barriers preventing animals from entering spaces or reaching plants. Traps also physically capture and remove pests. While humane traps are ideal for large animals, adhesive traps, pheromone traps, light traps, and baited enclosed traps can catch insects, rats, voles, and other unwelcome visitors.
- Biological Controls
Encouraging natural predators by providing food, water, and habitat keeps desired insects, birds, and beneficial microbes thriving in the ecosystem. Introducing predator insects or bacteria targeting problematic species allows nature to run its course. Also, nurturing healthy soil and plant diversity enables vegetation to withstand and outcompete pests.
- Custom Maintenance
Diligent garden care disrupts pest life cycles. Weed, prune, and remove debris, denying pests food and shelter. Check for early signs of infestation. Clean tools and equipment between gardens to avoid spreading issues. Proper irrigation, fertilization, and mulching strengthen plants. Turn the soil to expose insects so birds can feed.
- Eco-Friendly Pesticides
As a last resort, consider using eco-friendly or minimum-risk pesticides. Neem oil, pyrethrins, insecticidal soaps, diatomaceous earth, and microbial inoculants control pests without extensive toxicity when applied carefully according to label guidelines from manufacturers.
Rather than relying on one approach, integrate multiple prevention and suppression tactics compatible with the property and rental landscape needs. Evaluate and adjust to find the right non-toxic pest management recipe that maintains healthy, attractive gardens for the enjoyment of tenants.
Building Pest-Resistant Gardens
While quick fixes temporarily help you get rid of pesky garden invaders, you need to look for long-term solutions. Landlords willing to invest effort on the front end will reap rewards, reducing headaches associated with recurring pest outbreaks. Here are a few tips that you can follow to build a pest-resistant garden.
- Site Evaluation
Conduct a site evaluation assessing sunlight, drainage, soil conditions, microclimates, and problem areas needing amendment. Address issues prior to installing new beds or plants. Test soil balancing nutrients based on test results.
- Plant Diversity
Incorporate a variety of plants with different growth habits and maturation rates to avoid mass susceptibility. Mix edibles with ornamentals – bushes, cane fruits, trees, vines, ground cover, annuals, and perennials. Interplant with pest-fighting herbs and flowers.
- Right Plant, Right Place
When adding or replacing vegetation, select pest—and disease-resistant species well-suited to the sunlight, soil, moisture, and hardiness zone. Provide ample spacing for root and canopy development. When possible, grow locally adapted heirloom varieties.
- Smart Design
Arrange plants with compatibilities in mind. Keep susceptible plants isolated from likely sources of infestations. Remove alternate hosts and diseased vegetation. Incorporate structural deterrents needed, like small garden fences or trellises.
- Healthy Soil
Build raised garden beds with enriched organic soil. Compost boosts beneficial microbes, suppressing soil-borne diseases. Avoid synthetic fertilizers and pesticides, which destroy microbial life. Use cover crops, rotate annually, and mulch for sustainably fertile soil.
- Care and Upkeep
Check regularly for early signs of problems. Weed and prune to increase air circulation in your garden. Clean up fallen debris sheltering overwintering pests and promptly treat or remove diseased plants. Establish an irrigation schedule optimal for plant health.
Communication and Guidelines for Tenants
Clear communication with tenants about pest control in rentals can help keep gardens healthy and address any issues before they escalate. Here’s how you can do it:
- Rental Agreements
In rental contracts, specify responsible use instructions for garden areas and consequences for neglect. Addendums can outline relevant pest prevention policies, like prohibiting certain plant types prone to issues.
- Education
Inform tenants about typical garden pests and the conditions that encourage them like overwatering, piled debris, overripened fruit, or bird feeders. Share ways they can actively assist prevention efforts such as garden sanitation, drainage improvements, monitoring for problems, and avoidance of pesticide usage.
- Feedback Channels
Establish convenient reporting procedures for pest sightings and infestation signs. Provide contact details to submit complaints via email, tenant portals, maintenance request forms, or phone. Maintain a protocol for rapid response, including inspection and planned action.
- Resolution Updates
Follow up on each garden pest complaint with transparency about investigation findings and next measures for resolution. Convey written or in-person progress reports to affected tenants detailing the status of pest control initiatives in their garden spaces until elimination is achieved.
Final Words
Now you know how to keep the gardens of your rental properties free from pests. Make sure to look for long-term and sustainable solutions that can help you keep your properties free from pests at all times. Keeping the gardens of your rental properties free from pests helps protect your investment by improving its outdoor curb appeal and ensuring tenant satisfaction in the long run.

Growing autoflowering seeds outside is not just possible—it’s a fantastic way to cultivate cannabis. Autoflowers are a bit different from regular cannabis plants, and for beginners, they offer a lot of advantages. Let’s dive into what makes them great for outdoor growing and how you can ensure a smooth experience in your own backyard or garden.
What are autoflowering seeds?
Autoflowering seeds are unique because, unlike photoperiod seeds, they don’t rely on the changing light cycles to trigger flowering. Instead, they flower based on age, typically in about 2-4 weeks. This makes them perfect for growers who don’t want to fuss with light schedules or just simply want to grow weed as fast as possible.
Where do autoflowering strains come from?
Autoflowering cannabis plants originated from the Cannabis ruderalis species, which is native to harsh climates in Central Asia, Eastern Europe, and Russia. Unlike typical cannabis strains, ruderalis adapted to shorter growing seasons by flowering automatically based on age, not light cycles. Breeders later hybridized ruderalis with popular strains, creating modern autoflowers.
How autoflowering seeds differ from photoperiod seeds
Photoperiod seeds depend on the light cycle to flower, meaning they need long days of light and short nights to stay in the vegetative stage. Autoflowering plants? Nah, they don’t care. They flower automatically after a certain amount of time, whether they’re getting 18 hours of light or 12. That’s why they’re called autoflowers!
Benefits of growing autoflowering seeds
You’ve got some cool perks with autoflowers:
- Faster growth cycles, meaning more harvests per year.
- They’re compact, making them ideal for smaller spaces.
- They tend to be more resilient against pests and diseases.
Common strains of autoflowering seeds
Some fan-favorites among autoflower growers include strains like Northern Lights Auto, Amnesia Haze Auto, and Blueberry Auto. These strains are well-known for their fast flowering times, strong effects, and delicious flavors.
Can you grow autoflowering seeds outside?
Absolutely! Autoflowers can thrive outdoors, and they’re often easier to manage because they’re more forgiving than regular cannabis strains. The key is to pay attention to your climate and provide some basic care.
Climate considerations for outdoor autoflowering grows
Autoflowers are hardy, but they’re not invincible. If you live in a region with warm summers, you’re golden. Autoflowers generally do well in moderate to warm climates. If it gets too cold or too wet, you’ll want to grow during the warmer months or try growing in pots so you can move them around.
Best time of year to plant autoflowering seeds outdoors
The best time to plant autoflowers outdoors is in late spring to early summer. This gives them enough warmth to grow healthy and strong. Since they flower based on age, you can also squeeze in a couple of harvests per year in warmer climates.
How autoflowering seeds adapt to outdoor conditions
Autoflowers are super adaptable to outdoor growing because they’re smaller, don’t need much light, and have shorter life cycles. This makes them great for quick outdoor harvests, even in less-than-perfect conditions.
Outdoor growing requirements for autoflowering seeds
Just because autoflowers are easy doesn’t mean they’re completely hands-off. Like any plant, they have some needs. Let’s get into the basics.
Soil preparation for outdoor autoflowering plants
For the best results, use a high-quality soil mix with good drainage. Autoflowers don’t like to sit in soggy soil. Mix in some perlite for extra aeration, and you’re good to go!
Watering needs for autoflowering plants grown outdoors
You want to keep the soil moist but not waterlogged. Water them regularly, especially if it’s hot, but don’t overdo it. Overwatering can lead to root rot, and nobody wants that.
Light requirements for outdoor autoflowering growth
Autoflowers don’t need a strict light schedule, but they still love the sun. The more sunlight they get, the bigger and better they’ll grow. Aim for at least 8 hours of direct sunlight each day.
Potential challenges of growing autoflowering seeds outside
Growing outside always comes with some challenges. But hey, that’s part of the fun, right?
Pests and diseases that affect outdoor autoflowering plants
You’ll have to watch out for pests like aphids, caterpillars, and spider mites. Autoflowers are resilient, but it’s always good to keep an eye on your plants and use natural pest control methods like neem oil or ladybugs.
Managing temperature fluctuations when growing outdoors
Autoflowers can handle a bit of temperature variation, but they’re happiest between 70-85°F (21-29°C). If it’s getting too cold or too hot, consider using a greenhouse or bringing potted plants inside.
How to protect outdoor autoflowering plants from weather extremes
Weather can be unpredictable, especially if you’re growing outdoors. If there’s heavy rain or wind in the forecast, cover your plants or move them to a sheltered area. You can use plastic sheeting or a simple DIY canopy to keep them safe.
Tips for successful outdoor autoflowering seed growth
If you want to maximize your outdoor autoflower grow, here are a few tips from my own experiences.
Choosing the right autoflowering strains for your climate
Pick strains that match your environment. If you’re in a hot, dry area, go for strains that can handle heat, like Gorilla Glue Auto. If it’s cooler, something like Lowryder Auto might do the trick.
How to maximize yield from outdoor autoflowering plants
To boost your yield, make sure your plants get enough sunlight and nutrients. Autoflowers don’t need a ton of feeding, but using a balanced fertilizer during the vegetative stage and a bloom booster during flowering can help.
Harvesting and curing autoflowering plants grown outdoors
Autoflowering cannabis seeds are ready to harvest in as little as 8-10 weeks. Once the trichomes are milky and the pistils are mostly amber, it’s time to harvest! After cutting them down, dry your buds in a dark, ventilated area for about a week, then cure them in jars for a few more weeks for maximum flavor and potency.
Can autoflowering seeds grow outdoors in any climate?
Yes, but they grow best in moderate to warm climates. In colder areas, plant during the warmest part of the year.
How long does it take for outdoor autoflowering plants to flower?
Autoflowers typically start flowering within 2-4 weeks of germination, regardless of light conditions.
Do autoflowering plants need as much sunlight as photoperiod plants?
No, but more sunlight can boost their yield. Aim for at least 8 hours of direct sunlight daily.
What is the ideal temperature for growing autoflowering seeds outdoors?
The best temperature range is between 70-85°F (21-29°C) for healthy growth.
How do I protect outdoor autoflowering plants from pests?
Use natural pest control methods like neem oil or introduce beneficial insects like ladybugs to keep pests away.
Growing autoflowering seeds outside is an awesome option, especially if you’re looking for a low-maintenance grow. These plants are tough, quick, and easy to manage, making them perfect for both newbies and seasoned growers. By understanding their basic needs, keeping an eye on the weather, and giving them a little TLC, you’ll be harvesting your outdoor autoflowers in no time!

Gardening is not just a hobby, but rather an art form that has the power to bring immense joy, deep relaxation, and a profound sense of accomplishment to countless individuals around the world. It is a beautiful and fulfilling activity that allows us to connect with nature, nurture life, and create our own little havens of tranquility and beauty.
As someone who is passionate about gardening, I can personally attest to the profound solace and contentment that can be found in tending to a vibrant oasis of flowers, vegetables, and herbs. Each day, as I carefully nurture and care for my plants, I am filled with a sense of wonder and awe at the miracle of life and growth. The simple act of planting a seed and watching it sprout, grow, and eventually bloom into a beautiful flower or bear delicious fruits and vegetables is truly magical.
But gardening is not just about the physical act of planting and tending to plants. It is also about the mental and emotional benefits it provides. Spending time in nature, surrounded by the sights, sounds, and scents of a garden, has a therapeutic effect on the mind and body. It allows us to escape the stresses and pressures of everyday life, and instead, immerse ourselves in the beauty and serenity of the natural world.
Furthermore, gardening teaches us valuable lessons about patience, perseverance, and the cycle of life. It reminds us that growth takes time, and that with dedication and care, even the smallest seed can transform into something extraordinary. It teaches us to appreciate the beauty in imperfection, as not every plant will grow perfectly or according to our expectations. But even in their uniqueness and flaws, they possess a charm and character that is truly captivating.
In this article, I aim to share my experiences and insights as an ordinary gardener, in the hopes of inspiring others to discover the joys and rewards of gardening. Whether you are a seasoned gardener or a complete beginner, I believe that there is something magical and transformative about getting your hands dirty, connecting with nature, and watching the fruits of your labor bloom and flourish.
So join me on this journey as we delve into the world of gardening, exploring its wonders, challenges, and the immense gratification that comes from nurturing and creating life. Together, let us celebrate the art of gardening and embrace the extraordinary beauty that can be found in the simplest of things.
To start a garden, one needs passion, patience, and a basic understanding of plants’ needs. I remember when I first started; it was a journey filled with trial and error. Understanding the soil composition, sunlight requirements, and watering needs of different plants was crucial in ensuring their healthy growth.
One significant factor that plays a role in successful gardening is the availability of natural sunlight. While some plants thrive under direct sunlight, others prefer shade. However, not all gardens have access to ample sunlight due to factors like building structures or tall trees that cast shadows over precious flower beds. In such cases, artificial lighting becomes essential.
Here comes the mention of LED grow lights – an innovative solution to provide adequate light for indoor or shaded gardens. These lights are energy-efficient and emit specific wavelengths that cater to plant growth. Although they can be effective for cultivating plants indoors or extending the growing season outdoors, it’s important not to rely solely on artificial lighting as natural sunlight remains optimal.
In my garden journey, I discovered that choosing suitable plant varieties is crucial for success. Different regions have varying climate conditions that affect plant growth. It is wise to select native or adapted species that can withstand local weather patterns and require minimal maintenance. By selecting appropriate plants for your garden’s microclimate – considering factors such as temperature range, average rainfall levels, and soil type – you increase the likelihood of bountiful harvests or flourishing blooms.
Watering is another aspect that demands attention. It is essential to strike a balance between providing enough water to sustain plants and avoiding overwatering, which can lead to root rot or other diseases. Regularly monitoring moisture levels in the soil and adjusting the watering routine accordingly is vital for a healthy garden. Additionally, using organic mulch around plants helps retain moisture, suppress weeds, and improve soil quality.
Gardening not only provides aesthetic pleasure but also promotes environmental sustainability. By cultivating organic gardens, we reduce our reliance on harmful pesticides and foster biodiversity by attracting beneficial insects and pollinators. I take pride in creating a small ecosystem within my garden that supports various living organisms while reducing my carbon footprint.
The therapeutic benefits of gardening should not be overlooked either. Spending time in the garden allows me to unwind from the stresses of daily life. The act of digging in the earth, planting seeds, and nurturing plants provides a sense of connection with nature that is often missing in our technology-driven world. Gardening has become my escape – a place where I can rejuvenate my mind and find solace.
In conclusion, gardening is an art that brings beauty, sustenance, and tranquility into our lives. From the simple pleasure of watching seeds sprout to reaping the rewards of bountiful harvests or colorful blossoms, every step in this journey offers fulfillment. As an ordinary gardener, embracing nature’s rhythms while employing basic techniques like appropriate plant selection, mindful watering practices, and considering innovative solutions like LED grow lights when necessary has allowed me to create an ever-evolving sanctuary right outside my door. So pick up your trowel and join me on this gardening adventure – let’s sow seeds of joy and watch them flourish together!
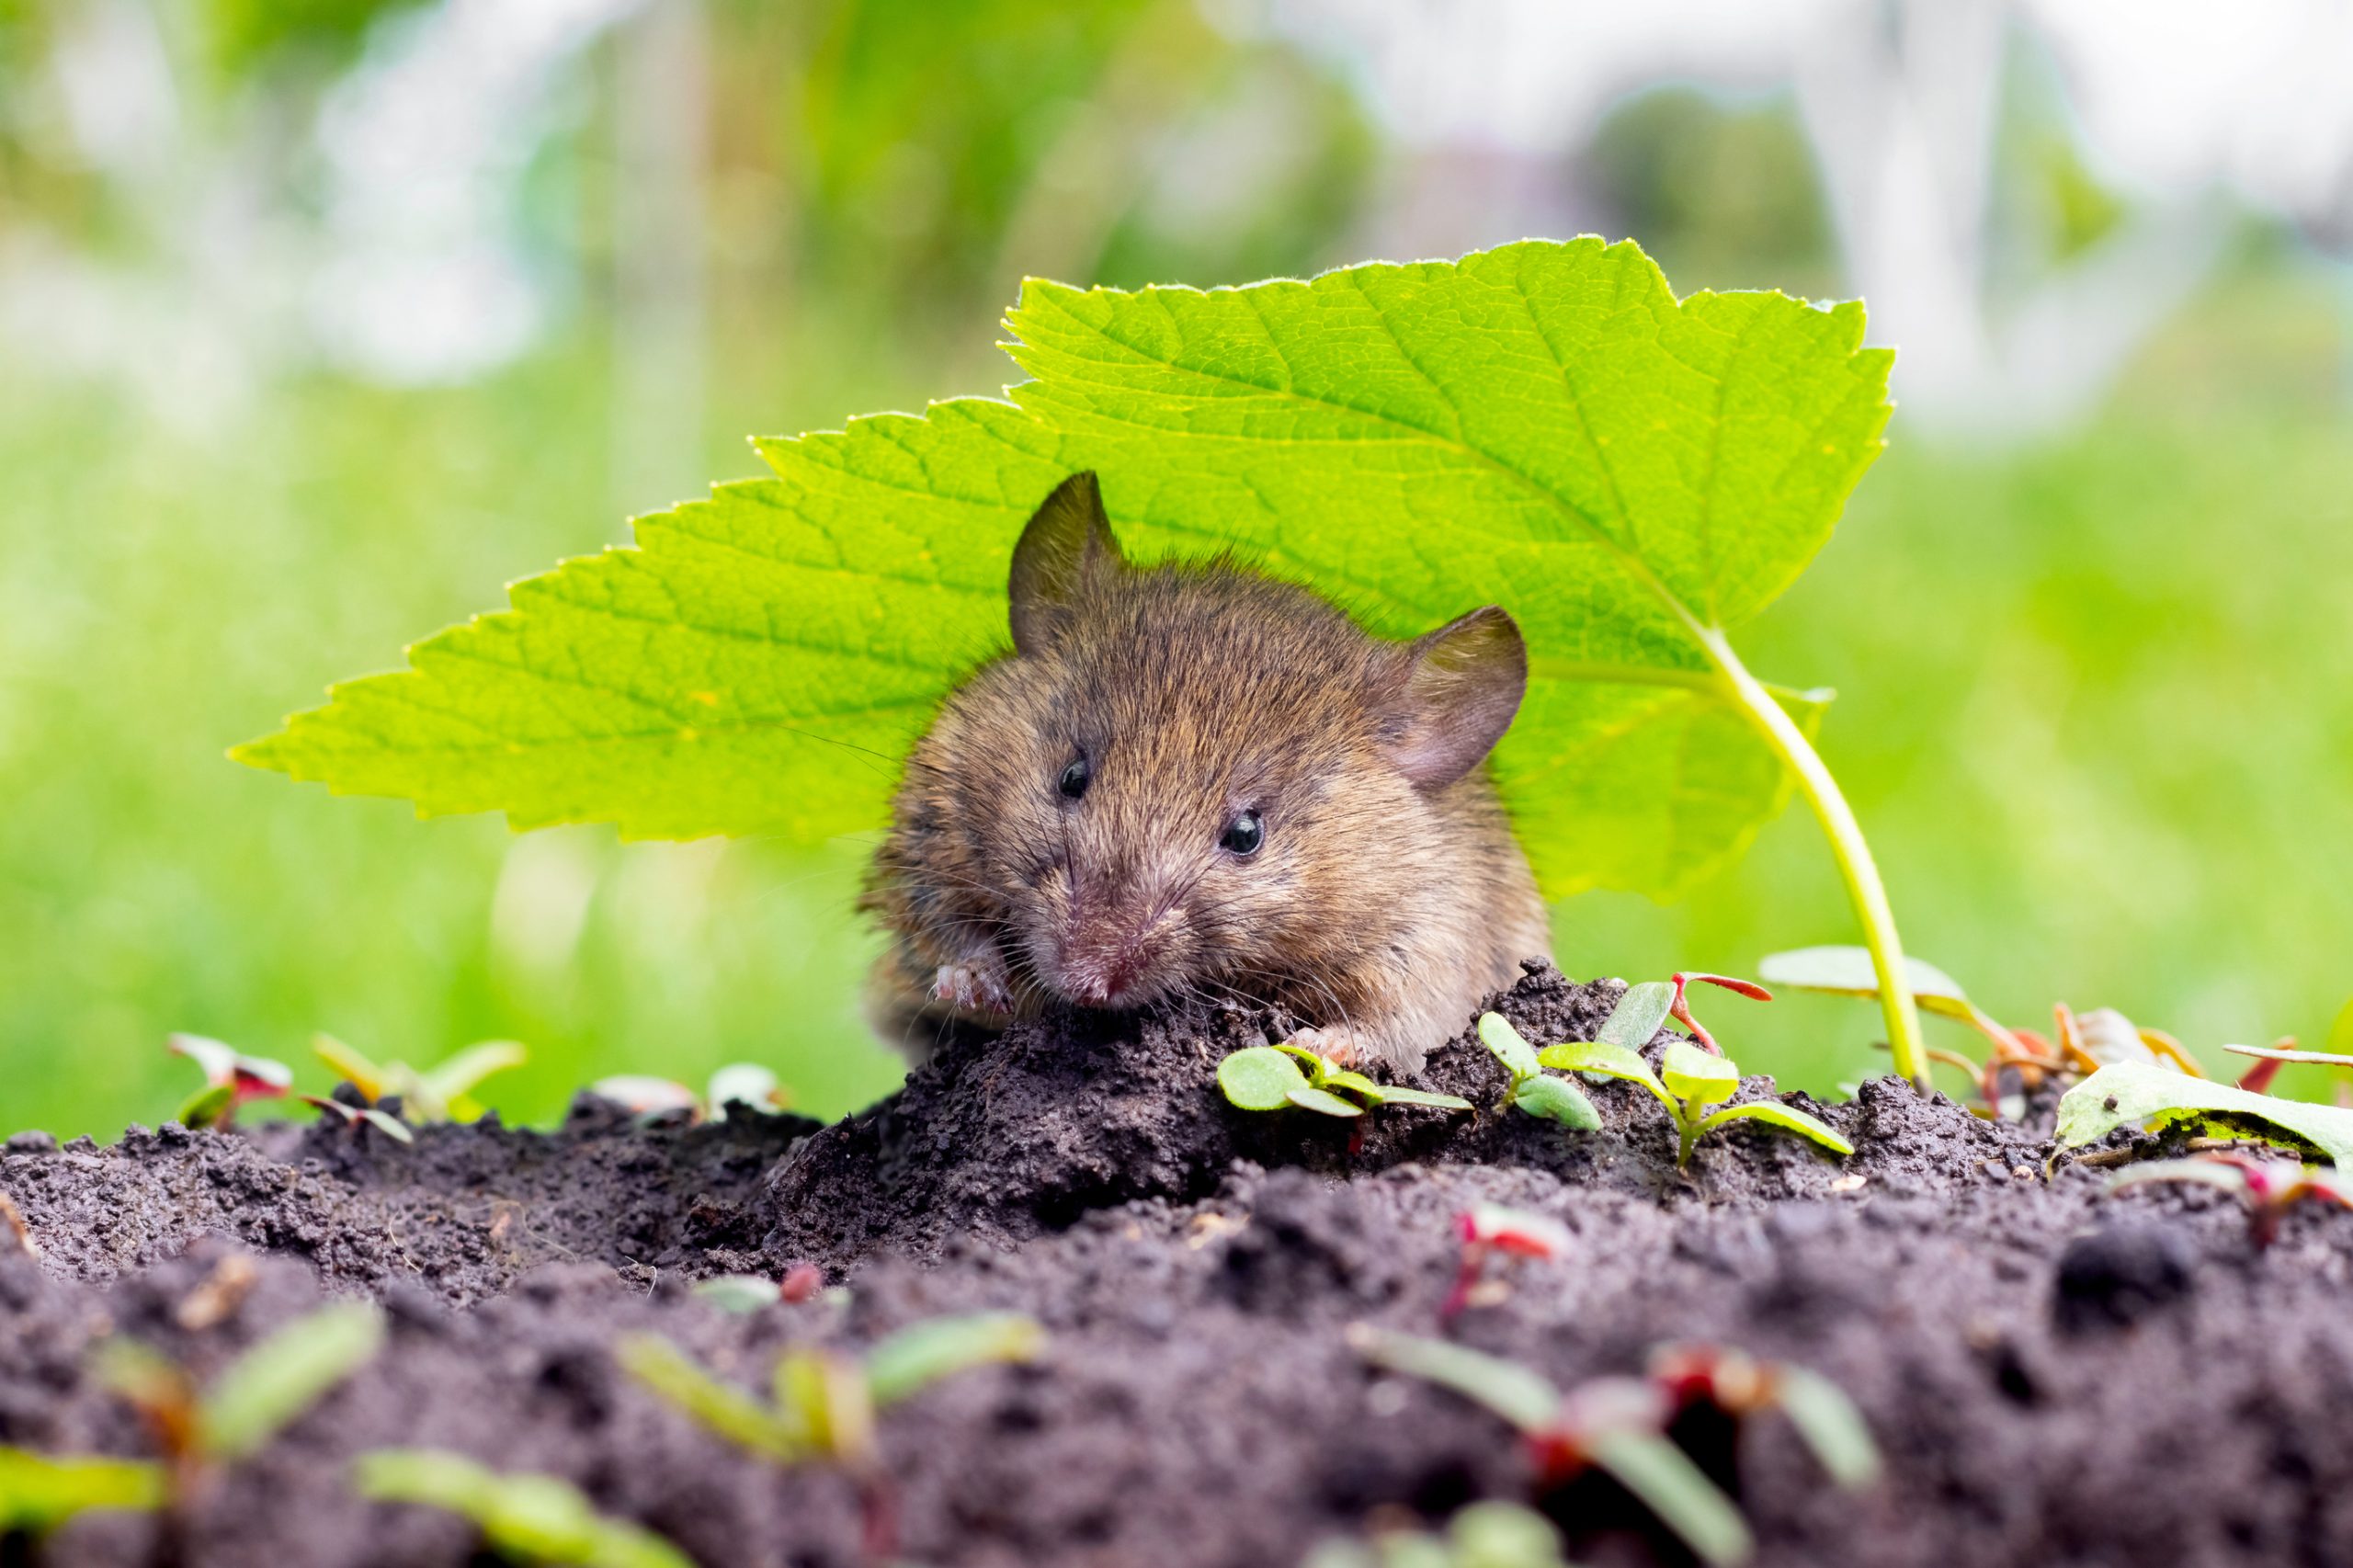
Welcome, fellow garden enthusiasts! Are you tired of finding your garden overtaken by sneaky rodents? Do you feel like your hard work in nurturing your plants is going to be wasted because of these pesky pests? Well, don’t worry! Greenhouse Termite and Pest Control is here to rescue your garden from mischievous rodents.
We understand the frustration and disappointment of finding the health and productivity of your carefully nurtured plants destroyed. That’s why we, a trusted, family-owned pest control company based in Tampa, Florida, have put together a comprehensive guide to help you take control of the rodent situation.
With our family history rooted in the pest control industry since the 1930s, we have a wealth of expertise and knowledge on how to address this common garden nuisance. Our methods have been enriched over generations, ensuring your garden remains a thriving sanctuary free from the destructive presence of rodents.
And the best part? We’re not just going to give you boring old advice. Throughout this guide, we’ll provide you with information on how to look for signs of rodent infestations, control, and prevent infestations. By following our recommended strategies, you can protect your garden and preserve those tasty fruits and vegetables.
Signs to Spot in Your Garden
Your garden is a true gem, and your fruits, vegetables, flowers, and plants deserve all the love and care. Unfortunately, sneaky pests like rodents can put a serious damper on your gardening efforts if you don’t keep an eye out for them. It’s crucial to understand the signs of their presence, which is why Greenhouse is here to inform you of a few things to keep your eyes peeled for.
Bite Marks: Sneaky rodents have a habit of gnawing at everything in sight. Look out for bite marks on your fruits, vegetables, and irrigation systems.
Droppings: Check for droppings near nesting sites and food sources. They look like small, dark pellets.
Burrows and Tunnels: Look for intricate burrows and tunnels in your garden beds and soil.
Nesting Sites: Keep an eye out for nesting materials made from shredded paper, fabric, or plant debris. You may find their nest in secluded, dark areas of your garden.
The Downside of Having Rodents in the Garden
As much as we love our green spaces, there’s one thing we can all agree on, rodents are not welcomed guests! These critters can cause significant damage to our gardens and even pose health risks. It’s important to be aware of the detrimental effects of rodents in our gardens, namely:
Crops Damage: These sneaky rodents can snack on your precious garden crops, leaving you with limited food sources and reduced amounts of crops.
Structural Damage: If they get their teeth on your irrigation systems, wiring, or wooden garden structures, they can compromise the integrity of your garden space.
Soil Disturbance: Rodents are notorious for burrowing, which can disrupt soil structure and plant roots, leading to soil erosion and decreasing plant health.
Health Risks: Unfortunately, rodents can carry and transmit diseases, parasites, and viruses that can pose risks to human health and contaminate garden produce.
But don’t worry, there are ways to manage rodent populations and keep your garden thriving. From natural repellents to traps, there are plenty of options to choose from.
Preventing Rodent Infestations in Your Garden
A rodent infestation can quickly turn your beautiful garden into a nightmare. But with a few simple tips, you can easily prevent rodent infestations from ruining your garden space.
Keeping your Garden Tidy: Maintaining cleanliness is key to preventing rodents from taking up residence in your garden. You’ll want to remove any debris or clutter that could serve as a hiding spot or nesting site for rodents.
Natural Repellents: Plant herbs like mint, lavender, or marigold to naturally repel rodents with their strong scents. Additionally, placing garlic or chili pepper flakes around the garden border can further deter them.
Eliminate Potential Food Sources: To prevent rodent infestation, you should eliminate any potential food sources in your garden. That means harvesting ripe fruits and veggies and getting rid of any that have gone bad or fallen on the ground. Trust us, this will reduce the likelihood of attracting rodents to your garden.
Seal Entry Points: Rodents may find their way into your garden by slipping through openings in your fencing or crevices in the garden walls. Be sure to create barriers to deter these critters, and thoroughly seal any potential entry points.
By implementing these simple preventative measures, you can create an environment that is less hospitable to rodents and enjoy a beautiful, rodent-free garden all year round.
Using Professionals for Rodent Control
Dealing with pesky rodents on your own can be quite a challenge, especially when it comes to protecting your beloved garden. Greenhouse Termite and Pest Control, however, has got your back.
Our expert team strategically places rodent boxes around your home to target those sneaky nesting and hiding spots. When it comes to your precious garden, we go above and beyond to create a customized plan that’s tailored just for you.
By placing bait boxes in all the right spots, we intercept and eliminate those pesky intruders. Our bait boxes are designed to provide rodent protection with poisonous bait inside. Once the bait is eaten, the rodent will be eliminated, and your garden will be protected.
With Greenhouse Termite and Pest Control on your side, you can rest easy knowing that your garden will remain a thriving paradise, free from the destructive presence of rodents. If you want to find more information, you can read our blogs on topics such as “Are Rodents Harmful to People?” And “What Are Rodents?” Or if you’re struggling with rodent infestations in your garden, don’t hesitate to reach out to us at 866-504-PEST for personalized assistance and expert advice.
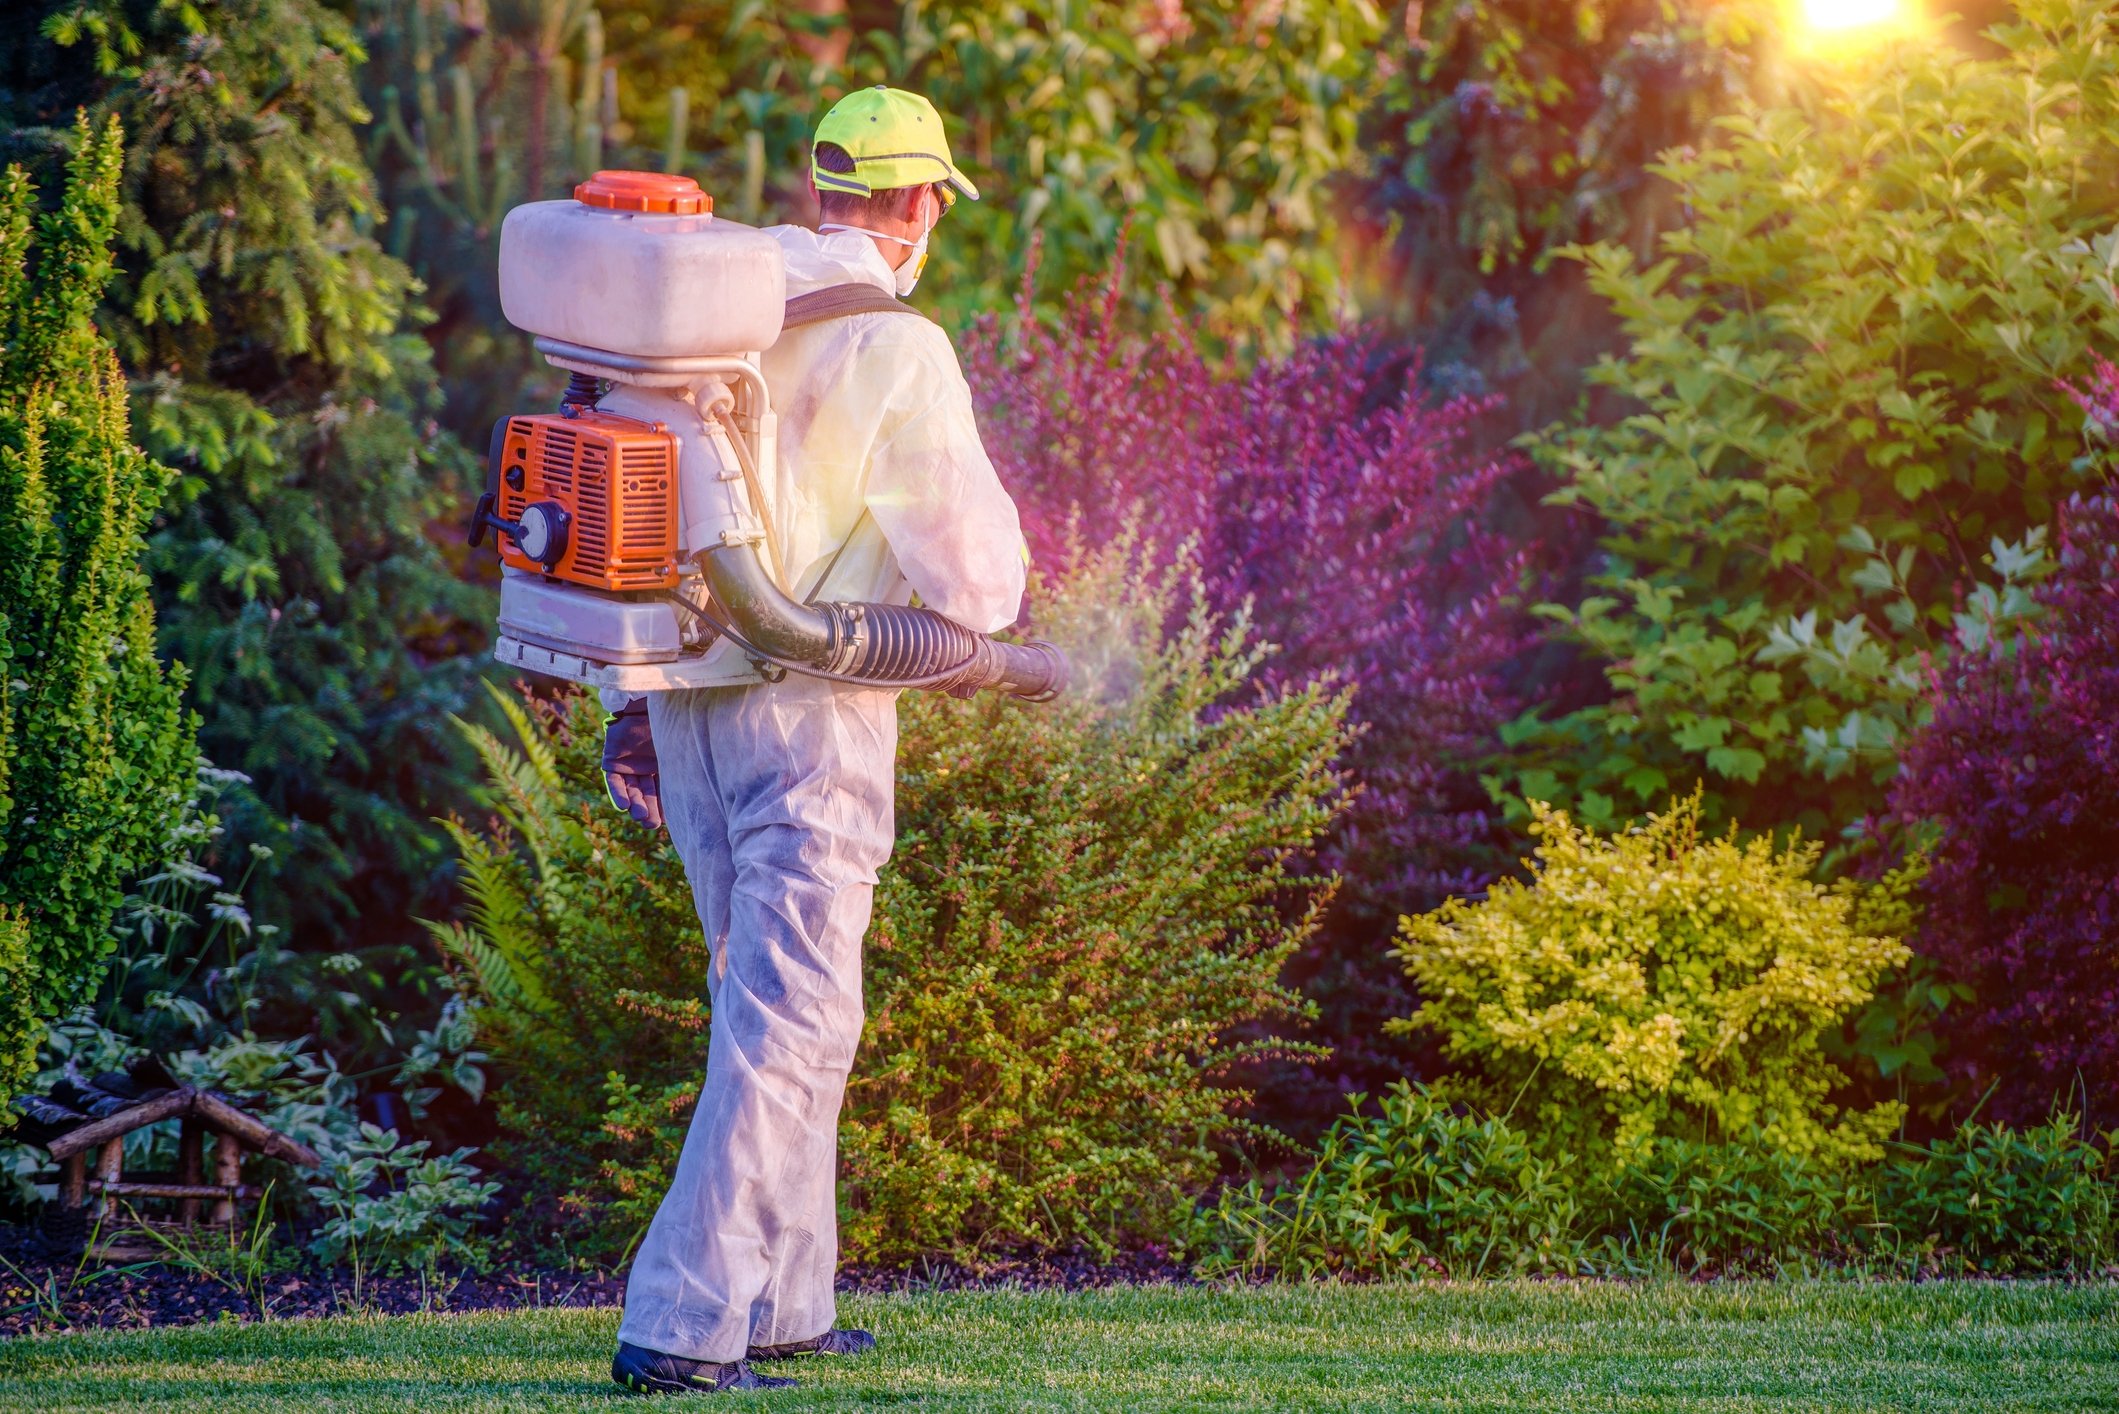
Are you struggling with garden pests wreaking havoc in your greenhouse? Don’t worry; you’re not alone. In this comprehensive guide, we’ll share effective strategies for eliminating these pesky invaders and help you maintain a healthy, thriving greenhouse.
Greenhouse pests, such as aphids, spider mites, and whiteflies, can significantly affect the yield of your greenhouse crops if left unchecked. But fear not! With the proper preventative measures and control tactics, you can protect your plants and enjoy a bountiful harvest. Stay tuned as we delve into practical and environmentally friendly ways to keep these uninvited guests at bay.
Throughout this guide, we’ll provide useful tips and techniques for tackling common greenhouse pests, from using beneficial insects to employing good hygiene practices. So, buckle up and get ready to transform your greenhouse into a pest-free haven where your plants can grow and flourish without any unwanted distractions.
Understanding Greenhouse Pests
As you begin your journey in greenhouse gardening, one thing you’ll need to keep an eye out for is the presence of various pests that can cause significant damage to your precious plants. Here, we’ll help you quickly learn how to recognise common greenhouse pests and understand their behaviours, so you can deal with them more effectively.
Insects: The world of insects is vast, but their small size can sometimes make it difficult to identify them correctly. A few common greenhouse insects include aphids, ants, and scale insects. Keep an eye out for changes in leaf colour, honeydew deposits, and the presence of winged or wingless pests on the undersides of leaves.
Mites: Spider mites are among the most troublesome garden pests you might encounter. They are tiny and can often be found on the undersides of leaves, causing damage by feeding on plant tissue. Keep an eye out for webbing on foliage, yellow stippling, and leaf drop as signs of a mite infestation.
Fungus and mold: Mildew, fungi, and mold come in various forms, including powdery mildew and sooty mold. These conditions thrive in moist and poorly ventilated environments, so be sure to check your plants regularly for signs of these issues, such as discolouration and leaf distortion.
Garden pests: Beetle larvae, caterpillars, snails, and slugs are some examples of larger pests that might find their way into your greenhouse. They are usually attracted by certain plants and can cause extensive damage to foliage, roots, and fruits. Keep an eye out for holes in the leaves, chewed edges, and trails left by slugs and snails.
To keep these pests under control, here are a few strategies that you can employ:
- Regular inspection: Make a habit of frequently checking your plants for any signs of pest activity, paying close attention to the undersides of leaves and hidden areas where pests may be hiding.
- Promote beneficial insects: Encourage the presence of ladybugs, lacewings, and other beneficial insects in your greenhouse by providing hiding spots and pollen sources. This natural form of pest control can help keep harmful insects at bay.
- Physical barriers: Use netting and other barriers to exclude larger pests like birds and butterflies from your greenhouse, helping to protect vulnerable plants from damage.
- Maintain good hygiene: Regularly clean your greenhouse and remove dead foliage, weeds, and other debris that might harbour pests or diseases.
By keeping a watchful eye on your greenhouse and implementing these strategies, you can greatly reduce the risk of pest infestations and ensure a thriving, healthy garden for you to enjoy.
Prevention and Control of Greenhouse Pests
So, you’ve got a lovely greenhouse full of flowers and vegetables, but those pesky pests just won’t leave them alone. Fear not! Here are some preventative measures and control strategies to help you keep your greenhouse pest-free.
First things first, let’s focus on prevention. Maintaining a clean greenhouse environment is key to keeping pests at bay. Regularly remove any dead leaves or decaying plant matter, and sterilise pots and tools. Keep an eye on the temperature and humidity levels in your greenhouse, as pests tend to multiply in warm and humid conditions. Proper ventilation and monitoring of the climate will help combat this issue.
Remember, not all insects are bad for your garden! Attract beneficial insects like ladybirds, parasitic wasps, and hoverflies by planting flowers that they love in or around your greenhouse. In turn, these creatures will help control your pest population by munching away on aphids, caterpillars, and other undesirable bugs.
For pest control, try these strategies:
- Traps: Employ sticky traps or flypapers to catch things like whiteflies and fungus gnats. Hang them near plants susceptible to these pests for maximum effect.
- Water spray: Give your plants a good blast with a hose or a high-pressure water spray. This will dislodge pests like aphids (greenfly) and can be especially effective on tomatoes and peppers.
- Biological control: Introduce natural enemies of the pests, such as predatory mites, to your greenhouse. These helpful critters will consume the harmful pests without causing damage to your plants.
Integrated Pest Management (IPM) is a crucial strategy in achieving long-term pest control in your greenhouse. This includes monitoring and identifying pests, determining action thresholds, and combining a variety of approaches, such as:
- Cultural (e.g. pruning and irrigation)
- Mechanical (e.g. netting and traps)
- Biological (e.g. beneficial insects and parasites)
- Chemical (only when absolutely necessary and used responsibly)
By following these prevention and control strategies, you’ll be well on your way to enjoying a thriving, pest-free greenhouse. Happy gardening!
Frequently Asked Questions
How can I prevent pests from entering my greenhouse?
To prevent pests from entering your greenhouse, it’s essential to maintain its cleanliness. Regularly clean the surfaces, windows, and floors of your greenhouse to eliminate potential hiding spots for pests. Installing plant netting and net screens can also create barriers to stop pests from entering your greenhouse and landing on your plants source.
What are eco-friendly methods for tackling greenhouse pests?
Eco-friendly methods for dealing with greenhouse pests include introducing biological controls like predatory insects such as ladybirds and lacewings that can help control common pests like aphids. Another option is using organic pest repellents like neem oil or garlic sprays. You can also try companion planting, which involves growing plants that repel pests naturally alongside your main crops source.
How do I deal with flies and insects in my greenhouse?
To deal with flies and insects in your greenhouse, ensure good ventilation and air movement as it can limit the population growth of pests. Sticky traps can be used to capture flying insects. For more persistent issues, consider introducing predatory insects like wasps and nematodes that can kill flies and mosquitoes naturally.
What natural predators can help control garden pests?
Natural predators, like ladybirds, lacewings, and hoverflies, can reduce the population of garden pests such as aphids and other harmful insects. Parasitic wasps and nematodes are also beneficial predators in your greenhouse as they target pests like vine weevils and leatherjackets.
How can I maintain a healthy greenhouse environment to deter pests?
To maintain a healthy greenhouse environment, keep it clean and well-ventilated. Remove any dead or decaying plant material, as it can attract pests. Ensure your plants are adequately spaced to promote proper airflow, reducing the chances of disease and pest infestation. It’s also a good idea to regularly inspect your plants for signs of pests to catch and address issues early.
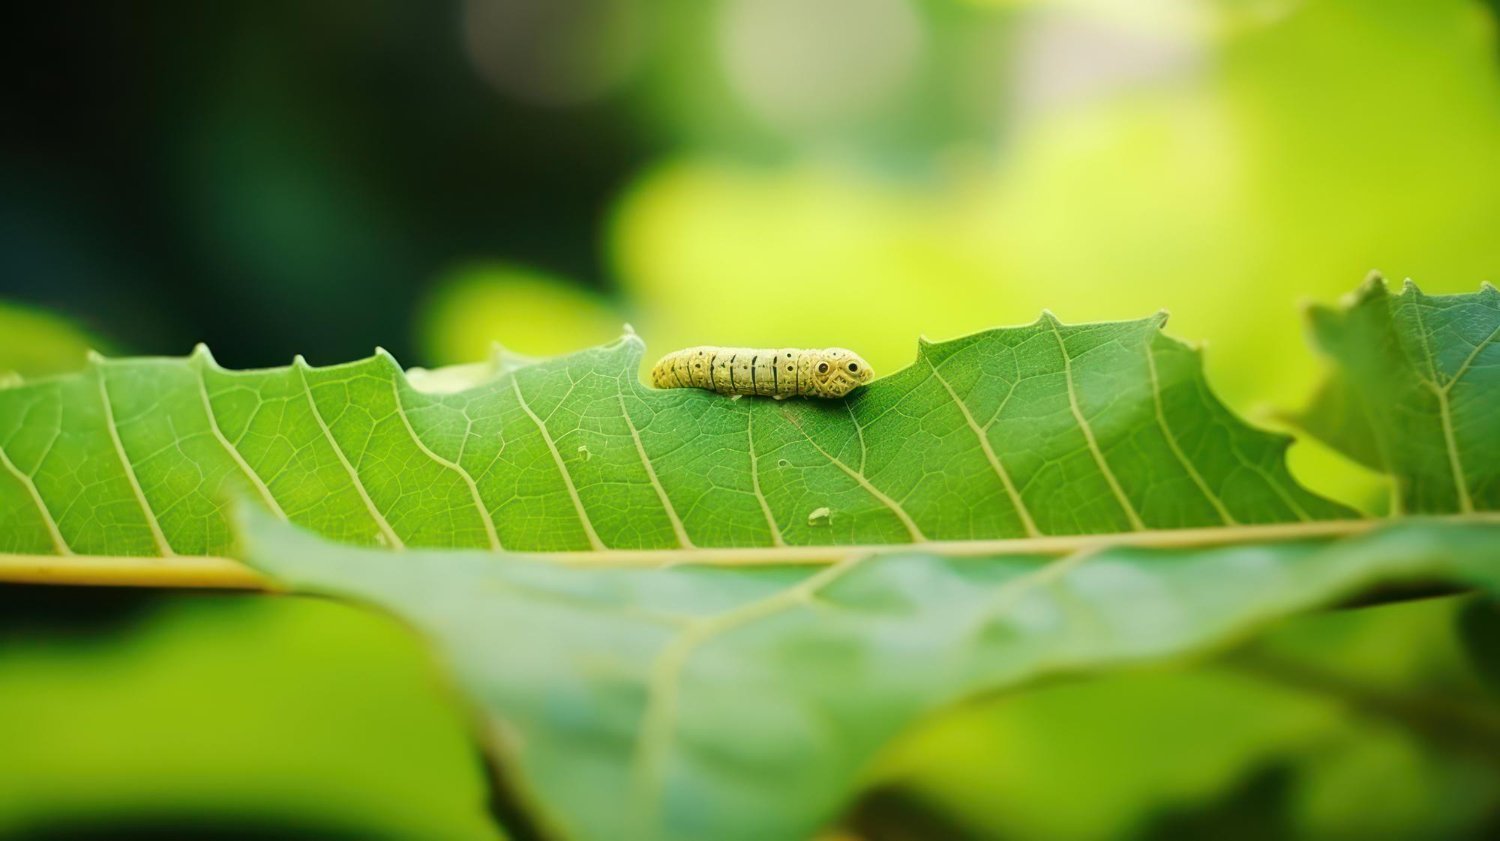
No matter how much you care for your garden, you will likely avoid pest attacks and diseases altogether. Harmful organisms can enter your property from adjacent or neighboring areas and be carried by wind, rain and air currents.
The garden contains lots of different organisms, including plants, insects and earthworms. Fungi and bacteria are also a part of this microcosm. Most of them thrive and live in harmony with each other. However, a few troublemakers induce threatening situations for the rest of the garden.
Traditional pest control methods assume that a good insect is a dead insect, so farmers in the 1960s, for example, tirelessly sprayed pesticides. The problem with this practice is… actually, there are a few things that could be improved. Pesticides can become ineffective over time because the insects develop resistance to them. Spraying exterminates both harmful and beneficial organisms. Chemical products are ruining the environment. That’s where IPM comes into play.
Understanding the Basics of IPM
Integrated Pest Management (IPM) is a method of maintaining a thriving garden in a sustainable and contemporary way. Unlike traditional practices of combating harmful microorganisms, the application of the integrated pest management helps to get rid of pests without harm to nature.
Let’s briefly review the fundamental principles and potential strategies of IPM before selecting the tools.
Identification
Defining a problem is the first step towards solving it. Start by carefully examining all the symptoms of disease or pest infestation. After gathering all the necessary information, use multiple sources to research the problem and learn practical methods to combat it.
Monitoring
Regular monitoring of garden conditions and pest activity enables determining the threat type and monitoring changes accurately. It helps to detect problems early and take effective measures. Records of type, population size, and distribution should also be maintained. All of this helps identify meaningful patterns and trends that will help keep your garden healthy.
Preventing Approach
Prevention is the core of IPM methods. The key to this practice is to stop pests or diseases before the vegetation is damaged. It’s important to choose plant varieties resistant to pests and maintain good hygiene to ensure a healthy garden.
Cultural Practices
Growers can clean their area by removing old crops, infested plants, and weeds that may shelter pests. Proper plant care, such as adequate watering, fertilization, and pruning to reduce plant stress, also falls into this category. Careful selection of varieties resistant to insect damage is one of the most effective ways to plan a garden using cultural control.
Biological Control
Rather than completely eradicating pests, biological control methods aim to maintain manageable infestation levels. This approach in integrated pest management allows for a sizeable natural niche to remain, which nature will always seek to fill. By keeping pests at tolerable levels, predator species have a steady food source while plant damage remains low.
Chemical Control (in a pinch)
IPM is designed to help significantly reduce the use of chemicals. However, from time to time, this measure may be helpful in exceptional circumstances. Pesticides must be used carefully, and choose those that target only a specific pest and do not cause severe damage to the environment.
Choosing the Right IPM Tools
After identifying the problem, analyzing the information obtained through monitoring and exploring possible strategies and options, you can choose tools to get integrated pest management benefits.
Physical Controls
This method is also called “mechanical” control. What specific actions should be taken? You can physically remove pests from your garden using traps, barriers, and tillage. When discussing diseases, this means additional pruning and removal of diseased plants.
Prevention
How do you keep pests from ruining your garden? Choose resistant varieties of plants that are also suitable for your region’s climatic and weather conditions. You can also install row covers or netting to block harmful insects from reaching your crops. Take care of the hygiene of your site by clearing it of debris and weeds that can serve as a home and food for pests.
Biological Control Tools
Ladybugs, lacewings and wasps are beneficial insects that are a must for any garden. You can purchase and release them or take care of attracting them to your site. Soil pests can be controlled by introducing nematodes. Support a variety of beneficial organisms, encouraging habitat diversity.
Chemicals
If pesticide use cannot be avoided, look for low-toxicity solutions that do not harm people or pets to save the lives of beneficial insects in the garden. The manual should be your best friend; don’t ignore it. Spot treatment is also a reliable way to minimize damage to the nature and garden inhabitants.
IPM is a sustainable pest and pathogen management approach that includes several strategies and practices. Choosing the right combination of tools helps control pest and disease problems without harming the environment and the microorganisms that help your garden stay healthy by supporting natural processes.
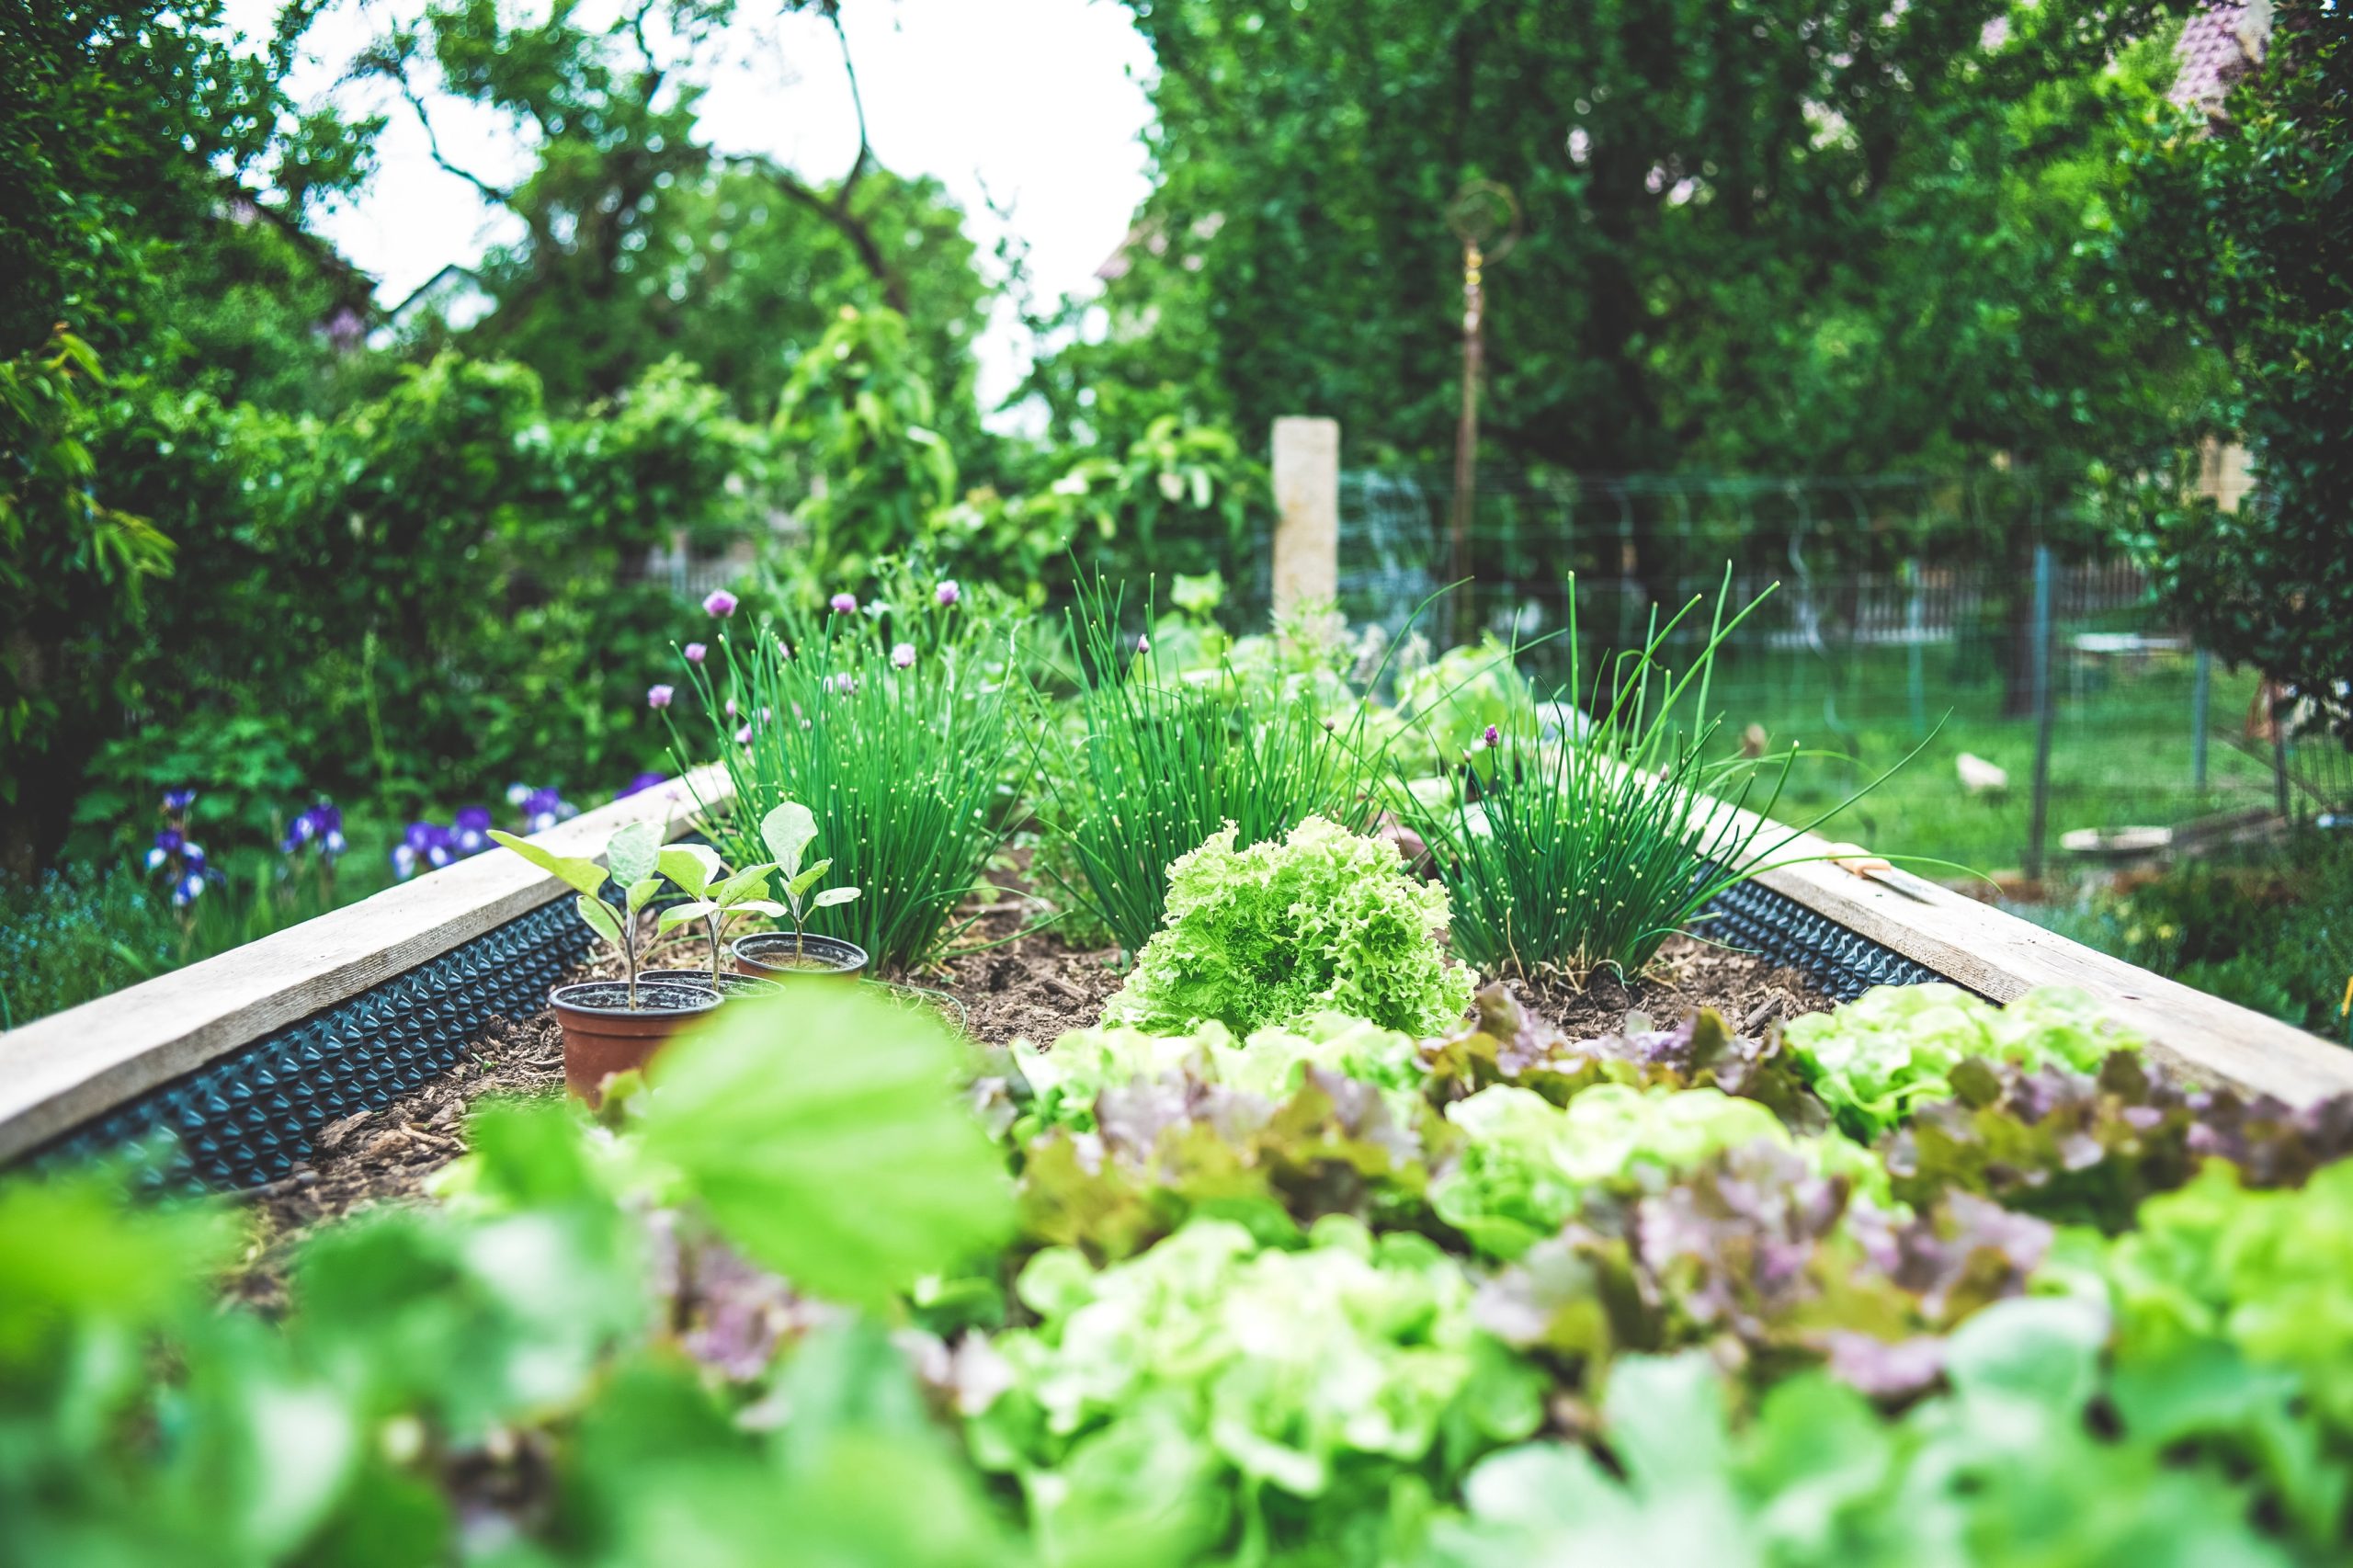
Gardening can be an extremely rewarding practice. It’ll lower your stress levels, provide you with some physical exercise, and allow you to cultivate a space that’s not only great for recreation, but also rich in herbs, fruits and vegetables.
Tips for new gardeners
But if you’ve never wielded a trowel in your life, it can be tricky to know where to start. Let’s look at some worthwhile tips for the gardening novice.
Start small
You can’t expect to main control over a massive and elaborate garden from day one. Don’t bite off more than you can chew: keep your plots small to begin with, until you have the skills and confidence you need to expand. You only need a packet or two of vegetable seeds to get started.
Do your research
There are vast amounts of information out there. Much of it’s available online, but you’ll also find valuable insights in books, and from other gardeners. Get to know the quirks of the plants you’re dealing with, and you’ll be rewarded.
Choose the right location
You might not have much scope to rearrange your garden. But it’s nevertheless important to shift your plants so that they’re getting the optimum sunlight. Hardier plants can be deprioritised in favour of the more fragile ones.
Get your soil tested
Not all soil is the same. In fact, it’s incredibly diverse. By understanding the acidity of your soil, and its composition of minerals and other nutrients, you’ll stand a better chance of troubleshooting any problems you might later run into. Get your soil tested regularly!
Prune and deadhead
Much of the work of gardening comes from removing growth that we don’t want, so that the growth we do can flourish. Dead and diseased branches will take vital resources away from the rest of any given plant: remove them with pruning shears.
Monitor for pests and diseases
Effective gardening means controlling pests. Make sure that you keep an eye out for them. Pest control can be performed using artificial chemicals – or you can use natural methods, like attracting predators, to deal with the problem. Spiders and larger insects are your friends – they’ll tend to eat the smaller ones that are destroying your plants.
Conclusion
Once you’ve got a few years of experience under your belt, your ambitions in the garden will doubtless develop in new and interesting ways. You should always be thinking ahead, since the work you do today probably won’t pay off for several months. Don’t be tempted to put your feet up during winter – by putting in a little work then, you’ll save yourself a lot of work in spring and summer.

When buying a new property, it is important to consider the issue of pest control. Pests such as rodents, termites, ants, and cockroaches can cause significant damage to your property and be a source of discomfort and health risks. To help you ensure that your new property is free of pests, here are 8 best pest control advice to consider:
- Give the property a thorough inspection
Before buying a property, it is crucial to conduct a thorough inspection to identify any existing pest problems. Hire pest experts, like rat control services from Toronto, to inspect the property and provide you with a report.
This report should identify any existing pest infestations, the severity of the infestations, and recommended treatment options. Armed with this information, you can make an informed decision about whether to proceed with the purchase or negotiate a better price to cover the cost of pest control.
- Check the building’s history of pest control
Find out if the property has a history of pest control measures. If pest control was conducted in the past, it is important to determine the effectiveness of these measures and whether they were successful in eradicating pests.
Knowing the history of pest control can help you identify any recurring pest problems that may require ongoing treatment. You can ask your real estate agent from Ajax to provide the history of the property for you.
- Inspect the surrounding area
The surrounding area can have a significant impact on the likelihood of pest infestations. For example, if the property is near a garbage dump or a stagnant body of water, it may attract pests such as rats, cockroaches, and mosquitoes.
Inspect the surrounding area for any potential pest hotspots and take steps to mitigate the risks, such as clearing bushes and debris, covering garbage bins, and draining stagnant water. You can hire pest control experts from Collingwood to thoroughly inspect the property for you.
- Seal up any entry points
Pests can gain access to your property through small cracks, gaps, and holes. Inspect the property for any entry points that pests may use to enter your home and seal them up.
This includes sealing gaps around doors and windows, repairing cracks in walls, and covering vents and chimneys.
- Keep the property clean and clutter-free
Pests thrive in dirty and cluttered environments. To reduce the risk of pest infestations, keep the property clean and clutter-free.
This includes regularly cleaning surfaces, vacuuming floors, and clearing clutter from cupboards and shelves. To avoid attracting pests, store food in airtight containers and regularly dispose of garbage.
- Install pest control devices
Installing pest control devices can help prevent and detect pest infestations. For example, installing fly screens on windows and doors can prevent flies and mosquitoes from entering the property.
Installing rodent traps and bait stations can help control rodent infestations while installing termite bait stations can help detect termite activity.
- Use pest control treatments
If pests are identified during the inspection, it is important to use effective pest control treatments to eradicate them. So, it’s advisable to seek the services of a professional pest control company like pest control Baltimore, a reputable service provider. They are equipped with the knowledge, tools, and specialized techniques to tackle various types of pests effectively. This may include using insecticides, baits, and traps. It is important to use these treatments safely and according to the manufacturer’s instructions.
- Regularly inspect and maintain the property
Regularly inspecting and maintaining the property can help prevent and detect pest infestations. This includes checking for signs of pest activity, such as droppings and damage to property, and taking appropriate action if pests are detected.
Regular maintenance, such as repairing leaks and cracks in walls, can also help prevent pests from gaining access to the property.
It is crucial to prioritize pest control when buying a property. Identifying and addressing any existing pest problems early on can save you from costly repairs and potential health risks down the line.
Taking the necessary steps to prevent pest infestations will help ensure that your home remains pest-free. When buying a property, be sure to consider pest control as a crucial aspect of the purchase process. Remember, early prevention is important to maintaining a safe and healthy living environment.
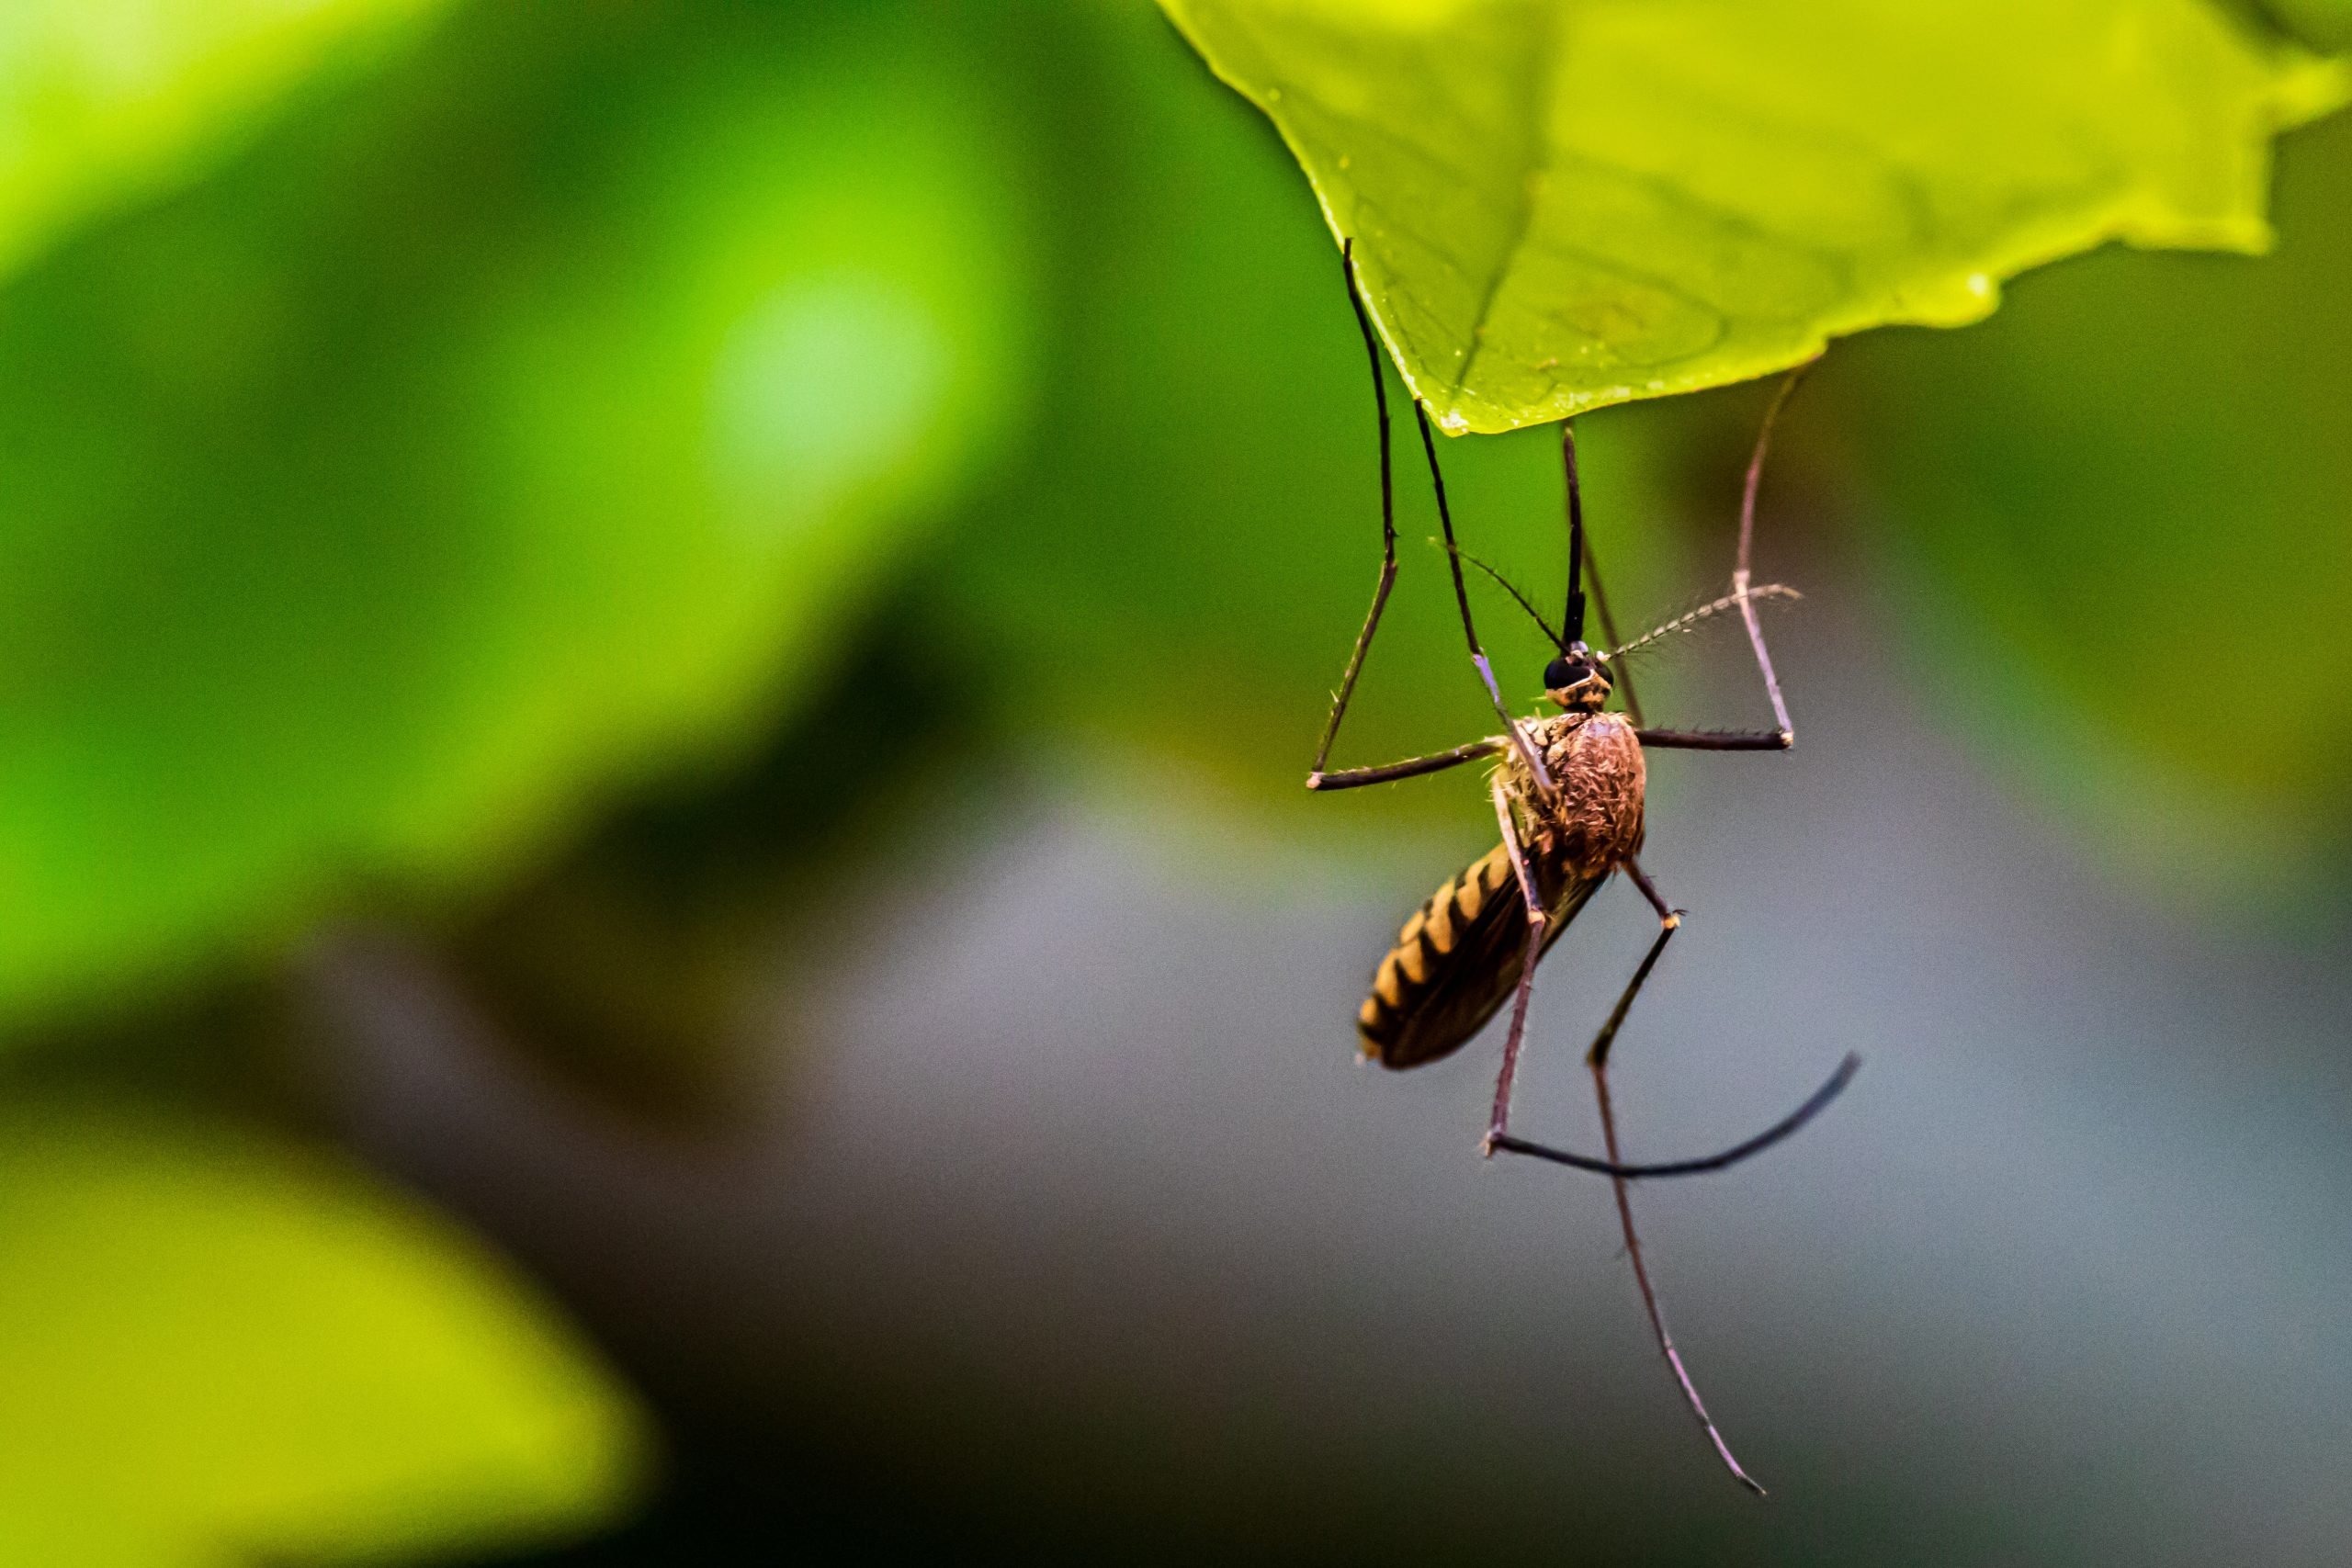
You might be surprised to hear that mosquitoes are the deadliest animal in the world. Yes, you read that right! Those pesky flies cause over 725,000 deaths every year, most of which are due to malaria.
Most of us know to avoid mosquitoes wherever possible, and it’s common knowledge that they carry a parasite called malaria. However, these pesky flies can carry much more than a single parasite. They also transmit viral diseases, including Zika, West Nile, yellow fever, and dengue.
In countries where mosquitoes are prevalent, it’s not uncommon to enter a home and see insect repellents or mosquito fogging systems, especially during summer where bugs seem to be everywhere. Many people also invest in professional mosquito fogging services to keep their homes pest-free.
Let’s take a closer look at what happens when a mosquito bites you and how these pesky flies can transmit diseases to humans.
What Happens When a Mosquito Bites You?
Learning about how mosquitoes transmit diseases can make it easier for you to keep yourself and your loved ones safe.
There are three different types of mosquitoes (Anopheles, Aedes, and Culex) that exist across the world, and each one carries different diseases. It’s only female mosquitoes that bite humans and such blood because they need this blood to supply nutrients for their eggs so that they can propagate.
A female mosquito can sense when a human is nearby by detecting the infrared (heat) waves that we emit from our skin as warm blood moves through our arteries and veins. They can also pick up on unique human scents.
When a mosquito punctures your skin with two tubes, one of which draws blood and the other of which injects an enzyme into your blood. This enzyme contains anti-coagulant proteins that prevent your blood from clotting, so they can enjoy a continuous flow of blood into their tube until they’re full.
The anti-coagulant proteins that a female mosquito injects into your skin can cause a small allergic reaction that leads to an itchy, red bite.
How Do Mosquitoes Spread Diseases?
It’s not just a raised, itchy bump that mosquitoes leave after they bite you; they might also infect you with a parasite or virus.
You can never be sure whether a mosquito is infected when it bites you, which is why it’s essential that you protect yourself from them as much as possible.
When an infected female mosquito injects its anti-coagulant proteins into your bloodstream through its saliva, it can also deposit parasites or viral particles. Inside your body, the parasite or virus can multiply and grow and may cause serious side effects or even death.
The most common diseases that a mosquito transmits include:
- Chikungunya
- Dengue Fever
- Malaria
- West Nile Virus
- Yellow Fever
- Zika Virus
In the United States, West Nile Virus is the most common virus spread by mosquitoes.
How Do You Stop a Mosquito Bite from Itching?
Usually, mosquito bites don’t require any treatment, and they will resolve by themselves after a few weeks. However, if you’re experiencing excessive itching, swelling around the bite, or additional symptoms, like ongoing headaches, you’ll need to take action.
It’s best to avoid itching the bite as much as possible to prevent breaking the skin and risking infection. You might benefit from applying topical creams, which you can get from your healthcare provider, to soothe the swollen area around the bite.
Keep the bite area clean by washing it with soap and warm water each day. You might also want to cover it with a plaster or bandage to reduce the risk of infection and stop you from scratching the area.
Some of the recommended treatments for mosquito bites include:
- Aloe vera
- Antihistamines
- Chamomile tea
- Honey
- Hydrocortisone
- Oatmeal
How to Protect Yourself From Mosquitoes and Mosquito-Borne Diseases
Taking the right steps to prevent yourself from getting bitten by mosquitoes will reduce your risk of nasty bites and potential diseases. Here are some great things that you can do to protect yourself from those pesky flies:
- Avoid traveling to areas of the world where mosquitoes are prevalent (usually countries around the equator where the weather is humid)
- Keep your skin covered up as much as possible
- Wear thick clothing so mosquitoes can’t bite through it
- Surround yourself with protective netting when sleeping
- Use protective screens over doors and windows
- Invest in a mosquito fogger to rid your garden of these pests
- Avoid going outside during dusk and dawn when mosquitoes are out in full force
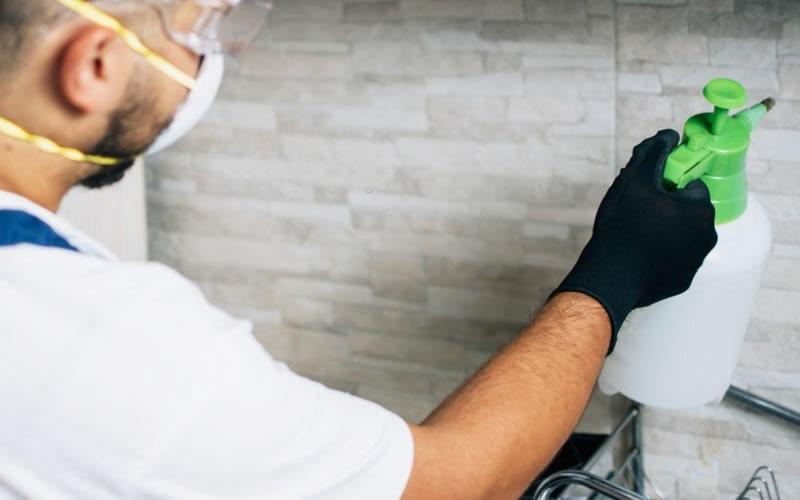
Choosing The Right Pest Control Team
One of the most difficult aspects of dealing with pests is figuring out how many there are and what they’ve done to your house. Fortunately, pest control experts like Pro Pest Control Sydney https://www.propestcontrolsydney.com.au can take care of everything for you. From identifying the type of pest you have to recommending the best pest control plan to solve the issue.
When it comes to finding the best pest controller for your home, it’s important to do your research. Different companies offer different services, and you’ll want to find one that can meet your specific needs. Here are eight tips on searching the best pest controller for your home.
1. See If They Do Inspections Or Consultations
Some pest control companies offer a free consultation and inspection to help determine the best course of action. It might be worth taking advantage of this free service. The professionals will be able to walk inside, and let you know if the pest problem was caught early or has simply been festering for a while.
2. Look For Pest Control That Is Environmentally Friendly
By looking for pest control that’s environmentally friendly, you’ll be doing your part in making the earth a better place. Along with being safe and effective on pests. Synthetic pesticides are harmful to children and pests who are likely to ingest these toxic chemicals. However, the environmentally friendly pesticides are not made with toxins. Thus, they are 100% safe for all members of the family.
3. Seek out Licensed Operators
Most pest control companies will gladly show you, their license. This is to prove that only licensed and properly trained professionals are working in your home. They should also display the labels for any pesticides they intend to use in your home, as well as other pertinent information. Visit Environmental Protection Agency to learn more about pest licenses and permits.

4. Ask For Referrals and Look For Reviews
One of the best ways to find a great pest control business is by asking others for referrals. If you want more assurance that your chosen company will live up their end of agreement, ask them if they have any online reviews or testimonials from past clients who used their service before.
5. Make Sure They Are Budget Friendly
The last thing you want is a pest control service that will break the bank. Make sure they are within your budget. Take advantage of consultations and inspections before committing to one company. This is to avoid being stuck with an overpriced bill when something goes wrong later on. Plus, don’t be afraid to shop around and find the best option.
6. Ensure They Can Handle Your Pests
Experience is key when it comes to ensuring that your home’s pests are taken care of. Some companies focus on several types, while others handle just one type. Make sure you know which ones can solve what’s bothering you before hiring them because if not then there could be more problems down the line. Always look at their level of expertise and if they know how to best handle any pest issues.

7. Make Sure They Can Work With You
If you own a commercial business, the times when you can have your business treated for bugs will most likely be different than if you have a residential problem. Most commercial pest controllers will be able to work around your schedule and perform treatments when your business is not open or serving customers.
8. Look For A Proven Track Record
You want to make sure you find a pest controller with an established track record of success. It’s easy for inexperienced people or new businesses set up shop in today’s market, but they might not be able handle the job properly and your home could suffer as well. How do I know if a company has been around for long? There are many ways, but one of the most straightforward is looking at their reviews. After all there’s nothing worse than hiring someone who can’t deliver on what they promised! Plus, when you’re in such an important position as deciding between two companies with similar services it pays off to be safe rather than sorry.
By following these simple tips, you can be sure to find the best pest controller for your home. And with pests under control, you can rest easy knowing that your family and pets are safe from harm.
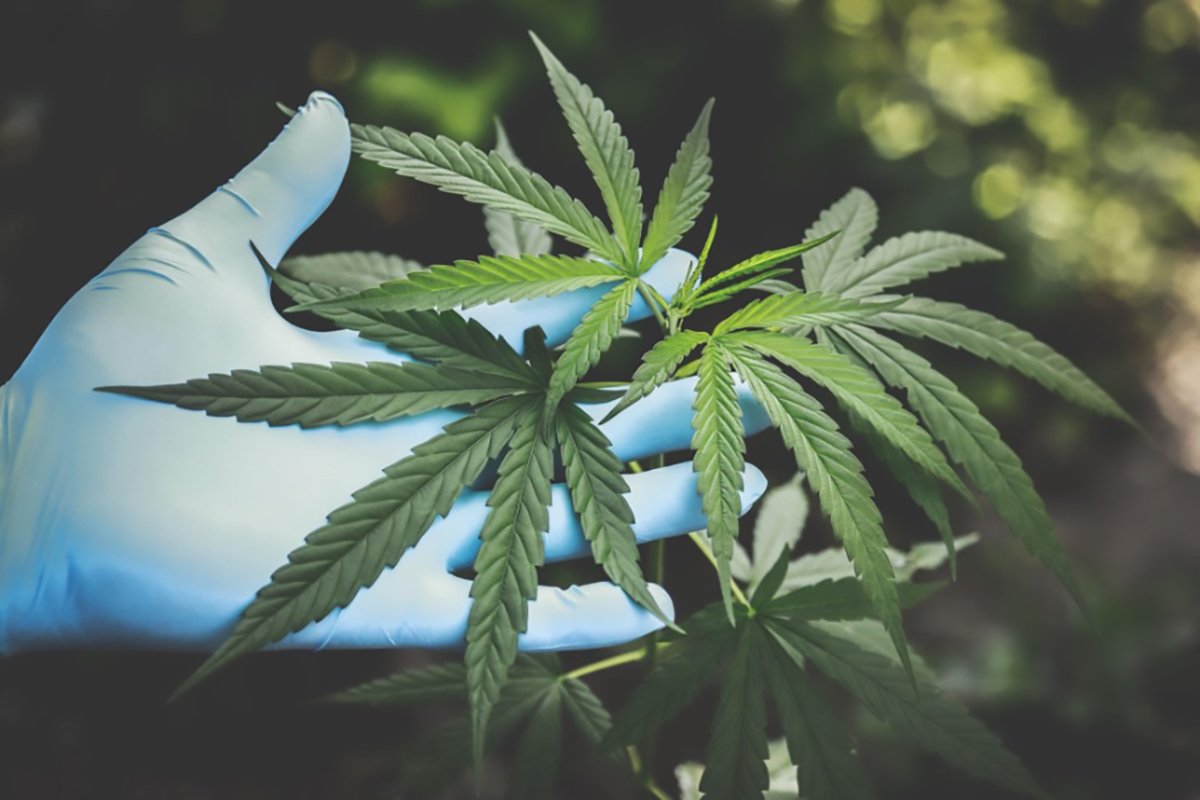
Successfully growing topshelf marijuana is quite a challenging task – especially if you are a beginner. It requires plenty of experience, knowledge and most importantly, patience. While it may seem daunting at first, it’s actually not as hard as you think. To help you grow the absolute best weed, we’ll be outlining the top five growing practices responsible for cultivating high quality craft cannabis.
- High Quality Genetics and Starting Material
Strain genetics are the foundation of any successful crop. In order to grow top shelf buds, you’ll need to start off with top shelf seeds. In my experience, it is best to do some research considering all cannabis strains possess their own attributes which can give insight on potency levels, taste and CBD levels. By selecting strains that have been bred for quality and potency, you’ll give yourself the best chance for a successful harvest. Genetics are also important for selecting the correct grow method. Some strains are better suited for indoor growing, while others do better outdoors. By selecting the right genetics, you’ll set yourself up for success from the start.
- Soil Quality
Similar to genetics, the quality of soil you utilize during cultivation plays a crucial role in your plants growth. Soil quality is extremely important when growing cannabis, as it directly affects the quality and yield of the buds. Poor quality soil can stunt a cannabis plant’s growth, leading to smaller yields and lower quality buds. Conversely, high quality soil will help a cannabis plant grow healthy and robust, yielding larger, more potent buds.
One way to ensure that your soil is high quality is to mix in organic matter. This could include compost, manure, or worm castings. These organic materials help to improve the structure and fertility of the soil, while also providing essential nutrients for the cannabis plant. Additionally, using a soil mix specifically designed for cannabis will help ensure that your plants are getting all the nutrients they need. A well-fed cannabis plant will produce large, resinous buds that are packed with THC and other cannabinoids. By using high quality soil and incorporating organic matter into it, you can give your plants the best chance at producing top-quality buds.
- Properly Dry & Cure Your Buds
When it finally comes time to harvest your precious buds, a thorough drying procedure followed by properly curing your buds can go a long way. These two final steps can greatly influence characteristics such as taste and aroma which ultimately have the ability to separate mediocre cannabis from craft bud. Drying is typically done in 60-70 degrees fahrenheit room with 45-55% humidity. As for curing, place your dried cannabis buds in airtight containers for at least 2-3 weeks to flush themselves of chemicals and prevent the formation of mold.
- pH Levels
When growing top shelf weed, it is important to regularly check the pH levels of the soil or growing medium. An ideal pH level for cannabis is 5.5 – 6.5, as this provides the best environment for the plant to grow and thrive. If the pH level is too high or too low, it can cause problems for the plant, such as nutrient lockout and wilting. For instance, as pH levels rise above 7.5, the cannabis plant will be unable to process fundamental nutrients such as copper, iron and zinc. By keeping a close eye on the pH levels and making adjustments as needed, you can help ensure that your cannabis plants grow healthy and robust.
- Air Quality
The quality of air is critical when growing high quality weed. Poor air quality can cause problems such as mold, mildew and pests. All of these can damage and/or kill plants. Good air quality, on the other hand, helps to ensure healthy, robust plants. Ventilation is essential for providing fresh air and removing stale air. Humidity should be kept at the correct level of 60% to avoid problems with mold and mildew.
Final Thoughts
By following these five tips, you can make the process of growing craft cannabis a little bit easier and less stressful. Just remember to always use high quality seeds and soils, take your time to properly dry and cure the buds, and routinely monitor the air quality and ph levels in your grow room. With a little bit of effort, you will be on your way to harvesting some top-quality buds from your own garden. And when it comes time to turn your top-shelf harvest into a finished product, you’ll want to learn about the top pre roll machines on the market.
Bonsai are one of the most beautiful and versatile plants, and they are very loved for it. We love keeping them in our homes, and we feel so proud when we successfully grow one.
They are not the easiest plant to grow, and so many people find themselves looking up how to grow a bonsai tree from a seed, but you can get bonsai plants already partially grown.
Looking after a bonsai is interesting, and its interest is increasing. It is cute, but these Bonsai trees are so cute as well, this makes them so popular in people’s homes. But, they are more than just cute plants.
Bonsai trees do have benefits for your soul and your body. This is part of why they are so popular, because even though they are not that easy to grow, they benefit us enough to keep us wanting to grow them.
With this in mind, let’s look at the top 5 benefits of growing a Bonsai tree for you.
#1. Bonsai Trees Are Good For Your Health
Bonsai trees have a number of benefits for your health that will make you feel better and improve your overall well being.
Here are some of the health benefits.
- Bonsai trees purify the air. Having plants indoors is a good idea in general, their presence in your home reduces pollutants in the air, and purifies the air inside your home. However, note that some species of bonsai will do this better than others do.
- Indoor plants, such as Bonsai will help to reduce your blood pressure, and lower any feelings of emotional stress. After a hard day at work, 1-1 time with your plant can totally refresh you emotionally.
- Plants help to improve your well-being overall, they can improve your attitude, activity, stress levels and so on, just by being around you.
- Plants also increase in home humidity. This means that having some plants in your bedroom can reduce the likelihood of you getting a sore throat, a cough, and even dry skin. Plants naturally increase humidity in any space.
#2. Bonsai Trees Help You With Patience
Having a Bonsai tree means you need to honor your long-term goal of growing it. Bonsai take a long time to grow in comparison to most houseplants. So, growing a Bonsai teaches you to be patient.
You are looking after the future by caring for the present, you achieve long term goals through careful maintenance on the daily. You will also honor cycles that tend to come with long-term goals as well.
#3. They Can Spark Off Your Creativity
Bonsai can also help spiritual benefits with your creative personality. As you care for the plant with proper techniques you can make your bonsai grow however you want. You are only limited by yourself.
Being adaptable and creative can help you to achieve whatever effect you desire from the plant, meaning you may have to learn new things, try out new techniques. You build cages, try rope training, or prune structurally.
Your tree is a living being, it will grow as it wants in the end, but the real challenge you face is your flexibility, and the tree will test this in you.
#4. Having Plants In Your Life Makes You More Self Aware
When we are taking care of plants we become more self aware. It is not unlike meditation or yoga, as it can help us to cultivate a better understanding of how we react internally to the world around us.
If you notice an oversized leaf, wilting branches, dry soil and so on, how you react to this will teach you how you react to challenges in your everyday life. Do you get annoyed, frustrated, angry, start blaming yourself, or self loathing.
Having a plant like this in your life helps you reflect on yourself and ask those ‘why’ questions that are not always so pleasant.
#5. They Make You Compassionate
Bonsai can live a very long time, and if you care for it properly, it may even outlive you. Tending to a tree like this reminds us that everything needs love and care, even when it does not look pretty.
Even as our tree sheds their leaves, or their branches need removing, it reminds us that new beautiful things will come from it. As you care for and love your tree as it goes through its cycles, you will become a compassionate ally. It can teach you acceptance in all forms.
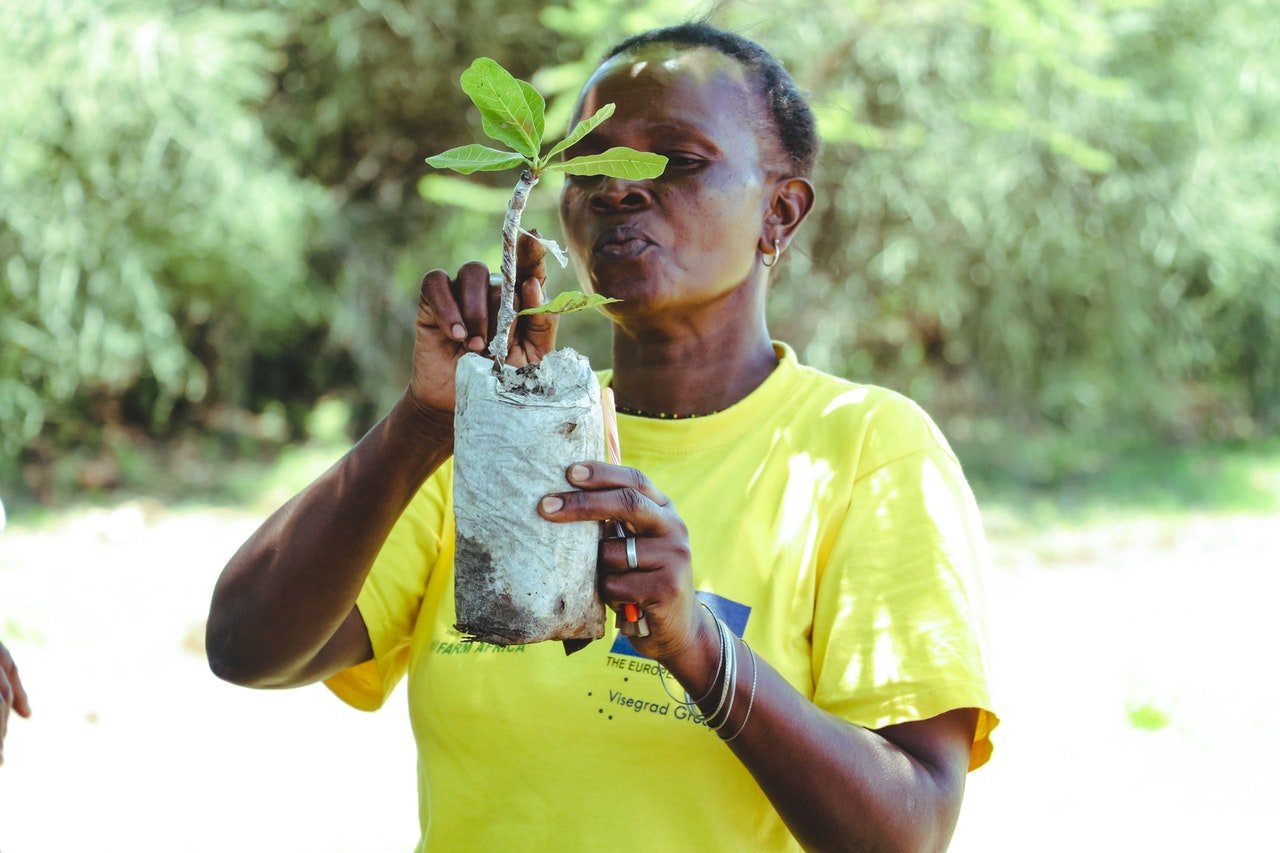
A sapling is a beautiful new beginning and requires care and love to become a strong addition to your landscape.
If you are bringing saplings into your garden and are looking for some insider advice on setting them up for health, strength, and maximum vivaciousness —stick around. Below TheTreeCentre cover all the important things you need to know about planting saplings in your yard.
Preparation
The first step in planning your sapling’s grand reception is to set the month of the year. The seasons play into the different ways you will prepare for sapling planting. There is no perfect time to plant saplings, but there are some considerations that will indicate the best time for you to plant your sapling.
Rule No. 1 is to make sure the ground is inviting. If the ground is frozen, soaked, or otherwise inhospitable, your sapling will have to struggle for its life in these conditions. If the weather is especially warm or dry, you will also need to consider the aftercare you are providing.
October – January
Deciduous trees will lose their leaves each year and enter deep sleep, or dormancy, for the winter months. During this time no energy is spent on growth and the tree is focused on hibernation. If you have a deciduous sapling, store it in the garage and keep the root ball moist. Don’t bring the sapling indoors as this will kill it.
Don’t store evergreens indoors at all, no matter the time of year. Evergreens need sunlight to stay alive. Unlike deciduous trees, evergreens are never fully dormant.
If you don’t have a location indoors where you can store your tree, have no fear. Wehave a fine selection of hardy local trees that will survive the elements well. We recommend that you keep these seedlings outside of any frost pockets as you await the perfect time to keep these saplings safe.
February – September
From February to September, the sapling will be coming out of its dormancy or in full leaf mode if it is evergreen. Either way, the temperature is perfect to plant in the ground as soon as the last frost has melted. If the weather gets warm or dry quickly, keep the roots moist in the weeks that follow.
Planting Tree Saplings in Pots
Some of the native trees that we provide include oak, which can grow to a staggering height with extensive limbs. This would make them best suited for a larger property where their massive boughs will not grow into buildings.
But don’t let this concern you, your oak sapling will live and thrive in a pot for over 10 years before it needs to be planted in the ground in its forever home. This is good news if you have to change homes, the treecan come too.
Planting Your Tree Sapling in a Pot
To accomplish this simple task, you will need:
- A watering can
- A trowel
- High-quality potting soil
- A large pot with good drainage holes
- And of course… your tree sapling
Planting Tree Sapling in a Pot
Begin by filling the pot or container with compost and then create a small hole in the center where you will place the plant. This needs to be at the perfect height, if the stem is toolow, it will rot, but if the roots are exposed, they will die. The key is to cover the roots completely, and add top-soil, a mix of compost and soil for a couple inches above that.
Add some soil to replace any that has fallen off the roots. You can thenadd a mixture of soil and compost to the top to get a good amount to cover the roots, but not too much of the stem. Some well-rotted manure can also improve thequality of the soil and its richness.
Secure the sapling in the pot and pat down the top layer of compost. Don’t pack this down too tightly; a good amount of water and air circulation can keep your soil healthy.
Once the soil is sufficiently settled, drive a stake into the ground near the stem for support. A tree guard can also be added. It is important to note that a tree will achieve a healthy trunk only if it is allowed to sway and move without support.
You can then repot your tree every few years until it can no longer be placed in pots and it can be planted in its final resting place outside.
If you expect your sapling to be in the pot for more than 2 years, you can top-dress the soil. This means removing the top layer of soil and replacing that with a layer of compost.
Planting Tree Saplings into the Ground
If you already have a spot where you will place your sapling, then you may be ready to plant it in the ground right away. Here is what you need to do the job:
- Your tree sapling
- A space in the garden to plant
- A trowel or spade
- A watering can
How to Plant Tree Saplings
After you have selected a spot for your sapling, draw a circle on the ground with white chalk that will be the hole you dig. This should be slightly bigger than the root ball itself. Keep the soil that you remove from the hole so that you can fill the holeafter the root ball is situated.
Plant the tree in the hole at a good height where the sapling will not be too low and not too exposed in the hole. Backfill any soil to ensure that the roots are completely covered. Then create a mixture of compost and cover the surface of the roots with this mixture.
Firm down the soil, but avoid packing it down too tightly. Add a stake and protection, but remember these should only be used temporarily. The sapling needs to be mobile to develop a strong trunk.
After Planting Tree Care Tips
Whether you have planted your sapling in a pot or the ground, you can ensure its greatest chances of survival by following some simple tips.
Keep the top-soil, the compost and soil mix, moist. This will allow the root systemto establish itself well. This is especially true for potted plants. Make sure the drainage is good, or you risk rotting the root ball.
Add another layer of mulch —as time goes by you will want to add another layer of mulch and this will allow the soil to retain moisture in dryer climates.
Protect from frost in the winter –frost damage is the killer of young trees. Even though native trees are well-adapted to the climate here, it would be a good idea to avoid damage to your tree if you can.
Ground planted trees —young trees will need all the moisture and nutrients they can get from the soil. Keep the area around your sapling clear of weeds to give it the best possible start.
If there is a traditional garden flower among the millions of species it must be the rose. Officially ‘Rosa’, they come in an abundance of exciting colors and also in many different types and formations of blooms. Roses are beautiful, whatever type you choose, and many are fragrant too. But are they easy to grow? And what are the different types of roses you can buy for your garden?
In the article that follows we look at what to choose in a rose, where best to plant them for maximum effect, and what you need to do in terms of maintenance. Let’s start by looking at some different types of roses.
What Types of Roses are There?
Roses come in a wide variety of types. For example, there are some roses where the blossoms look like Pentas, which are very popular with US gardeners. These are some of the various types of rose you could put in your garden:
- English Roses are the most prevalent type and come in a vast array of colours. These are the hardiest form of rose and the original English garden rose.
- Climbing Roses are often called vines but are not, they are simply roses that like to spread out more than the regular type.
- Groundcover roses are fast growing shrubs with a less grand flower than other types and are useful for filling spaces.
- Hybrid tea roses have been developed as garden roses with many large and colourful buds but are often affected by diseases so are avoided by some growers.
- Rambling roses are another form of climber and a vigorous one. This traditional type of rose is found in formal English gardens.
- Tea roses are the original form of rose from China that were first brought to the west by explorers. Just about every type of rose arises from this beautiful variety.,
- Miniature roses are as described and are often grown in pots on patios; hence they are referred to as a patio rose. Very pretty, easy to grow and hardy.
These are a few of the types of roses you can find in your garden and garden stores across the USA, so are they easy to grow? Let’s have a look in more detail about growing roses.
Are Roses Easy to Grow?
In general, roses are easy to grow and many types are in fact surprisingly hardy. However, it’s best to know that roses will struggle in dry soil or ground that is waterlogged, so need to be kept at just the right level of moisture. Furthermore, when planted in the shade they will not flower as abundantly as when in a spot with access to light. Roses love sunlight and will reward you with bloom after bloom during the summer season. Look for colors such as deep reds, bright orange, pinks, and whites and you’ll be able to put together a collection of roses that will be the pride of your neighborhood. Finally, a bit about tending for roses.
Tending for Roses
As we have said most types of roses are beautiful and hardy plants that will grow practically anywhere. You will need to wear gloves when pruning a rose – it should be cut back to encourage growth at the season’s end – as they do feature sharp thorns. Also, cut away dead flowers to bring about replacement blooms throughout the season. Apart from keeping the ground in which the plant grows regularly watered – but not overwatered – that’s just about all the maintenance needed, so check out the roses that take your fancy and give your garden more color.

Household pests are commonplace across the USA. Whether we’re talking rodents or roaches, ants, and termites, they are everywhere. While some pests are essentially harmless, you still don’t want to share a home with them. That’s why we’re going to be looking at different types of pest control treatments and methods.
If you want to look at an example of a typical pest control company, we believe Majestic Pest Control is a good one. They have some interesting information on their website about how to get rid of many different pests. We’ve put together some information on how to deal with pests and what methods are suitable. We’ll start with something that is often overlooked, and that’s knowing what you are dealing with,
Correct Identification
It is important to know what you’re up against when dealing with pests in the home, as each different one presents a separate scenario. Rats and mice, for example, will be caught mainly by bait and traps, while roaches are usually only eradicated by chemical methods.
The first thing a professional pest control expert will do is thoroughly examine your property for signs of pests that identify the species involved. They will then trace back to where the creatures are coming from and how they get into the home.
In the case of insects, it is vital to destroy the source to prevent further infestations and kill the creatures in the home. Some pests will not be exterminated. Bees, for example, are vital to the ecosystem. A bee’s nest can be dangerous and should not be tackled yourself – the same applies to wasps and hornets – and the expert will remove the nest and the bees to somewhere they can thrive.
So, step one is identification, and the next step is choosing the correct treatment method.
Organic Pest Control
The three main methods of eradicating pests are organic, chemical, and bait and trap. Many people do not like to use chemical pest control methods – more on them in a moment – and indeed, many commercial pesticides that have been removed from the market are now illegal to use after previously facing mass tort lawsuits. If you have any old pesticides in your shed or garage, please check if they are among the banned substances and ensure they are disposed of safely and correctly.
What do we mean by organic pest control? It’s an umbrella term that applies to any non-chemical – or safe chemical – pest control method. For example, Sodium fluoroacetate is a poisonous substance to many household pests and is regularly used in baits for rodents, roaches, and more. It is considered safe as it is biodegradable and causes no harm. Other organic methods include insecticide soaps, safe oil sprays, and even nematode worms targeting pests. Talk to your local pest control experts for more information on organic methods.
Chemical Pest Control
Chemical pesticides – as we have already mentioned – are the last resort. Many have been banned as the residue they leave behind finds its way into the watercourse and the ground. This is dangerous not just to us but to animals and plants. However, your pest control experts will be licensed to use certain chemicals, for example, when getting rid of roaches and other problematic insects.
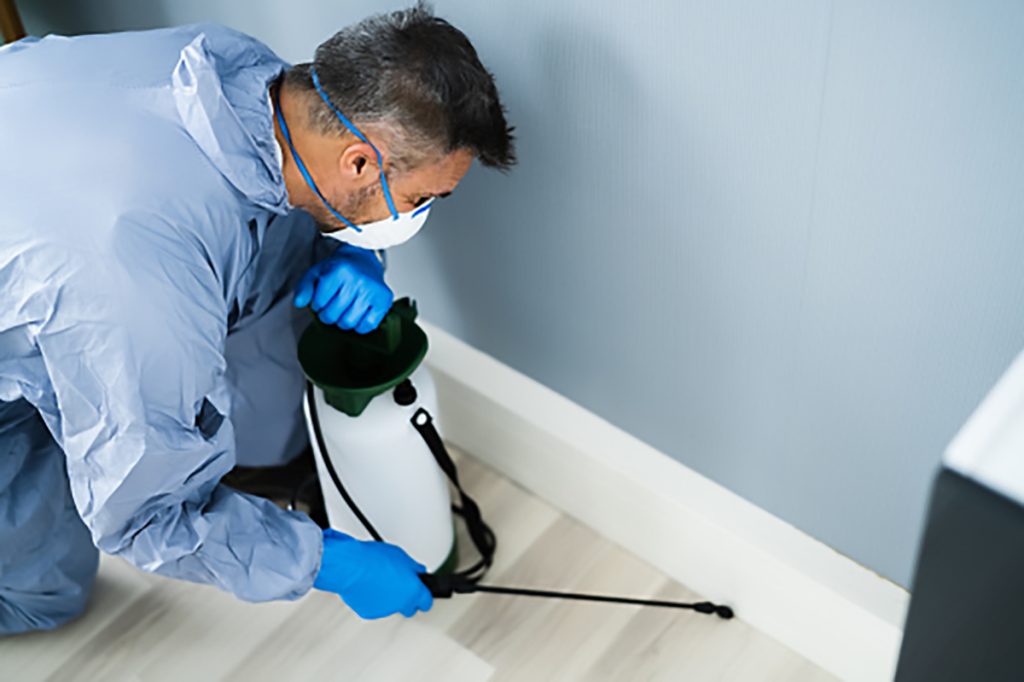
These methods use sprays, bombs, and other devices to eliminate even the most troublesome pests. As they know how to use these products correctly and safely, they will leave your home clean of chemicals and pests. The experts will advise you on how long you, your family, and your pets will need to remain off the premises while the work is carried out and ensure that the home is safe to return to before you do.
If you have an infestation of roaches, ants, or other insects, this may be the only treatment that works. On no account, dig out those old pesticides mentioned earlier as they will be dangerous, and don’t try using chemical methods yourself. Always talk to the experts and remain on the safe side.
Baits and Traps
Baits and traps are not just used for mice and rats – and other rodents – but can also be successful for insect pests. Roaches may be caught in a trap and are easily attracted by the right bait. The same applies to ants and termites, each of which can be drawn out from their hiding place by a carefully considered bait.
The knowledge that comes with the services of an expert in pest control cannot be overestimated here. They will carry out their home assessment and know precisely where to place the bait and trap and what bait to use. This method has a high rate of success. The expert will revisit your home regularly to collect the dead pests and monitor progress, and eventually, no more will be caught – they’ve been eradicated.
Preventative Pest Control
A professional will also be able to assess your house for preventative measures. Some of these are simple. For example, ensuring all food in the house is kept in airtight containers, and none is left out on the side for roaches and mice to enjoy. Also, look for leaking water pipes and other sources of moisture that insects tend to enjoy.
Then there’s proofing all entrances – including doors, windows, and air bricks – and filling in cracks and holes in masonry. You will be surprised how small a gap a mouse can squeeze through. There are many preventative measures you can take, and while none are a guarantee, each will help to an extent.
Conclusion
There is a strong likelihood you will experience an infestation of household pests at some point during your life. We recommend an immediate call to your local pest control experts as the best course of action. If you think you have a pest problem, get in touch now and have them assess your home for immediate treatment.
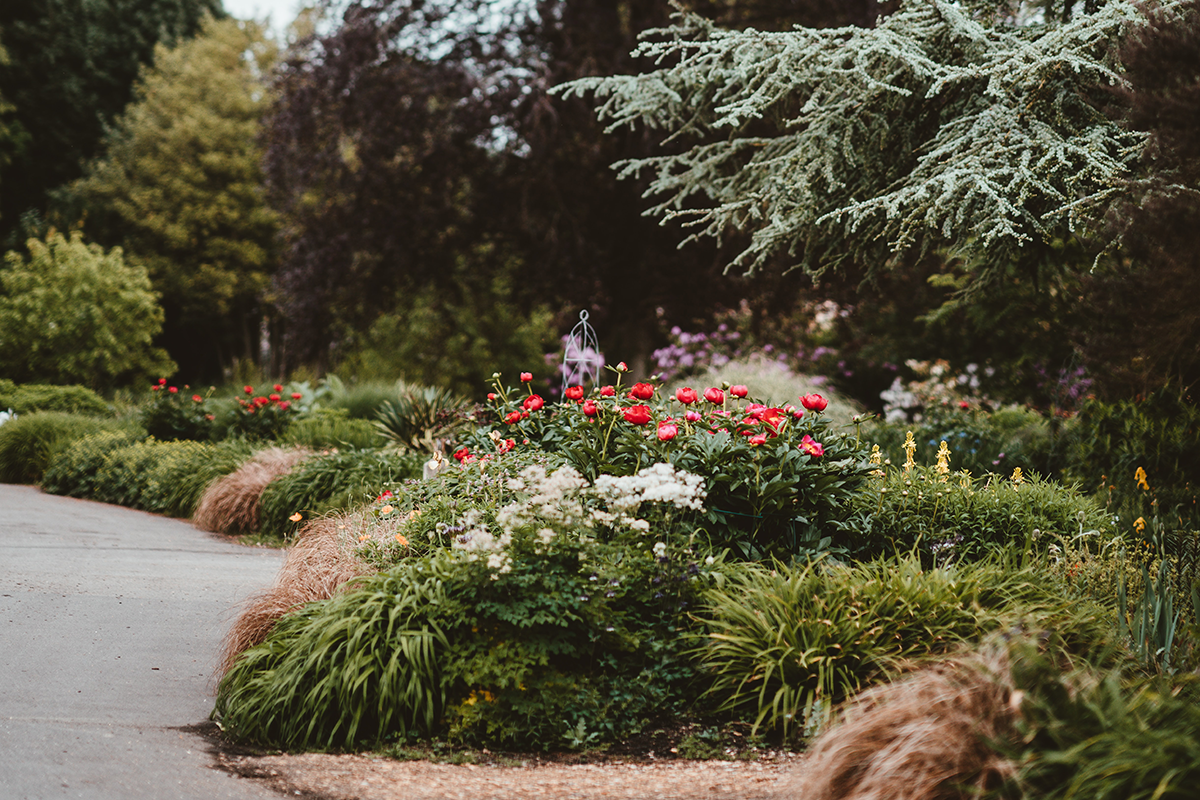
Gardening is good for your health. Studies show that gardening provides health benefits by increasing exposure to Vitamin D, providing aerobic exercise, and improving one’s mood. Spending time in green surroundings even helps combat loneliness and dementia.
Since your garden improves your health every time you visit it, shouldn’t you do your best to enhance your garden’s health in return? Just like humans, gardens need special care and attention to thrive and avoid destructive diseases and invaders. With a bit of planning and effort, you can keep your garden pest- and disease-free and repay it for all the benefits it provides.
Eliminating Pests
Numerous species of insects and small animals can cause irreparable damage in a garden. These pests can ruin all of your hard work and drastically reduce your harvest. While it is impossible to keep all pests out of your plot, there are specific actions you can take to protect your garden without resorting to harmful chemicals.
For instance, slugs and snails are common garden infiltrators. Because they are nocturnal, it’s challenging to find and remove them during the day, when you most likely perform most of your gardening. These pests will feed on your crops and leave dozens of eggs, perpetuating the problem indefinitely.
To eliminate slugs and snails, place small containers of beer around your garden. The mollusks will be attracted to the yeast in the beer. When they attempt to drink the beverage, however, they will fall into the container and drown.
Preventing Disease
Keeping your garden clean is the first step in disease prevention. Regularly remove all plant debris from your garden, as it can serve as a breeding ground for plant disease and pests. You should also clean and disinfect all of your gardening tools and paraphernalia regularly, including gloves.
For trees, it is essential to avoid injuring the tree or its roots when caring for your lawn. A cut on the body of a tree is similar to a wound on human skin. Infection can seep in through these abrasions. However, in the worst-case scenario, tree removal due to disease might be necessary as leaving a dying tree in place is a threat to nearby trees. It can even endanger your house and loved ones since dying trees often fall. It’s not a task that comes easily, especially if it’s a tree that’s been around for generations, but if it cannot be saved, it’s better to remove it.
Dealing with Sick Plants
No matter how often you clean and disinfect your garden and tools, some of your plants may fall ill at some point. The first step in dealing with a sick plant or tree is identifying its symptoms: discoloration, wilting, and defoliation can all be signs of an ill plant. Several online tools can help you determine what kind of disease your plant is suffering.
If possible, find an organic remedy for the disease with which your plant is struggling. Unfortunately, not every plant can be nursed back to health. If a plant is slow to respond to treatment, it might be best to remove it before the disease spreads to other nearby plants.
While pests and diseases are an inevitable aspect of gardening, you can reduce these factors. Organic products can be used to repel pests. Keeping a clean and disinfected garden can help reduce the chances of infestation or disease. When a plant or tree succumbs to disease despite your best efforts, removing it can help protect the surrounding plants.
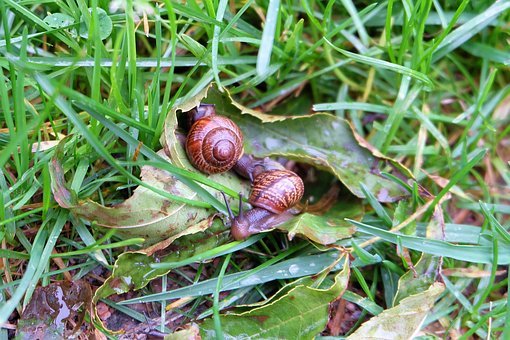
When it comes to harvesting the vegetables from your garden, you don’t want to find out they’ve been destroyed by insects or pests. Luckily, it’s quite simple to kill any pests that may be damaging your crops.
- Slugs and Snails
Both slugs and snails are commonly found in gardens, but unfortunately, these pests are notorious for damaging crops. Not only do they feed on crops, but they also only come out at night, making it tricky to kill them during the day. Slugs and snails also lay many eggs, which can lay dormant for several years before they hatch.
If you’re struggling with a slug and snail infestation, try a beer bath. Simply place small vats of beer around your garden. Slugs and snails are drawn to the yeast in beer. However, once they try to drink this yeasty beverage, they will fall in and drown.
- Aphids
Perhaps one of the most destructive insects, aphids love to drink the sap out of any plant in your vegetable garden. They even spread diseases. If you notice signs of an aphid outbreak, then you should make an organic insecticide out of dish soap.
Simply mix a few tablespoons of organic dish soap with a quart of water. Add a couple drops of orange or lemon essential oil. Spray this concoction directly onto your plants, making sure to fully saturate the leaves. This dish soap insecticide is also effective at killing other vegetable garden pests, including mites, mealybugs, and whiteflies.
- Cabbage Root Fly
The cabbage root fly is known for destroying vegetables by damaging the roots. These pests lay their eggs at the base of plants. When the eggs hatch, the maggots burrow deep down to the roots, where they feast. This can quickly kill your vegetable garden.
If you notice damage to the roots of your crops or you find maggots on the roots, you can quickly remedy the situation by placing a cabbage collar around the base of your plants. This will prevent any newly hatched maggots from reaching the roots.
- Rodents
Rodents, including mice, rabbits, moles, and squirrels, are always looking for their next meal. However, you don’t want them feeding on your vegetable garden. Spraying a mixture of soap, chili powder, and garlic onto your vegetables is one of the best ways to deter these pests. It even works to repel beetles, slugs, leafhoppers, and borers. This mixture will also keep your family pets out of your garden without harming them.
It doesn’t take very much effort to keep your vegetable garden healthy and free of insects and other pests. Natural and organic products are often all that’s needed to deter or kill these unwanted visitors.
Be proactive all year long to ensure your vegetable garden thrives and kill garden pests organically.
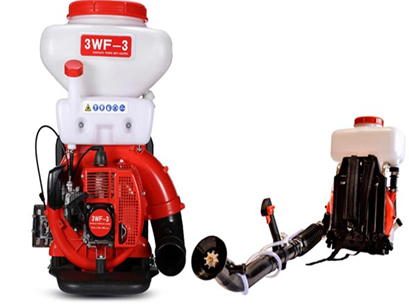
Nasty mosquitos can be one of the problems in a home. When they sting its itchy and may cause diseases. The foggers are handy in ridding them. They create a fog when the insecticide solution is sprinkled. The fog is able to penetrate into the depth of grass, trees and bushes making them the best alternative. Here are foggers worth trying; –
Burgess 1443 40-ounces Outdoor Propane Insect Fogger
This propane fogger is a reliable product. It is a thermal fogger making it suitable for outdoor use. It is effective in killing even in damp and marshy regions. It holds up to 40 Oz and uses the insecticide without wastage. The fog does not damage trees or shrubs when droplets fall on them.
Tri Jet ULV Non-Thermal Flogger
The fogger is easy to set up and use and operates using electricity. Though it has not become very popular the few customers have expresses satisfaction in its effectiveness. The fogger can be used for both indoors and outdoors purposes. It is effective in getting rid of mosquitoes, molds, spiders, roaches and bugs. It sprays 4000 sq. ft of territory and has a tank volume of 1 gallon, the approximate insecticide needed for 1000 sq feet is 1 quart of the insecticide. The fogger sprinkles up to thirty feet. After spraying the fog covers the area to up to 25 to 30 mins. One defect is that it is expensive.
Bonide420 Fog-Rx Propane Insect Fogger
This propane powered fogger is effective in getting rid of mosquitoes and midges. It is easy to operate and fast acting giving up to 4 days of mosquito-free time. However, it requires safety measures as the flogging fluid can shoot flames mosquito foggers.
Burgess 960 40 oz. Outdoor Electric Insect Flogger
It the successor of burgess 1443 however it uses electricity instead of propane. Very effective for outdoor use. A compatible insecticide is recommended for use. Treatment may last 3 to 5 hours or longer offering protection by vaporizing the insecticide killing mosquitos and other biting insects. Dissatisfaction by the users has been expressed, stating that it does not have any effect on the number of mosquitos.
BEAMNOVA Mist Duster Blower Spray Gasoline Powered Mosquito Powered Cold-Fogger Backpack Sprayer
Its engine operates using petrol. Not only can it be used as a fogger but also can also be used in pest control. It can also be used with both liquids and dust. Users feedback is positive, it is highly recommended for its speed and works without any mechanical issues. However, it is expensive and assembly manuals, to others, may not be so helpful.
Aerosol fogger
Are simple and easy to use. There are very effective outdoors and kills mosquitos on contact when sprayed effectively.
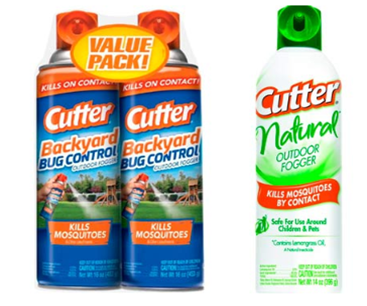
Black Flag 190255 fogging insecticide works with a variety of foggers such as black flag, burgess, and repel thermal fogger. When sprayed it kills the mosquitos and offer protection few hours up to 3 days. It’s well for use.
Hope the information above helps!
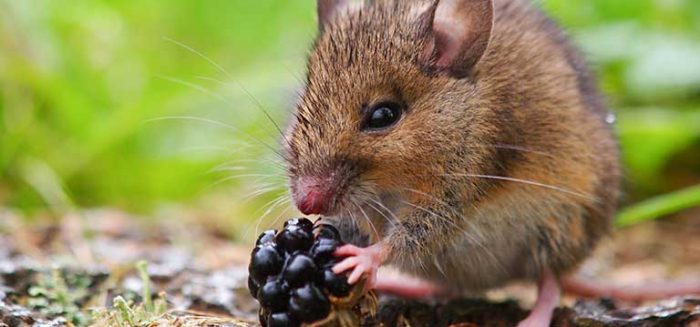
 Every now and then, people encounter intruders in their gardens and they don’t know how to react. Unfortunately, there are many different animal species that can infest your garden and live off of your vegetables, fruits, or even flowers. The thing is, it’s kind of impossible to expect that everyone will know everything about potential infestations and pests.
That’s why people aren’t strangers to exterminators and wildlife experts, depending on what type of animal we’re talking about. Although, something can be said which I think most people would love to hear. In short, you’re entirely capable of dealing with an infestation yourself. You don’t need any expensive services and people that’ll deal with the infestation instead of you (of course, if you tried everything and nothing works, the exterminators are a good option).
In this article, we’ll be talking about how you can gain control over your garden and what’s in it by identifying what type of animal is bothering you. We’ll also mention something about how to get rid of mice in the garden (as they’re also a type of pest that may annoy you).
Identify the Enemy
Each pest can be dealt with as long as you know what you’re doing. But before you actually start researching about the various methods to get rid of vermin from your garden, you’ll need to figure out what exactly is ruining it.
The most common pests found in the garden are raccoons, mice, rats, and others. With the exception of mice and rats, killing wildlife isn’t exactly allowed (unless you have a permit, and some US states don’t allow those either).
You best hope that you’re dealing with mice or rats because it will take a bit more effort for anything else.
Prepare your Defenses
Once you’ve identified the enemy, you’ll be entirely capable of setting up your defenses. When talking about mice or rats, your best bet would be to get traps. And, luckily for everyone, there are many different traps available. For example, snap traps are great against mice but not very effective against rats.
Then again, there are specific rat traps as well. But, if we’re talking about raccoons, squirrels, or even moles – you won’t exactly be able to kill them. Just to be safe, make sure you use live traps (otherwise called catch & release traps). Also, bait choice is very important so be sure to educate yourself on this as well. Peanut butter should work great for most pests, but again, knowledge is everything.
Conclusion
And that’s basically it. Place your traps in potent trap locations such as entry points (doors, windows…), and throughout your garden. Also, make sure you keep your garden clean and without clutter. Most pests will have to find shelter, water, and food. The entire process isn’t difficult, but if you, for whatever reason, can’t clear out your garden – call the professionals. Additionally, ask them for some tips so if there’s another infestation, you have a bit more knowledge with you!
Read More Articles
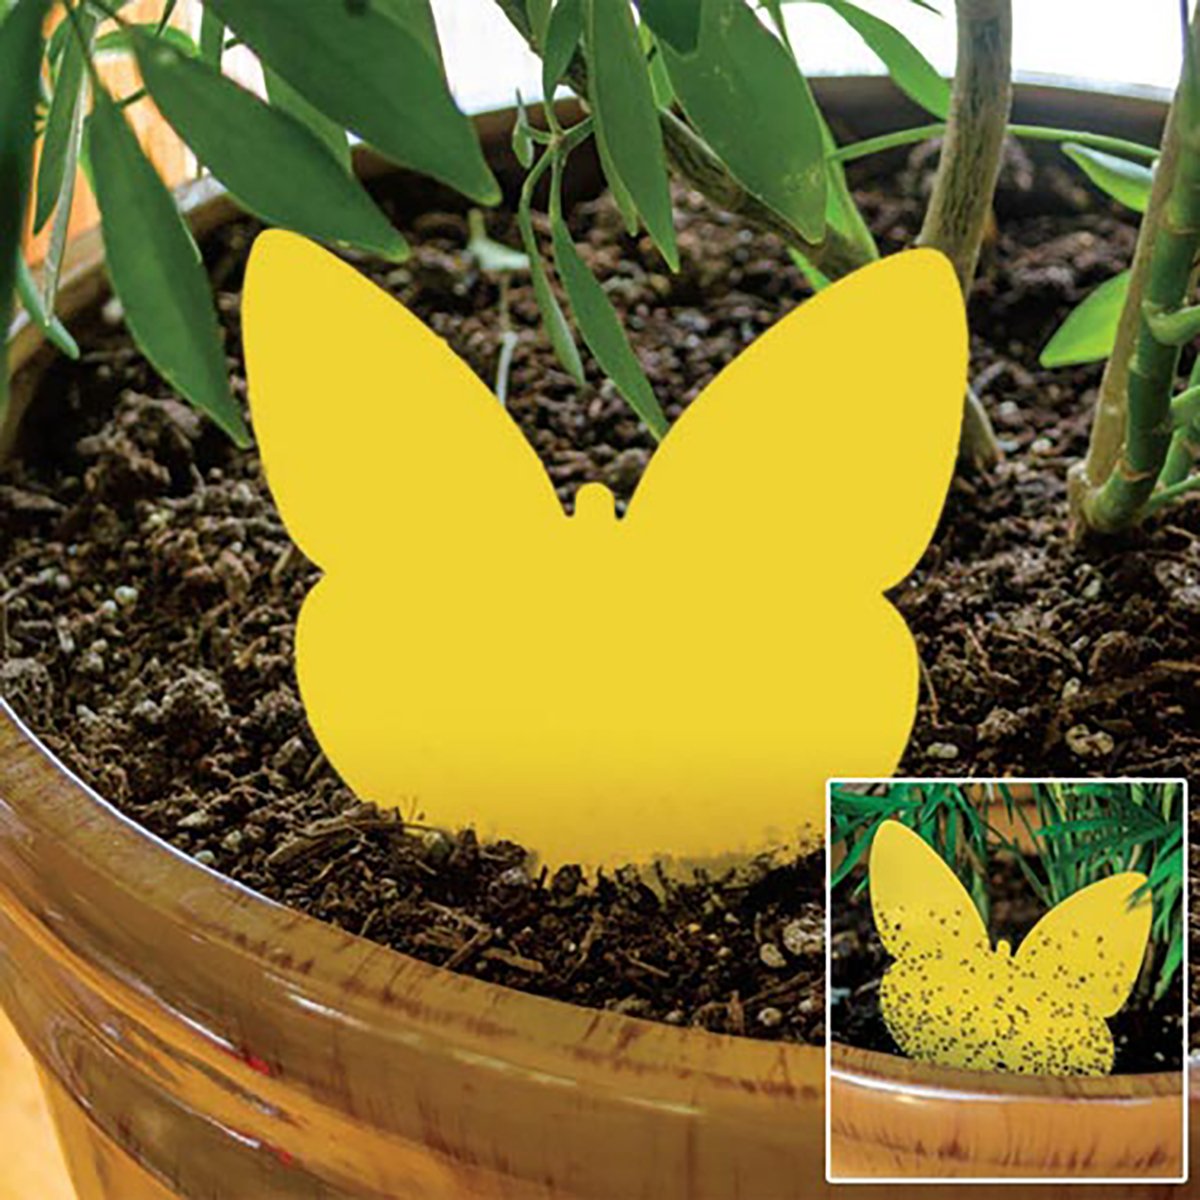
The spring season brings new beginnings for plant growth. The landscape becomes green again and multitudes of colors and fragrances fill the air as flowers break through the ground’s surface. The new life brought on by spring is rejuvenating for horticulturists. It is not just plants and flowers that “come alive” during this time of year. Just as new plant life emerges all around us in spring, new life for pest insects is also resurrected. As temperatures rise and the summer months approach, more and more insects leave dormancy and begin new life cycles. This is why it is so important for greenhouse gardeners to be aware of and take counter measures against pest insects during the spring and early summer seasons. In many cases, a few simple preventative steps can reduce the likelihood of a devastating pest insect attack.
Sanitation
Sanitation is the number one defense against pest insect infestations. Keeping the greenhouse and the plants clean and tidy can do wonders in preventing pest insects and pathogens. Periodically wiping down the surface of the greenhouse and removing dead or dying vegetation will greatly reduce the possibility of pest insects. Plants should be closely monitored for pest insects on a weekly basis (at the very least).
It is a good idea to set up a quarantine area in the greenhouse. Whenever a new plant is purchased or gifted, it should be quarantined immediately for a week or two to ensure it does not harbor pest insects. After the quarantine period is over and the plant has received a clean bill of health, it may join the other plants in the greenhouse. Bringing new plants into a greenhouse is the most common way a greenhouse gardener will introduce pest insects into his or her own garden. If pest insects are observed on any new plant, it should be thoroughly treated before being introduced to the other plants in the greenhouse.
Monitoring for Pests
As previously mentioned, it is important for greenhouse growers to monitor their gardens for any signs of pest insects. Yellow sticky traps are great tools for monitoring a greenhouse. Yellow sticky traps are similar to fly paper in that they “catch” flying insects in a glue-like substance. By closely examining the yellow sticky trap, a gardener can see if and what types of pest insects are present in the garden. Yellow sticky traps allow a horticulturist to identify potential problems before they get out of hand.
Identifying the Pest Insect
Identifying the pest insect early and accurately is vital to stopping a few pest insects from becoming an infestation. When monitoring the plants, there are some tell-tale signs that will indicate which pest insect a gardener may be dealing with.
Spider Mites
The first sign of a spider mite problem usually shows up in the form of yellow speckling on the surface of the leaves, which is caused by the insects sucking nutrients from the underside of the plant leaves. The speckling from spider mite damage will resemble light yellow spray paint misted on the leaves. Closer examination of the bottom of the leaves will reveal clusters of very tiny red mites and their eggs. A magnifying glass may be necessary to see them. In more extreme infestations, webbing may be found in-between or on the tips of branches and leaves. This webbing looks very much like a spider web and is how these nasty bugs received their name. Spider mites are difficult to get rid of and require a miticide for treatment. These tiny black bugs become active from late spring in places like your yard and garden.
Mealybugs
The first sign of mealybugs is normally cotton-like, fluffy masses found in the crotches or joints of the plant, typically near young tender growth. These tiny “cotton balls” are actually clusters of the slow moving mealybugs. These bugs can reproduce and lay eggs every seven days, so they should be treated immediately to reduce any possible contaminations. It’s difficult to kill the eggs, often in the soil, so it’s important to treat for live mealy bugs every five to seven days for three to four weeks to terminate all adults before they become mature enough to lay eggs.
Fungus Gnats
The first sign of a fungus gnat problem is typically the small, mosquito-like, black or gray insects that fly around aimlessly. They are most prevalent right after a watering or when the soil is disturbed. Fungus gnat larvae look like tiny, light-colored worms that wiggle around in the top layer of soil. They can sometimes be seen “dancing” in standing water after a feeding.
Thrips
The first sign of a thrip issue is usually “shiny streaks” that show up on the surface of the leaves. The shiny trails are actually the areas of the leaf where the thrip larvae have been feeding. Gardeners may also notice tiny black specs on the leaf surface; this is actually the larvae’s fecal matter. To the naked eye, thrip larvae resemble fast moving grains of rice. The larvae can be many different colors, but are usually yellowish-green.
Scale
The first sign of scale is usually a protective covering or bumps on the stems and stalks of the plants. The females lay eggs underneath the protective covering, which will hatch in one to three weeks. The newly hatched nymphs leave the protective covering as tiny white specs and move around the plant to feed. Nymphs insert their piercing mouthparts into the plant and begin to feed, gradually developing their own protective covering as they turn into immobile adults. Scale do not pupate and may have several overlapping generations in one season. A scale infestation is difficult to eliminate and requires a systemic insecticide.
Treatment and Control
Early detection and treatment diligence are the keys to eradicating pest insects. A gardener can start treatment with an organic or all-natural insecticide that is designed for the particular pest insect he or she is battling. Yellow sticky traps are effective in capturing most flying insects, such as fungus gnats and white flies. Denatured alcohol is highly effective as a combatant against mealy bugs and scale by wiping it on the infected areas with a cotton swab or small paint brush. Pyrethrum is an organic derivative of the chrysanthemum plant and is extremely effective against many greenhouse pest insects. Pyrethrum is the primary ingredient in several commercial spray products commonly available at most garden centers. In some cases, a pest insect (scale and mites), cannot be controlled with an organic or all-natural approach.
When this occurs, the gardener may need to implement a systemic chemical control. Systemic pesticides, such as Orthene, are effective against pest insects because they enter the plant’s tissue and kill the bugs as they feed on the plant tissue. Regardless of the treatment program, horticulturists should always use caution and be sure to read the manufacturer’s directions for application.
For more information visit ArcadiaGlasshouse.com
Most of these tips will work for traditional cuttings as well as hydroponic cloning.
Select the plant you plan to clone. Select only plants that are in good health and are at least two months old. New growth is best if it’s available, however, any healthy stem with at least two or three healthy sets of leaves will work. Only take cuttings from well hydrated plants. Plants that are dry will not perform as well as cuttings.
Hygiene cannot be stressed enough. Disease, fungus and viruses spread quickly and are a primary cause of failure. Luckily, a few easy steps will ensure healthy cuttings. It may be tempting to skip the cleaning steps, but you will be rewarded with quick healthy cuttings by spending a few extra seconds.
- Gather your tools: A sharp craft knife or razor blade, cutting shears, container with water, rooting hormone, clean cutting mat, cloning system.
- Prepare the water bath in the cloner. Measure nutrients carefully.
- Select a 2”-3” stem of plant, ideally with new growth. (Note: fall is the ideal time to find new growth, but cuttings will work in spring) cut below the intersection of leaves on the stem. Immediately place cutting into water until you are ready to process all cuttings.
- Remove lower leaves by carefully slicing them at the stem. Leave several leaves at the top of the stem. If leaves are too large for the cloning space, cut then lengthwise.
- Place cutting on a clean cutting mat. Sterilize blade with alcohol and carefully cut the stem diagonally at a 45° angle to expose as much of the plant’s cambium as possible. Be careful not to crush any tissues. Dip knife in alcohol between each cutting.
- Place a small amount of rooting hormone in a small Dixie cup or small glass and dip cutting into hormone. Do not dip the cutting directly into main container to avoid contamination. Throw the excess compound away; do not add back to the original container. Note: Commercial growers typically use liquid rooting hormone because the plant absorbs the liquid faster than the powder.
- Secure the cutting in the basket and place in cloner.
Check your cuttings frequently. In a few days you will start to see nodes forming just prior to root development. Change the water once a week or per the manufacturer’s instructions. Once roots are formed, transplant into 4” pots. Placing them in a cool greenhouse with bottom heat will encourage healthy root growth while keeping top growth compact and healthy.
The best way to avoid pest problems in a greenhouse is to keep them out to begin with. The list that follows gives many ways to help keep a greenhouse pest free. The more of these that can be integrate into greenhouse gardening practices, the better chance a gardener will have of winning the war against undesirable garden pests.
Start Plants from Seed
If plants are bought at a nursery or a garden center, one can not be assured that the plants are perfectly clean. If one has been getting plants from a reputable producer and has not had problems in the past, it would be a good idea to stick with that grower, even if the prices are higher. Treated seeds are safer for starting your greenhouse plants. Untreated seeds are more likely to carry a seed-borne bacterial or fungal disease.
Repot Plants Outside the Greenhouse
Repotting plants should be done outside of the greenhouse, and any used pots should be cleaned and disinfected with a 10% bleach solution before use. Commercially available soilless mix should be used as the media for seed starting and potting greenhouse plants. This will allow one to avoid introducing insect and microbial pests that often live in soil.
Protect the Work Area
Protect the ground on the floor of the greenhouse with a barrier to keep soil born pests from digging their way in from the outside. Work in the greenhouse first before working in the outside garden. Outside plants should not be kept near the greenhouse door. These plants can be a safe harbor for bugs waiting for a chance to get in the greenhouse.
Hands should always be washed before going into the greenhouse. This is particularly important after working with plants, or produce in the kitchen.
If one has been in close contact with plants, grass or dirt/mud, a change of clothing may be in order before entering the greenhouse. If one has been walking through grass or mud, it is a good idea to remove footwear, before entering your greenhouse. If one will be walking in the woods or a wooded area under trees, or even just walking on dirt paths, try to do it after working in the greenhouse.
Consider possible contamination by visitors to the greenhouse. Visitors should not enter the greenhouse after being in another greenhouse, a garden or an agricultural field.
Clean the Tools
Insects, mites or diseases can be taken into the greenhouse on garden tools that have been used outside. Tools should be thoroughly washed and disinfected with a 10% bleach solution before bringing them in the greenhouse and in between working on separate plants.
Items that have been exposed to plants or produce are a source of contaminants. Used plant shipping boxes and produce shipping boxes may be very useful, but they should never be taken into the greenhouse.
No Pets Allowed
Dogs and cats, that live or spend time outdoors, should never be allowed in the greenhouse.
A Few More Things
Screen air intakes to the greenhouse with a very fine mesh. The screen area should be at least five times the area of the greenhouse air intake, as to not restrict airflow.
Consider if a double door is possible. This is particularly helpful in keeping moths and butterflies out. Moths and butterflies are not generally a problem themselves, but when they lay their eggs on your plants, they will soon hatch caterpillars and start to eat their hosts. On your daily bases remove any of them that are present.
Sticky fly traps can help in early detection of some flying and crawling pests.
Inspect plants as often as possible for visual predators or damage caused by harmful pests, fungus, bacteria or disease.
A pesticide is any substance or mixture of substances intended for preventing, destroying, repelling, or mitigating any pest and will make claims of this on the label and advertising. Any substance falling within this definition of a pesticide must be registered by the Environmental Protection Agency (EPA) before it can be legally sold or distributed in the United States. Section 25(b) of the Federal Insecticide, Fungicide, and Rodenticide Act (FIFRA) has determined a Minimum Risk Pesticide does not require EPA registration because it poses little to no risk to human health or the environment. Individual states may still require registration of minimum risk pesticides.
Even the most careful indoor gardeners can suffer from insect and disease problems with their plants. Minimum risk pesticides are made from natural ingredients that have proven over time to defend against insects and disease, making them an effective option for prevention and control that is also non-toxic to humans. Minimum risk pesticides are generally a solution of botanical oils from herbs such as clove, thyme and rosemary. They work on contact by smothering and dehydrating insects and disease spores while providing a barrier preventing pest establishment.
Things to Consider When Selecting a Minimum Risk Pesticide
Safety and Use
It is important to remember that these products are still pesticides and though their ingredients are naturally occurring, it does not mean all of them are suitable for consumption. Not all minimum risk pesticides are allowed for use on food crops. EPA regulations are very specific on which products are allowed and which are not. A product label should clearly list specific insects, diseases, and the crops they can be applied on.
Ingredients Approved for Use on Food
Castor oil (U.S.P. or equivalent), cinnamon and cinnamon oil, citric acid, cloves and clove oil, corn gluten meal, corn oil, cottonseed oil, garlic and garlic oil, geraniol, mint and mint oil, peppermint and peppermint oil, potassium sorbate, putrescent whole egg solids, rosemary and rosemary oil, sesame (includes ground sesame plant) and sesame oil, sodium chloride (common salt), soybean oil, thyme and thyme oil, white pepper
Ingredients Not Approved for Use on Food
Cedar oil, citronella and citronella oil, dried blood, eugenol, geranium oil, lauryl sulfate, lemongrass oil, linseed oil, malic acid, 2-phenethyl propionate, sodium lauryl sulfate, zinc metal strips
Efficacy and Control
There are significant differences in efficacy and control when using natural products. It may cost a little more, but purchasing the right product should resolve your pest problem and be safe for you and your plant. An easy test is to compare two products with the same active ingredient at different price points. The higher priced item is likely to have more active ingredient leading to a greater chance for control. Research the products before you make a purchase, a little digging can give you a lot of insight into what goes into making and supporting each product. For example, can you find test data to prove efficacy? Has a product been formulated using new techniques or technologies to give it a performance edge? These questions are just the start to finding the best minimum risk pesticide for your needs.
Although germination and rooting techniques vary depending on the specific plant species, there are some general guidelines that can be followed for propagating the majority of greenhouse ornamentals and vegetable plants.
From Seed (Sexual Propagation)
A plant started from seed receives its genetics in a manner similar to the way humans receive genetics. Just as we are made up of a combination of our father and mother, a plant started from seed is made from the genetics of its father and mother. As with humans, some traits can skip generations and there is no guarantee that a plant started from seed will inherit specific traits from its mother or father. This is the main reason the majority of commercial plant propagation is done by clone or tissue culture. Starting from seed is unpredictable but it is also a chance to start a completely unique plant that will add more biodiversity to our wonderful planet.
Temperature and Humidity for Starting Seeds
Germination is the process in which the plant emerges from the seed to start its life. For most plants germination is best done in a very moist (high humidity) environment at a reasonably warm temperature, usually around 75-85 degrees F (the exception to this would be seeds that are generally planted in early spring when the ground temperature is much cooler). Propagation trays with humidity domes are great for starting seeds because they create a microclimate that is more easily controlled. Seeds can be placed directly into a moist medium in the tray and covered with the humidity dome. If the environment is not at least 75 degrees F consistently, it is advised to place a seedling heat mat under the tray to keep a constant temperature. Plants, in general, respond better to consistency and this is especially true with seeds or clones. Keep the top portion of the medium moist until all of the seeds have sprouted. Once the seedlings have broken the surface, lift the dome off periodically to bring in fresh air and also acclimate the seedlings to the lower humidity of the environment. Slowly increase the amount of time each day the dome is removed until it is removed entirely. Most varieties of plants can be acclimated in a matter of a few days. Follow the seed packet’s instructions for thinning, spacing, and transplanting.
Another popular germination method is the wet paper towel technique. Place your seeds in a damp paper towel and fold the paper towel over the seeds. Put the paper towel in a ziplock bag and place it on top of your refrigerator (toward the back; this keeps the seeds at a consistent temperature). Check daily by gently unfolding the paper towel to examine the seeds. Keep the paper towel moist; adding water if necessary. In a few days you should see the first root coming out of the seed (radicle root). Gently, using a tweezers if necessary, place the seed into the soil with the radicle root facing downward. Cover the seed and keep the top layer of soil moist until the plant breaks the soil’s surface. The paper towel technique is a fun way to teach children how plants start from seeds. This technique works best with larger seeds (melons, cucumbers, squash, corn, sunflower, etc.). Most smaller seeds, such as lettuce, are best planted directly into the soil.
From Clone (Asexual Propagation)
Starting a plant from a donor or mother plant is a form of cloning or asexual propagation. Some plants naturally propagate themselves this way; a good example is the inch plant (wandering jew). Cloning has become the most popular method among commercial growers because the offspring are identical to the donor plant so the growers know exactly what they are going to get. It also allows the gardener to replicate plants with desirable qualities such as a certain fragrance, color, resistance to pathogens, or any other trait that could be deemed as beneficial.
There are two popular types of cloning techniques: cuttings and tissue culture. Hobbyist gardeners generally take cuttings to replicate their favorite plants because tissue culture is a more involved process that requires special equipment. African violets, pothos, gardenia, crepe myrtle, cyperus, geranium, wandering jew, coleus, impatiens, spider plants and hibiscus are all easily propagated by cutting. Many vegetables, including peppers, tomatoes, cucumber and squash, can also be propagated by cutting. Some vegetables, like cabbage, can be cloned via their root. Although there is a slight variance in cloning techniques (depending on plant species) the majority of the focus should be on environmental conditions as they are usually the determining factor in cloning success.
Temperature for Cloning
Like plants started from seed, plants propagated from cuttings respond best to consistent temperatures. Ideally the root zone (or potential root zone) is kept at a temperature of 75-85 degrees F. If the environment where the clones are kept has fluctuating temperatures it is best to utilize a heat mat or heat cables to rectify this problem and maintain consistent temperatures. For most species of plants, if temperatures are too low or continually fluctuate below the desired range, the plants enter what I refer to as a state of suspended animation. In other words, they remain green and healthy looking but fail to create roots or carry out any vital functions needed to stimulate new growth. Eventually these clones will die without ever creating a root.
In cases where humidity levels are high and temperatures are low a cutting or seedling will dampen off. Damping off is a horticultural disease caused by pathogenic microorganisms which destroy a seedling or cutting before it has a chance to grow. On the other end of the spectrum, clones that are kept in temperature ranges above the desired range will commonly wilt or rot and turn into mush long before they develop a new root zone. An inexpensive digital thermometer is a great way to monitor the temperature of the root zone. Make sure to monitor the temperature during the coldest and hottest points of the day to ensure you stay within the desired range even when the atmospheric conditions are the most volatile.
Humidity for Cloning
Humidity levels for cuttings should be kept high for at least the first few days. Although they are not yet established plants, cuttings still transpire moisture through their stomata and without the ability to absorb replacement moisture through a root zone a cutting can quickly wilt in lower humidity environments. Ideally, the humidity level for cuttings should be kept at 80-100% for the first few days. Humidity domes, plastic bags, or any way you can temporarily enclose the cuttings to retain a high humidity environment will suffice. I prefer the humidity domes sold at local gardening centers because they make it very easy to acclimate the plants to their future environment.
After you take your cuttings, lightly spray the inside of the humidity dome with water and place it on the tray. In the subsequent days remove the humidity dome for a few minutes each day to give the cuttings some fresh air; very similarly to the way you would acclimate seedlings. After four days, you can incrementally increase the amount of time you remove the dome each day until the cuttings are completely acclimated to their environment. Although some plant species are more finicky than others, generally speaking, the cuttings will have created their own roots in 7-14 days and at that time should be completely acclimated to the environment.
Sterilize Equipment
Seedlings and cuttings are more sensitive, not only to environmental conditions but also to pests and pathogenic microorganisms, than adult plants. Before planting seeds or taking cuttings completely sterilize all the equipment you plan on using. Diluted bleach or hydrogen peroxide are great ways to effectively sterilize your propagation equipment before each use. Make sure the medium you choose is sterile as well. Prepackaged propagation mediums offer the peace of mind of a sterilized medium and ensure the seedlings or cuttings aren’t being placed in a compromised medium.
There are many products on the market designed to aid the propagation process. Rooting hormones, seedling heat mats, aeroponic clone machines, humidity domes, sterile disposable scalpels and numerous prepackaged mediums are all products that can help achieve successful propagation. Just remember, there is no magic product that will automatically guarantee propagation success. These products teamed with sound environmental conditions are the keys to thriving seedlings and clones. Stable environmental conditions are the foundation for making any aspect of greenhouse gardening flourish and propagation is no different.
Unstable atmospheric conditions may be the biggest cause of failure in cloning by novice gardeners. Some plant varieties are resilient and will not be adversely affected by large temperature or humidity swings. However, many plant varieties require uniform atmospheric conditions during the initial rooting stage.
A temperature range of 70-80 degrees F for clones is generally accepted. If this is not possible in your greenhouse or indoor garden it may be necessary to create a small sub-climate elsewhere. Uniform temperature is probably the single largest factor for cloning success. If the temperature gets too hot, the clones will wilt and die before creating roots and if the temperature gets too cold, the clones will enter a state of suspended animation and never create the root systems they need to become individual plants.
Seedling heat mats are a great way for horticulturists to maintain the proper temperature during the cloning process. Humidity is also a large contributing factor to successful cloning. Many plant varieties do best with a high humidity (80-99%) during the beginning stages of cloning.
The cutting, once removed from the donor plant, has no root system to bring in moisture. It is, however, able to lose moisture through the surface of its leaves. This makes the cutting rely heavily on the moisture in the surrounding air to maintain health, especially for the first few days. Humidity domes or humidity chambers are great ways for a gardener to maintain a higher level of humidity for the initial stages of cloning. Generally speaking, it is a good idea to acclimate the clone to the ambient humidity after three to seven days. This can be done by taking off the humidity dome each day for a few minutes and then increasing the duration of removal each day.
After selecting, inspecting, and preparing the donor plant, a gardener may begin taking cuttings. Generally speaking, it is best to make a 45 degree angle cut just above a node site (the place where a leaf or branch attaches to the main stem). There are some varieties of plants that create roots very easily. Those plants can be placed directly into a cup of water after being cut from the donor plant. For example, spider plants, wandering jew, and coleus can all be easily rooted in a cup of water. However, some plant varieties need a little extra care to ensure rooting success. For these plants it may be necessary to use a rooting hormone or cloning gel. These products aid in speeding up the cloning process by immediately providing the cutting with the hormones necessary for root production. When using a rooting hormone or cloning gel, the freshly cut end should be dipped into the hormone right after it has been taken from the donor plant. After dipping the cutting, it can be placed into the chosen medium.
Some plants can be rooted directly in water and do not require a special medium for rooting. Many plant varieties clone best when placed in some sort of inert grow medium designed for root development. Stonewool, coco fiber, peat moss, perlite and clay pebbles are all examples of inert media that gardeners commonly use to root clones. Some gardeners even choose to place the freshly cut clones into a light soil mix for rooting. In many ways the medium chosen is personal preference. As long as the medium has the ability to hold some moisture and provide oxygen to the developing roots, it will work just fine. Nutrition is not as important in the medium during the early stages of root development. In fact, soils rich in nutrients (especially high nitrogen soils) can slow or inhibit early root development. Most gardeners use no fertilizers during the cloning process; although I have had more than a few people swear by using a very diluted blooming fertilizer (less nitrogen) until the clone has developed a healthy root system.
One of the most important aspects of cloning by taking cuttings is selecting an appropriate donor plant. The idea is to select a plant variety that has the traits a grower wishes to replicate. However, it is also very important to select a donor plant that is in good health. If the donor plant has diseases, pest insects, or other pathogens chances are good that any clones taken from that plant will have those same problems. Always inspect a potential donor plant carefully before taking cuttings.
Once a donor plant is selected, it can be prepared for the cloning procedure. One technique that helps to increase cloning success rates is to limit the donor plant’s exposure to intense light for 24 hour prior to taking clones. The plant does not need to be moved into complete darkness. Moving the donor plant to a shaded section of the greenhouse or removing the plant from direct horticultural lighting will help to prepare the plant for cloning purposes. It is also important that the donor plant is not showing any signs of environmental stresses. In other words, it is not wise to take clones from a donor plant that is wilted due to heat or lack of water. If possible, try to make sure the donor plant is at the highest level of health before taking clones.
There are several easy propagation methods you can use for houseplants. There are some basic concepts that apply to all propagation methods, rather you are try plant plant cuttings, plant division, offsets, air layering, or plantlets.
General Propagation Rules
- Always use clean sharp utensils that have been sterilized in alcohol.
- Whichever propagation method you select, the parent plant must be healthy. Cuttings taken from a sick or dying plant are doomed to fail.
- Rooting hormone helps roots develop; but too much is worse than none at all.
- Since moist conditions are needed for rooting to be successful, it is important to use a rooting hormone that contains a fungicide to prevent plant diseases.
- The rooting medium should be light and fast draining. If you purchase new construction sand, vermiculite, peat moss, or perlite, it can be used directly from the bag. Medium taken from any other source should be sterilized by heating it in the oven at 200 degrees for 30 minutes.
- Pots or containers for the new plants must be clean and free of old soil and plant material; if using old pots be sure to wash them well with a household disinfectant. It’s important to use very small containers when you propagate to prevent over watering and help roots development. 2” or 4” pots work well for a single cutting or use a 6” pot for several cuttings.
- Roots that form in water are different than roots that form in soil. If possible, use soil rather than water to propagate plants.
- Indirect light and temperatures between 70-80 degrees are best for propagation.
- Never allow the soil of newly propagated plants to dry out, but on the other hand, the soil should never be soggy. If the planting medium is too dry or too wet, roots don’t develop.
- To increase the humidity and keep the soil from drying out place newly propagated plants into a plastic bag and seal the top or cover the plants with a sheet of plastic. You can use small picks or sticks to keep the plastic from resting on the plants.
Tissue culture, in horticulture, refers to the replication of a plant from its cells or tissue which are grown in a nutrient culture medium under sterile conditions. Basically, tissue culture is like growing a plant in a petri dish from just the tiniest slice of tissue. Most plant varieties can be successfully duplicated with tissue collected from the root, stem, leaves, seed, flower, or virtually any other part of the plant. Sterile conditions are crucial for the tissue culture technique because living plant materials are naturally contaminated with microorganisms. Tissue culturists must sterilize the starting plant material in a chemical solution, usually consisting of alcohol and sodium hypochlorite. After sterilization, the starting plant material is placed in a sterilized container which contains the nutrient culture medium. The nutrient culture medium consists of a correct balance of plant hormones (auxin and cytokinin) and a nitrogen source. Too much auxin will result in excess root growth, whereas too much cytokinin will result in excess shoot growth. Once the specimens grow large enough, they can be transplanted into potting soil or other desired medium to grow like normal plants.
Tissue culture offers the horticulturist many different advantages. Like conventional cloning, tissue culture offers the ability to create large numbers of genetic copies of a desirable plant. Unlike conventional cloning, tissue culture can be used as a way to preserve rare or endangered plant species and can also be used to rescue embryos in distantly related cross pollinated species. The biopharmaceutical industry uses massive bioreactors filled with tissue cultures which can produce valuable compounds used as biopharmaceuticals. Another huge advantage of tissue culture is the ability to “clean” plant material of contaminates. In other words, a plant that has developed a disease or virus can still be propagated without bringing the pathogen along with it. This advantage alone provides an invaluable asset of preservation to modern horticulture.
Tissue culture kits are available for hobbyists to use. There are even some recipes online for creating tissue culture kits out of mostly around-the-house items. Because sterilization is so important, hobbyists who want to experiment with tissue culture need to have a dedicated area. Although tissue culture may be a fun experiment, other asexual propagation techniques are more practical for the average greenhouse hobbyist.
A plant started from seed receives its genetics in a manner similar to the way humans receive genetics. Just as we are made up of a combination of our father and mother, a plant started from seed is made from the genetics of its father and mother. As with humans, some traits can skip generations and there is no guarantee that a plant started from seed will inherit specific traits from its mother or father. This is the main reason the majority of commercial plant propagation is done by clone or tissue culture. Starting from seed is unpredictable but it is also a chance to start a completely unique plant that will add more biodiversity to our wonderful planet.
Temperature and Humidity for Starting Seeds
Germination is the process in which the plant emerges from the seed to start its life. For most plants germination is best done in a very moist (high humidity) environment at a reasonably warm temperature, usually around 75-85 degrees F (the exception to this would be seeds that are generally planted in early spring when the ground temperature is much cooler). Propagation trays with humidity domes are great for starting seeds because they create a microclimate that is more easily controlled. Seeds can be placed directly into a moist medium in the tray and covered with the humidity dome. If the environment is not at least 75 degrees F consistently, it is advised to place a seedling heat mat under the tray to keep a constant temperature. Plants, in general, respond better to consistency and this is especially true with seeds or clones. Keep the top portion of the medium moist until all of the seeds have sprouted. Once the seedlings have broken the surface, lift the dome off periodically to bring in fresh air and also acclimate the seedlings to the lower humidity of the environment. Slowly increase the amount of time each day the dome is removed until it is removed entirely. Most varieties of plants can be acclimated in a matter of a few days. Follow the seed packet’s instructions for thinning, spacing, and transplanting.
Another popular germination method is the wet paper towel technique. Place your seeds in a damp paper towel and fold the paper towel over the seeds. Put the paper towel in a ziplock bag and place it on top of your refrigerator (toward the back; this keeps the seeds at a consistent temperature). Check daily by gently unfolding the paper towel to examine the seeds. Keep the paper towel moist; adding water if necessary. In a few days you should see the first root coming out of the seed (radicle root). Gently, using a tweezers if necessary, place the seed into the soil with the radicle root facing downward. Cover the seed and keep the top layer of soil moist until the plant breaks the soil’s surface. The paper towel technique is a fun way to teach children how plants start from seeds. This technique works best with larger seeds (melons, cucumbers, squash, corn, sunflower, etc.). Most smaller seeds, such as lettuce, are best planted directly into the soil.
For years commercial horticulturists have been taking advantage of the multiple advantages offered by asexual propagation. These advantages are now being reaped not only by the commercial growers but by hobbyists as well. One of the largest advantages of asexual propagation is the reduced time it takes for a plant to reach maturity or get to a sellable size. This has obvious advantages for the commercial grower but the advantages extend to the hobbyist as well. The faster the plants can reach maturity, the longer the hobbyist can literally enjoy the fruits of his or her labor. Asexual propagation also gives the gardener the ability to create identical replicas of the most prized plants. This can be especially advantageous for the vegetable grower who wishes to replicate the plants with desirable traits. The best tasting tomatoes or crispest cucumbers can be perpetually grown and cloned in a hobby greenhouse and enjoyed year after year. Aside from flavor and aroma, plants can be cloned to preserve other desirable traits like a heightened resistance to stress or disease. Cloning by taking cuttings is the most common asexual propagation technique used by the hobbyist.
This technique is very effective on a wide variety of plants and is also relatively easy to master. The process of cloning some varieties of plants may only consist of cutting a small branch off the plant and placing the stem in water. After a few days roots will begin to form and the plant can be transplanted into soil or another desired medium. The once part-of-a-plant becomes a plant itself; a genetic duplicate of its donor plant. Spider plants, wandering jew, and coleus are a few plants that clone very easily in straight water and with very little effort.
However, not all plants will root as easily as a coleus. Other plant varieties require a little more attention to obtain a high propagation success rate. These varieties usually root better with the aid of a rooting hormone and more precise control over temperature and humidity. Tomatoes, peppers, cucumbers and many other vegetable varieties clone best in a consistent environment. Geraniums, hibiscus, and some African Violet varieties will root much faster and at a higher percentage within a consistent environment. When cloning these more finicky plants, try to keep the temperature consistently between 72-85 degrees F, especially in the root zone. A seedling heat mat may be necessary to ensure a consistent temperature during the night hours. The optimal humidity for clones during the first stages of propagation is 80-100%. After the plants create their own roots they can be acclimated into the ambient humidity. Humidity domes placed over the propagation trays are a great way to control the higher humidity needs of clones and seedlings without affecting the ambient humidity of the greenhouse. Clones that are kept in a consistent environment will root faster and also have a higher overall success rate.
Tip for the Hobbyist
When taking a cutting off a plant, it is best to do so just above a node site (a site where a branch occurs). A 45 degree angle cut just above a node site is my preferred method for most soft stemmed plant varieties. After cutting, place the clone directly into a rooting compound or water. Not only does this method create healthy clones, it also promotes the donor plant to multiply its shoots.

Tips on Using a Strimmer Effectively

Organize and Store Your Seeds Right to Keep Them in Perfect Condition

The Danger Of Leaving Rotten Trees In Your Yard

How to Efficiently Clean Your House

Does Landscaping Increase Property Value?

How to Winterize a Greenhouse Before the First Frost: The 2026 Checklist

How to Protect Your Garden and Greenhouse from Extreme Summer Heat: The Complete 2026 Survival Guide

Pruning Machines: How Professional Equipment Is Transforming Vegetation Management

Roof Leak Repair: 7 Signs Your Roof Needs Immediate Attention

The Best Tile Materials for Installation in Seattle: Tips from TK Tile

A Sustainable Wood Substitute: Hemp-Based Lumber

Preventing Pest Infestations in a Greenhouse

Hardening Off Your Seedlings

Starting Seeds Indoors or in a Greenhouse
